
Accord L4-1955cc 2.0L SOHC 2-bbl (1986)
Housing Assembly HVAC: Service and Repair
Removal/Replacement
Button Type
HEATER ASSEMBLY REPLACEMENT
1. Drain coolant at the radiator.
2. Disconnect heater hoses at the firewall.
NOTE: Coolant will run out when the hoses are disconnected; drain it into a clean drip pan.
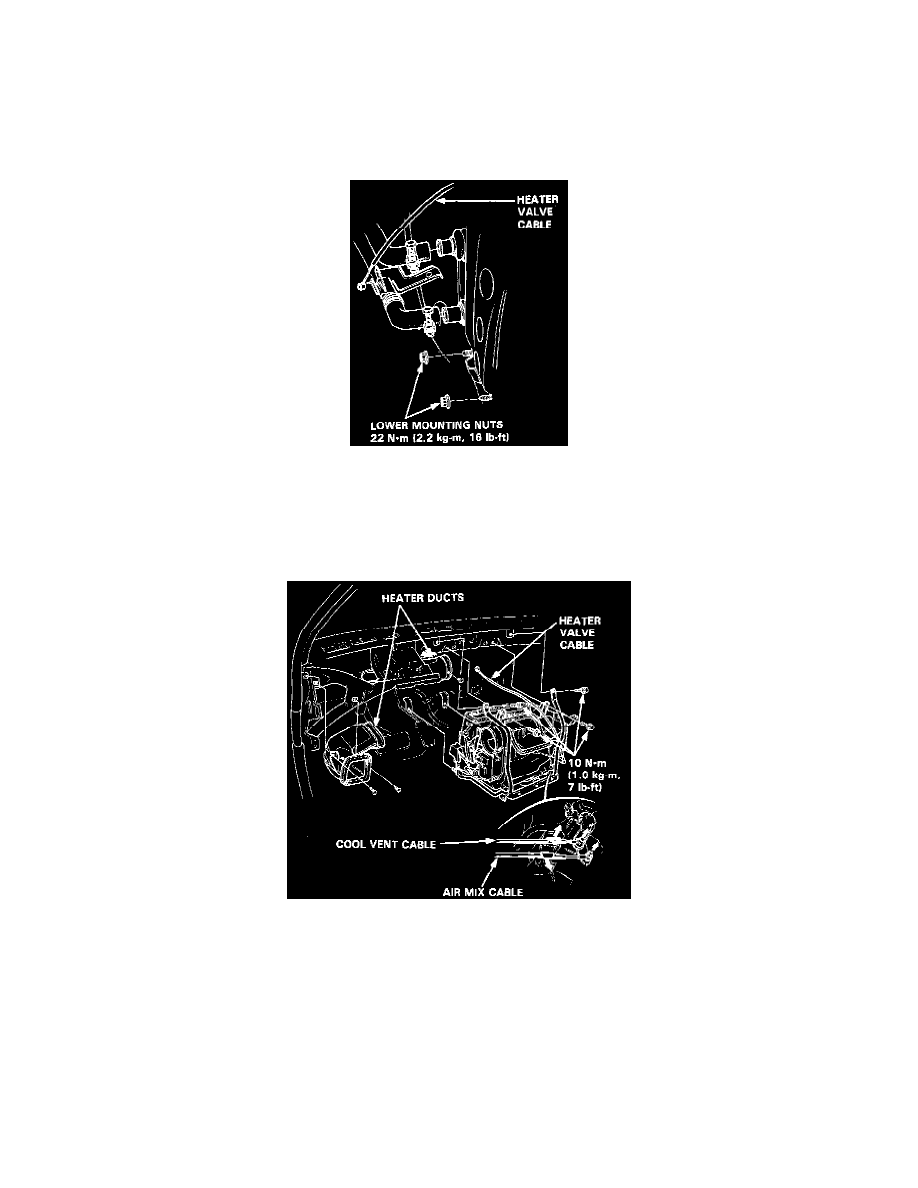
3. Disconnect the heater valve cable from the heater valve.
4. Remove the heater lower mounting nuts (2).
5. Disconnect the cool vent cable from the heater.
6. Remove the dashboard.
7. Remove heater duct.
8. Disconnect the air mix cable from the heater.
9. Disconnect the wire harness at the connector.
10. Remove the heater mounting bolts (4), then pull the heater away from the body.
11. Install in reverse order of removal, and:
-
Apply a sealant to the grommets.
-
Do not interchange the inlet and outlet hoses. Make sure that the hose clamps are secure.
-
Loosen the bleed bolt on the engine and refill the radiator and reservoir tank with the proper coolant mixture.
Tighten the bleed bolt when all the trapped air has escaped and coolant begins to flow from it.
-
Connect all cables and make sure they are properly adjusted.