
Accord L4-1955cc 2.0L SOHC FI (1987)
Brake Master Cylinder: Service and Repair
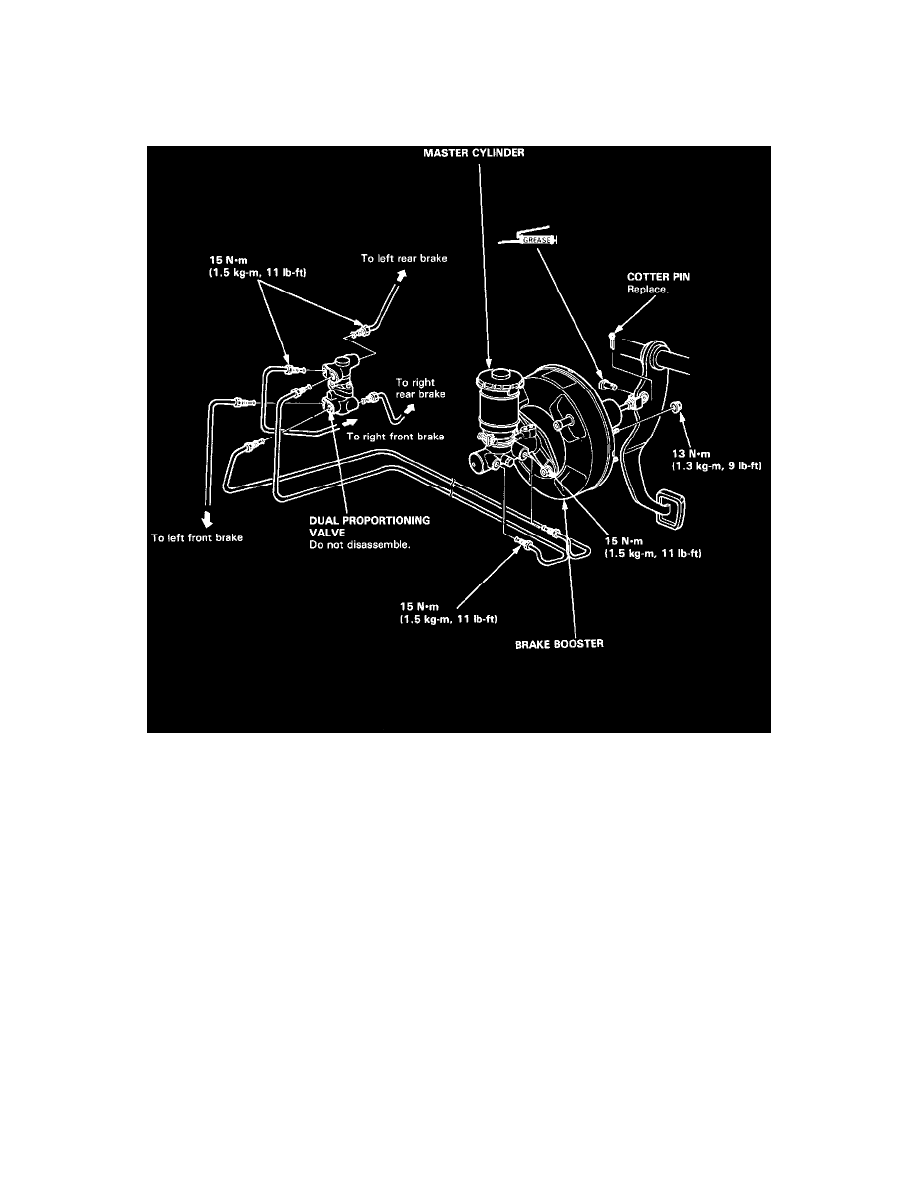
Removal and Installation
Removal
Master Cylinder And Proportioning Valve
1. Draw out brake fluid from master cylinder reservoir with appropriate tool.
2. Remove brake lines from master cylinder.
3. Disconnect fluid sensor electrical plug.
4. Remove both mount nuts from master cylinder.
5. Remove master cylinder.
For additional information see Notes, Warnings, and Hints. See: Fundamentals and Basics
Installation
For additional information see Notes, Warnings, and Hints. See: Fundamentals and Basics
INSTALLATION
1. After adjusting the pushrod clearance, install master cylinder on brake booster.
2. Attach with mount nuts and torque to specifications - 15.0 Nm (9.0 ft lb).
3. Install brake lines. Torque line nuts to specifications - 15.0 Nm (11.0 ft lb).
4. Fill master cylinder reservoir and bleed brake master cylinder and brake system.
NOTE: It is good idea to flush the entire brake system when replacing the master cylinder.
PUSHROD/PEDAL HEIGHT ADJUSTMENT