Accord L4-2.2L SOHC VTEC (1994)

Power Unit: Service and Repair
Removal and Installation
Modulator Unit
Removal/installation
Removal:
-
When removing the modulator unit or after removing it, be careful not to turn it upside-down or lean excessively.
-
Do not spill brake fluid on the car; it may damage the paint; if brake fluid does contact the paint, wash it off immediately with water.
-
Take care not to damage or deform the brake pipes during removal and installation.
-
To prevent the brake fluid from flowing, plug and cover the hose ends and joints with a shop towel or equivalent material.
-
Do not loosen the relief plug on the accumulator.
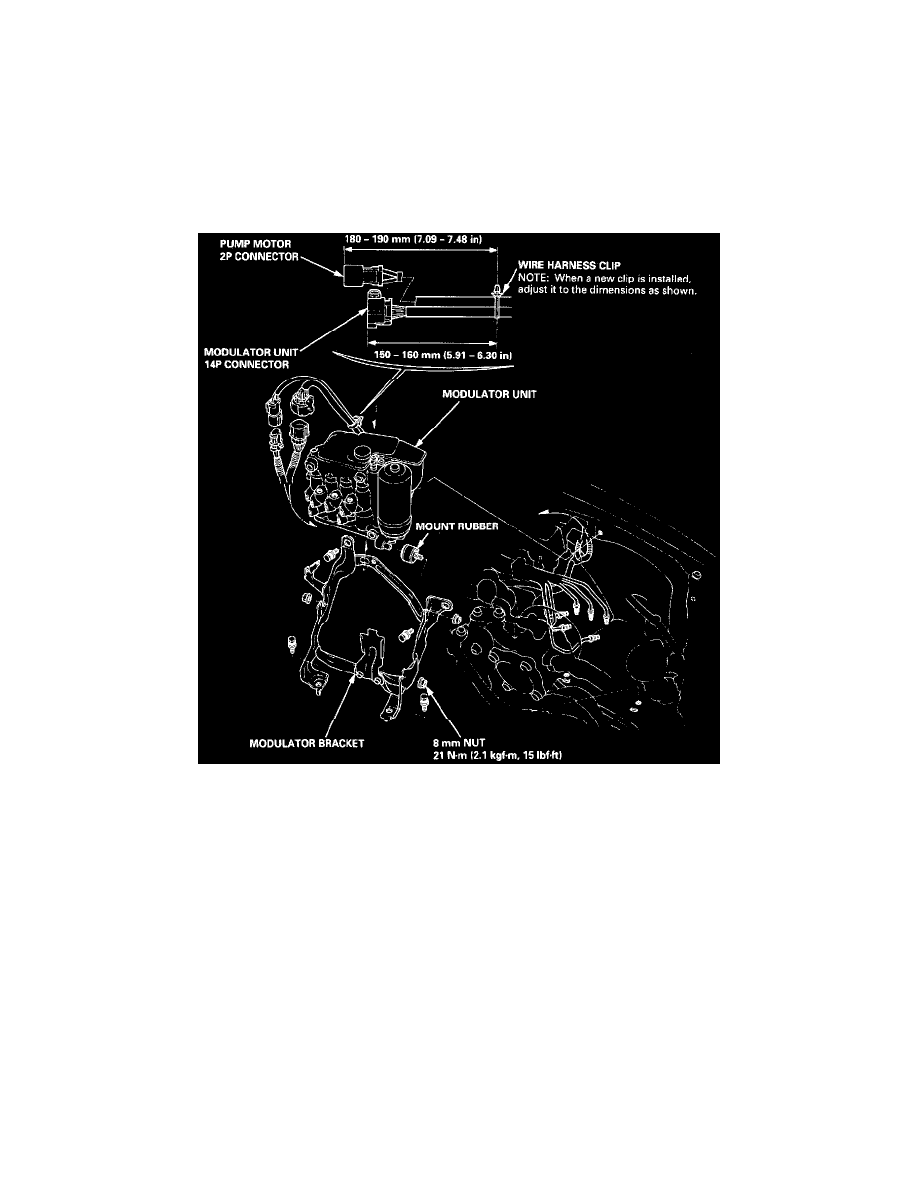
1. Disconnect the modulator unit 14P connector and pump motor 2P connector.
2. Remove the wire harness clip from the modulator bracket.
NOTE: When a new harness clip is installed after a wire harness or modulator unit replacement, adjust the harness clip to the dimensions shown
below.
3. Remove the three 8 mm nuts, and remove the modulator unit from the bracket.
NOTE: When the pump motor or the modulator unit is replaced, bleed the high-pressure brake fluid first.
