Accord L4-2.2L SOHC VTEC (1994)

Fuel Pressure Regulator: Testing and Inspection
WARNING: Do not smoke while working on the fuel system. Keep open flames or sparks away from your work area. Be sure to relieve fuel
pressure while the ignition switch is off.
NOTE: The radio may have a coded theft protection circuit. Be sure to get the customer's code number before disconnecting the battery. After service,
reconnect power to the radio and turn it on. When the word "CODE" is displayed, enter the customer's 5-digit code to restore radio operation.
1. Disconnect the battery negative cable from the battery negative terminal.
2. Remove the fuel fill cap.
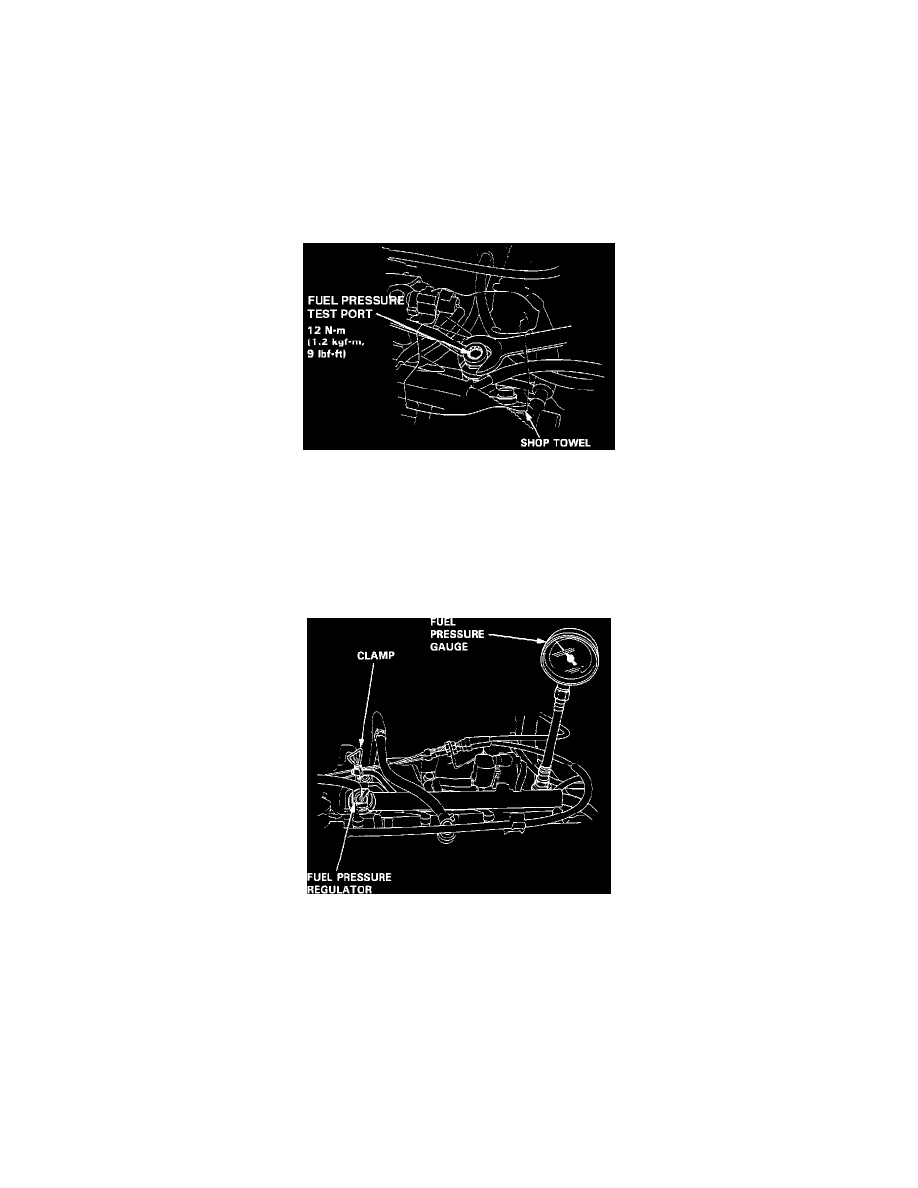
3. Use a box end wrench on the 6 mm service bolt at the fuel rail, while holding the special banjo bolt with another wrench.
4. Place a rag or shop towel over the 6 mm service bolt.
Fuel Pressure Release and Test Port
5. Slowly loosen the 6 mm service bolt one complete turn.
NOTE:
^
A fuel pressure gauge can be attached at the 6 mm service bolt hole.
^
Always replace the washer between the service bolt and the special banjo bolt whenever the service bolt is loosened.
^
Replace all washers whenever the bolts are removed.
Checking Fuel Pressure
6. Attach a fuel pressure gauge to the service port of the fuel filter.
Pressure should be: 38-46 psi (2.7-3.2 kgf/cm2) (with the fuel pressure regulator vacuum hose disconnected and pinched)
7. Reconnect the vacuum hose to the fuel pressure regulator.
8. Check that the fuel pressure rises when the vacuum hose from the fuel pressure regulator is disconnected again.
^
If the fuel pressure did not rise, replace the fuel pressure regulator.
