
Accord L4-2.4L (2005)
Shift Solenoid: Testing and Inspection
The Content of this article/image reflects the changes identified in TSB - SNO050900-09
Shift Solenoid Valve Test
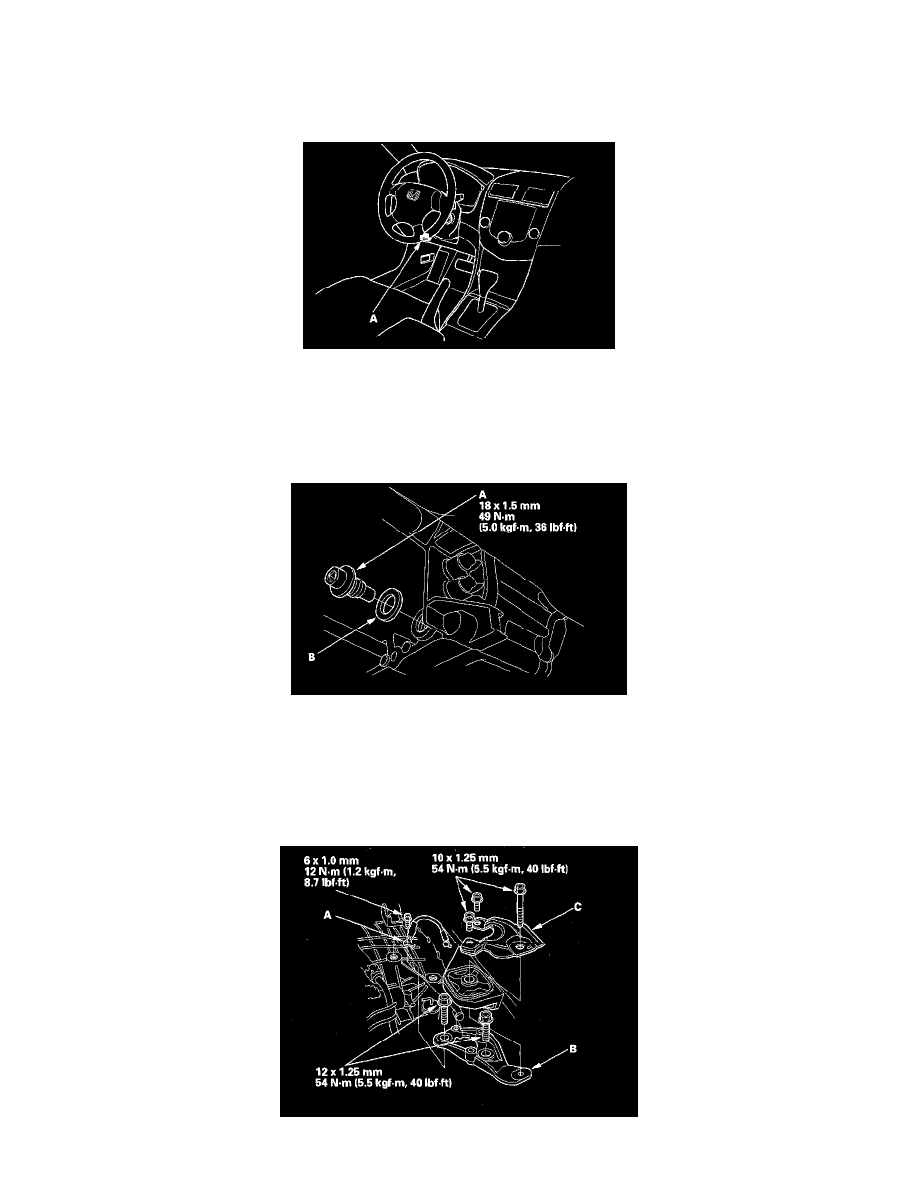
1. Connect the HDS to the DLC (A).
2. Choose Shift Solenoid A, B, C, D, and E in Miscellaneous Test Menu on the HDS.
3. Check that the shift solenoid valve A, B, C, D, and E operate with the HDS. A clicking sound should be heard.
4. Shift solenoid valves test has finished if the test results are OK.
If no sound is heard, remove the shift solenoid valves and test.
5. Remove the splash shield.
6. Remove the drain plug (A), and drain the automatic transmission fluid (ATF). Then reinstall the drain plug with a new sealing washer (B).
7. Get the customer's radio anti-theft code (navigation code), and write down the radio station presets.
8. Disconnect the battery negative terminal, then disconnect the battery positive terminal.
9. Remove the battery hold-down bracket, then remove the battery cover, battery, and battery tray.
10. Remove the intake air duct and air cleaner housing.
11. Loosen the two bolts securing the battery base from under the vehicle, and remove the two bolts securing the battery base in the engine
compartment, then remove the battery base.
12. Remove the ground cable (A), transmission upper mount bracket (B), and bracket plate (C).