
Accord L4-2.4L (2005)
12. Connect the front stabilizer link to the lower arm.
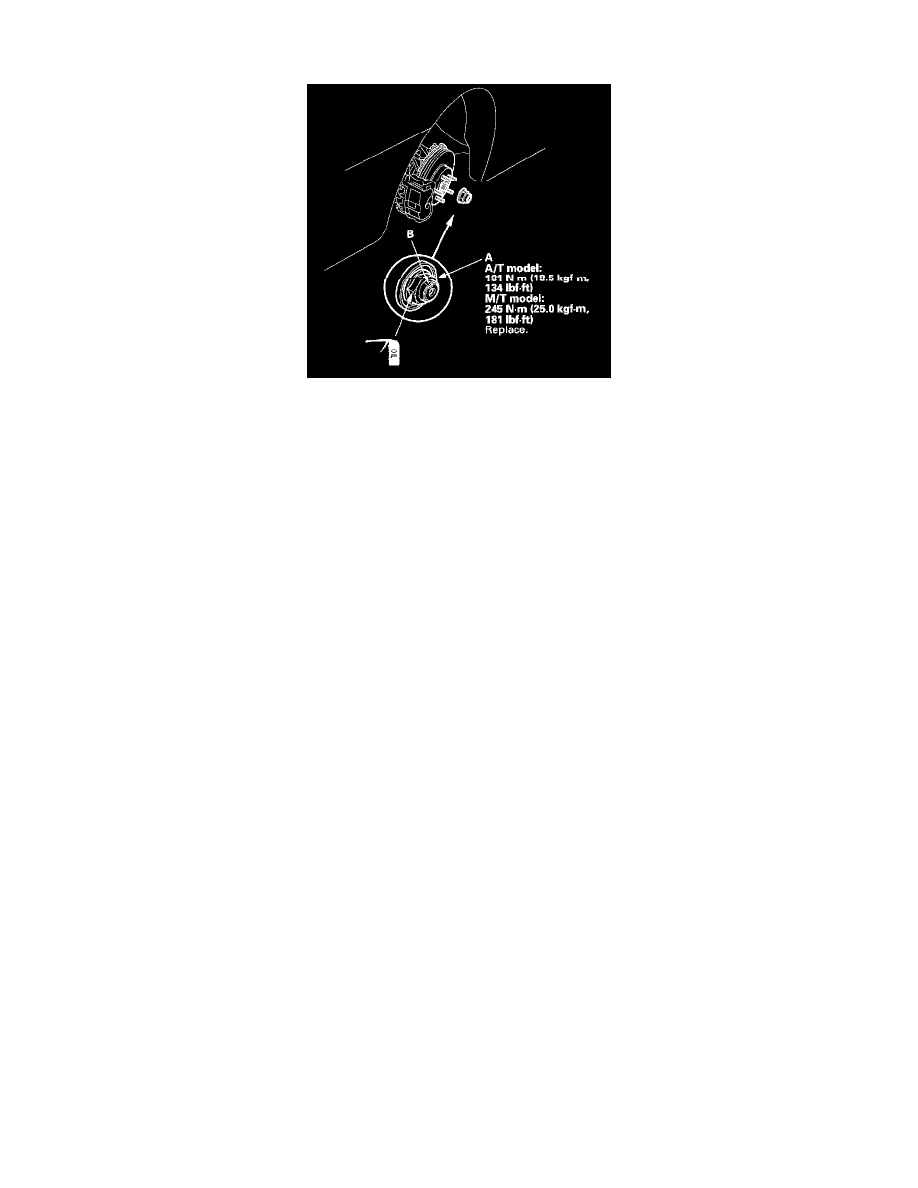
13. Apply a small amount of engine oil to the mating surface of the new spindle nut (A).
14. Install a new spindle nut, then tighten the nut. After tightening, use a drift to stake the spindle nut shoulder (B) against the driveshaft.
15. Clean the mating surfaces of the brake disc and the front wheel, then install the front wheel.
16. Turn the front wheel by hand, and make sure there is no interference between the driveshaft and surrounding parts.
17. Tighten the flange bolt and the self-locking nut with the vehicle's weight on the damper.
18. Refill the transmission with the recommended transmission fluid:
19. Lower the vehicle on a lift.
20. Check the front wheel alignment, and adjust it if necessary.
21. Test-drive the vehicle.
Dynamic Damper Replacement
Dynamic Damper Replacement
1. Remove the inboard joint.
2. Remove the dynamic damper bands. Be careful not to damage the dynamic damper.
^
If the band is a welded type, cut the band.
^
If the band is a double loop type, lift up the band end, and push it into the clip.
^
If the band is a low profile type, pinch the band using commercially available boot band pincers.