
Accord L4-2156cc 2.2L SOHC (1991)
Radio/Stereo: Service and Repair
NOTE:The original radio has a coded theft protection circuit. Be sure to get the customer's code number before
-
disconnecting the battery.
-
removing the radio fuse from the under-hood fuse/relay box.
-
removing the radio.
After service, reconnect power to the radio and turn it on. When the word "CODE" is displayed, enter the customer's 5-digit code to restore radio
operation.
Refer to the TSB listed below for information on how to obtain the code in the event the customer does not have the code.
TSB # 98-026
April 15, 1998
Applies To: ALL with Anti-Theft Audio Units
Audio Unit Anti-Theft Code Labels
BACKGROUND
This service bulletin describes where to attach the audio unit anti-theft labels that come in the glove box of vehicles equipped with anti-theft audio
systems.
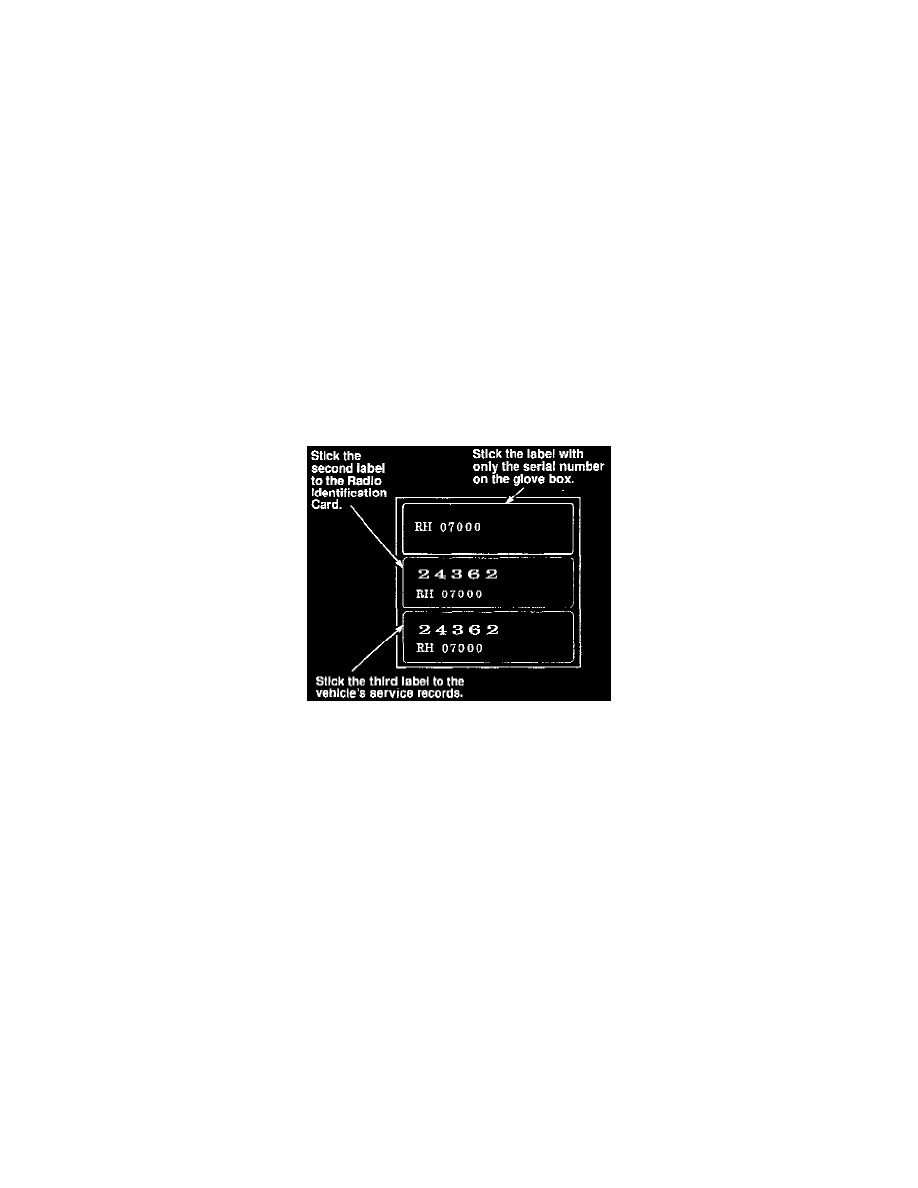
If a vehicle has an anti-theft audio system, there are three peel-off labels in the glove box. Two of the labels have both the anti-theft code and the audio
unit's serial number, and a third label contains only the serial number for the audio unit.
During Pre Delivery Inspection, stick the label with only the serial number on the glove box. If the radio code ever needs to be retrieved through the
HONDANET 2000 system, this will save you the time and labor of removing the audio unit to record the serial number.
NOTES:
-
Also perform this procedure when installing an accessory audio unit that is equipped with an anti-theft system.
-
If a remanufactured audio unit is installed in a vehicle, remove the old labels and install new ones on the glove box, Radio Identification Card, and
the vehicle's service records.
-
If the glove box is ever replaced, transfer the labels from the old glove box to the new one.
WARRANTY CLAIM INFORMATION
None. This bulletin is for information only.
Skill level: Maintenance Technician
PROCEDURE