
Accord L4-2156cc 2.2L SOHC (1991)
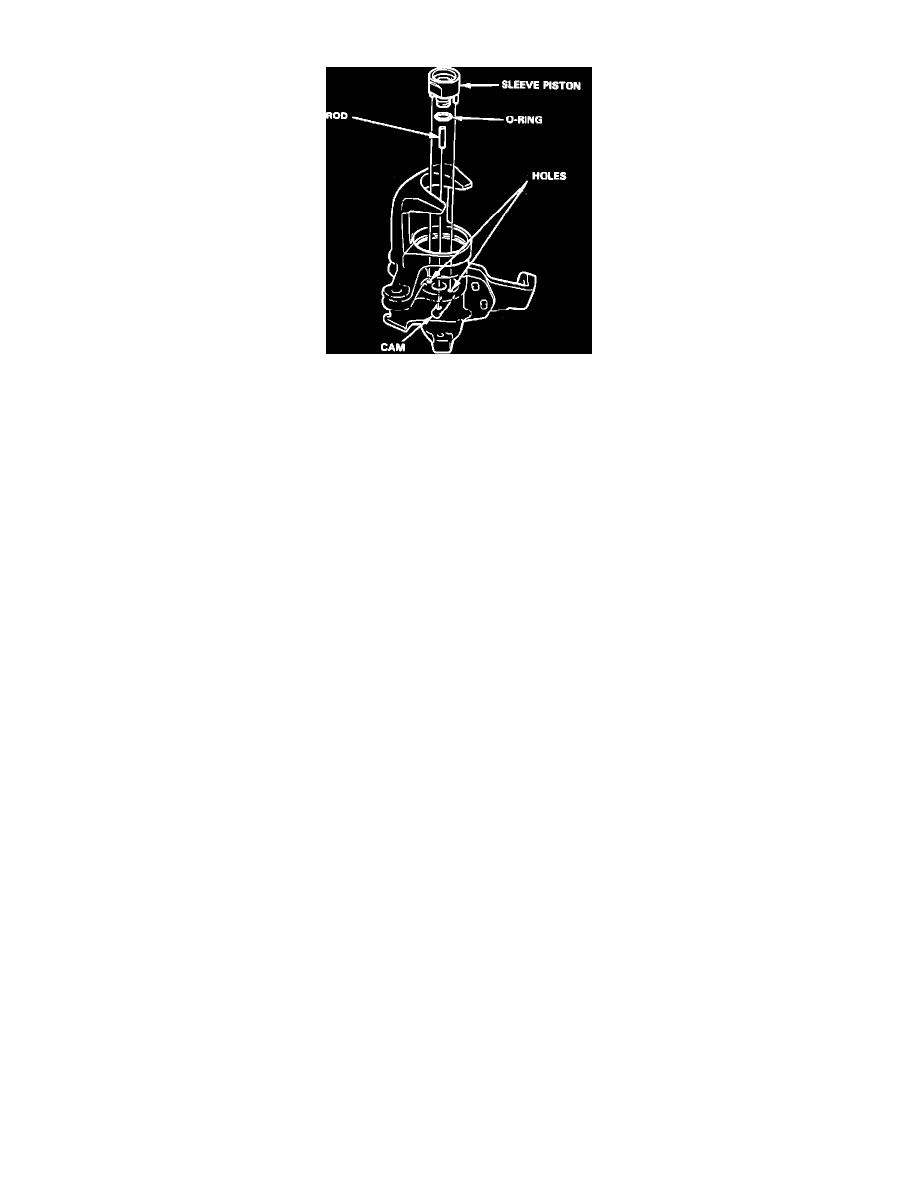
Fig. 31 Adjusting Spring Compressor Tool
Fig. 32 Installing Spring Piston In Caliper
Ensure dirt or other foreign matter is not allowed to contaminate brake fluid. Do not mix different types of brake fluid as they might not be
compatible.
1.
Adjust brake spring compressor as shown in Fig. 31.
2.
Pack all cavities of needle bearing and coat new cam boot with brake cylinder grease part No. 08733-B020E or equivalent rubber grease, then
install in caliper.
3.
Install cam with threaded end facing up. Avoid damaging cam boot since it must be installed first.
4.
Install lever, spring washer and parking nut.
5.
Tighten parking nut, then install return spring.
6.
Install rod in cam, then a new O-ring on sleeve piston.
7.
Install sleeve piston with hole in bottom of piston aligned with rod, and two pins on piston aligned with holes in caliper, Fig. 32.
8.
Install a new cup with its groove facing toward bearing A side of adjusting bolt.
9.
Fit bearing A, spacer, adjusting spring B and spring cover on adjusting bolt, then install in caliper cylinder.
10.
Install brake spring compressor and compress spring until it bottoms out.
11.
Ensure flared end of spring cover is below circlip groove, then install circlip and remove compressor.
12.
Install adjusting nut, adjusting spring A and washer in piston, then secure with circlip.
13.
Coat new piston seal and piston boot with silicone grease, then install in caliper.
14.
Coat outside of piston with silicone grease, then install it on adjusting bolt while rotating it clockwise being careful not to damage piston boot.
15.
Install pad spring in caliper housing.
16.
Install caliper assembly as described under REMOVAL/INSTALLATION.