
Accord L4-2156cc 2.2L SOHC (1991)
Front View Belt Positioning
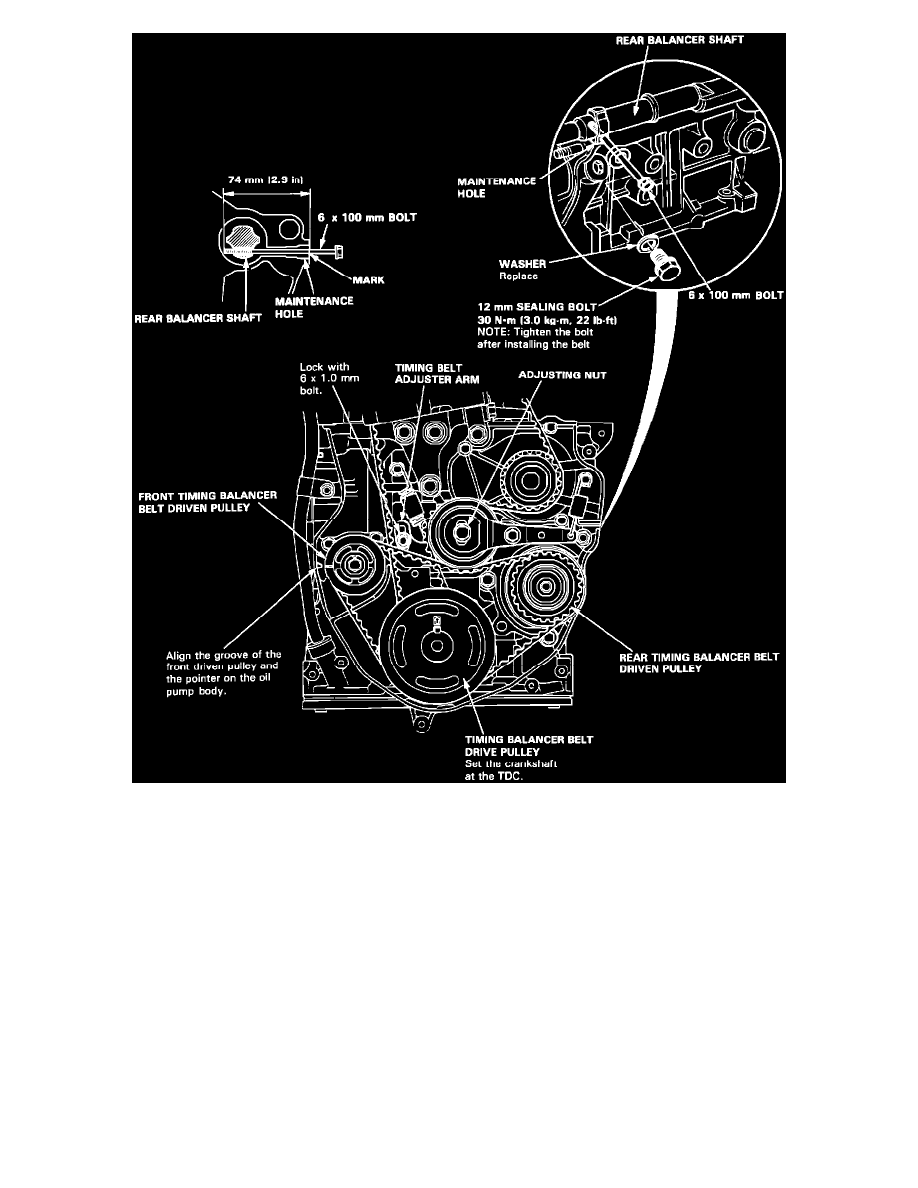
11. Verify alignment of the groove on the front balancer shaft pulley with the pointer on the oil pump housing as shown.
12. Verify alignment of the rear balancer shaft pulley by using a 6 x 100 mm bolt or equivalent as an alignment tool. Scribe a line 74 mm (2.9 in) from
the end of the bolt. Insert the bolt into the maintenance hole to the scribed line.
13. Loosen the adjusting nut and verify that the timing balancer belt adjuster moves freely. Remove the alignment tool.
14. Turn the crankshaft pulley about one turn, then tighten the adjusting nut to 45Nm (4.5 kg-m, 33 lb ft).
NOTE: Both belt adjusters are spring-loaded to properly tension the belts. Do not apply any extra pressure to the pulleys or tensioners while
performing the adjustment.
15. Remove the 6 x 1.0 mm bolt from the timing belt adjuster arm.