
Accord L4-2156cc 2.2L SOHC (1991)
Air Bag(s) Arming and Disarming: Service and Repair
Airbag System Disarming
Except SE
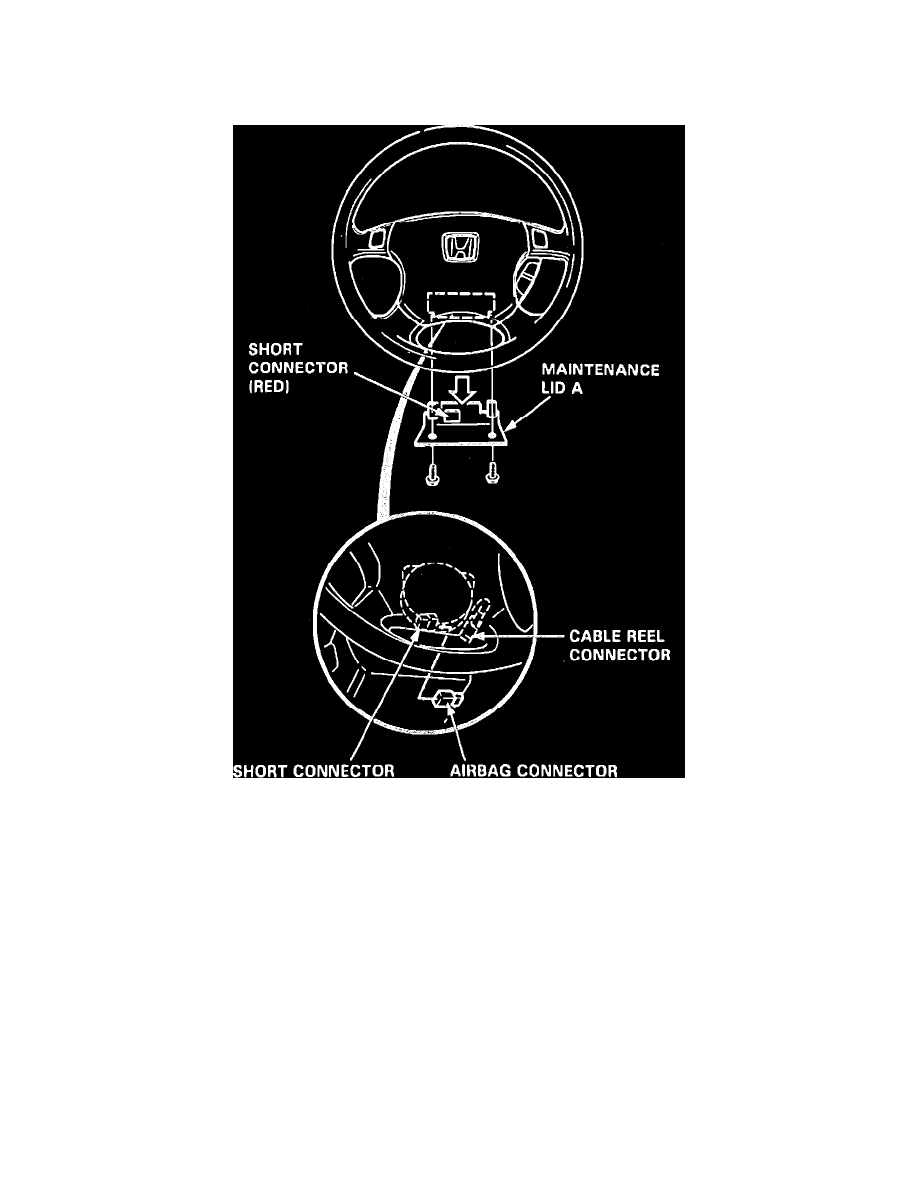
Fig. 1 Airbag Short Connector Location
1.
Disconnect both the ground and positive battery cables.
2.
All supplemental restraint system (SRS) electrical wiring harnesses are covered with yellow outer installation.
3.
Remove access panel from steering wheel, then remove short connector (RED) from panel, Fig. 1.
4.
Disconnect connector between airbag and cable reel, then install short connector (RED) on airbag.
5.
Using Torx T30 bit, remove bolts and airbag assembly.
6.
Reverse procedure to install. Torque Torx bolt to 7.2 ft. lbs.
SE
1.
Disable coded theft protection system as described in CODED THEFT PROTECTION DISARMING.
2.
Disconnect both the ground and positive battery cables.
3.
All supplemental restraint system (SRS) electrical wiring harnesses are covered with yellow outer installation.
4.
Remove access panel from steering wheel, then remove short connector (RED) from panel.
5.
Disconnect connector between airbag and cable reel, then install short connector (RED) on airbag.
6.
On models with passenger's side airbag, open glove box, then remove access panel from inside glove box.
7.
Disconnect connector between front passenger's airbag and SRS main harness, then install short connector (RED) on airbag.
8.
On all models, using Torx T30 bit, remove bolts and airbag assembly.
9.
On models with passenger's side airbag, remove tweeter cover from dashboard, then remove visor and black face panel.
10.
Remove glove box and four mounting nuts from passenger's airbag assembly.