
Accord L4-2156cc 2.2L SOHC (1991)
Brake Bleeding: Service and Repair
System Bleeding
Anti-Lock Brake System
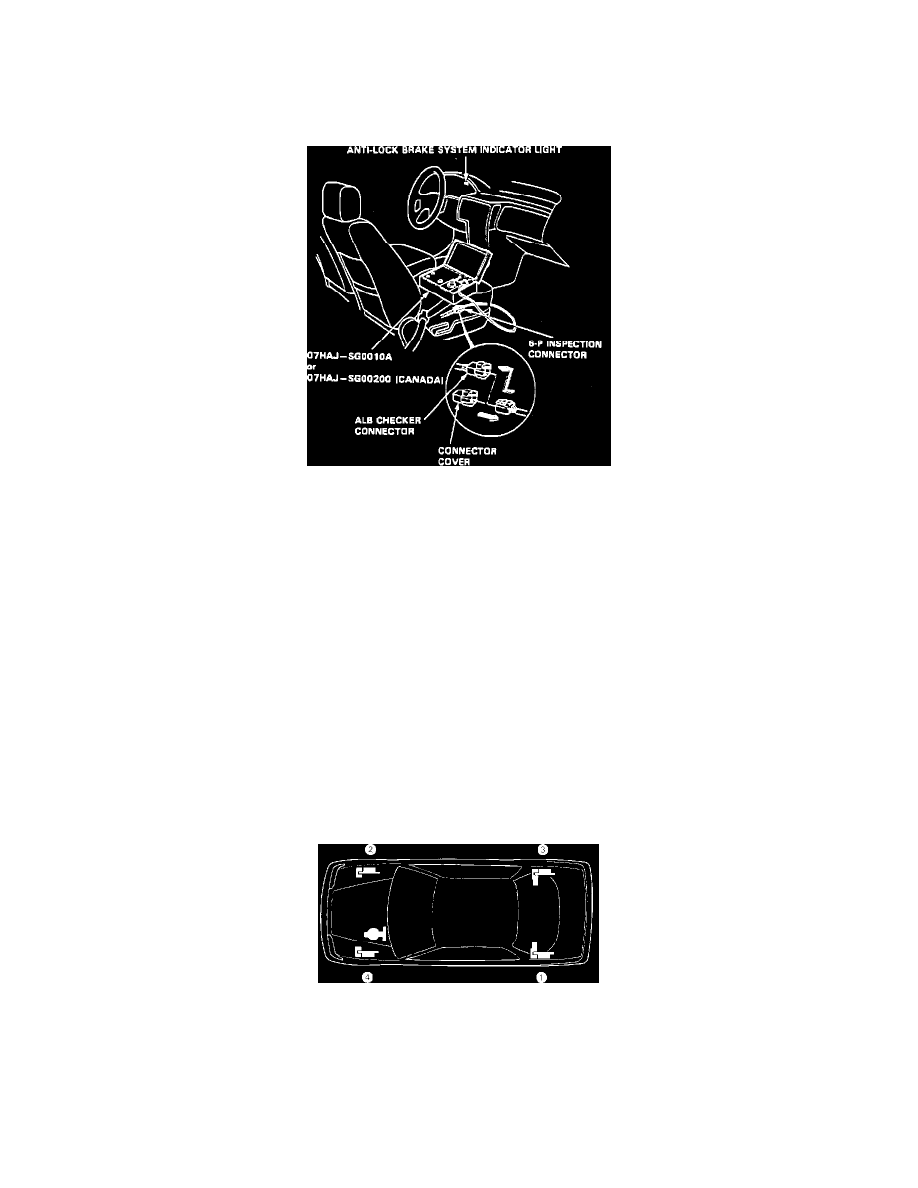
Fig. 6 Inspection Connector Location. 1992 Prelude & Civic
Place vehicle on level ground with wheels blocked, put transmission in neutral for manual transmission models and in ``park'' for automatic transmission
models when bleeding brakes.
1.
Fill modulator reservoir to max level with brake fluid.
2.
With ignition switch off, disconnect 6-P inspection connector from connector cover on the crossmember under passenger seat and connect it to
anti-lock brake checker No. 07HAJ-SG0010A or equivalent, Fig. 6.
3.
Start engine and release parking brake.
4.
Set pulse selector switch to 50 and mode selector switch to one, then turn anti-lock brake checker on and press start test switch.
5.
Power unit should run. After power unit stops running, turn mode switch to two.
6.
Press start test switch.
7.
Brake fluid in reservoir will bubble briskly for 20 seconds after switch is pressed. Wait four to five minutes for brake fluid to stop bubbling.
8.
Repeat steps six and seven on mode four.
9.
Repeat steps six and seven on mode five.
10.
Repeat steps five through nine, two or three times.
11.
Fill modulator reservoir to max level with brake fluid and install cap.
12.
Check anti-lock brake system function in all modes as described under DIAGNOSIS & TESTING PROCEDURES/TESTING
PROCEDURES/FUNCTION TEST.
Without Anti-Lock Brakes
Bleeding Sequence