
Accord L4-2156cc 2.2L SOHC (1991)
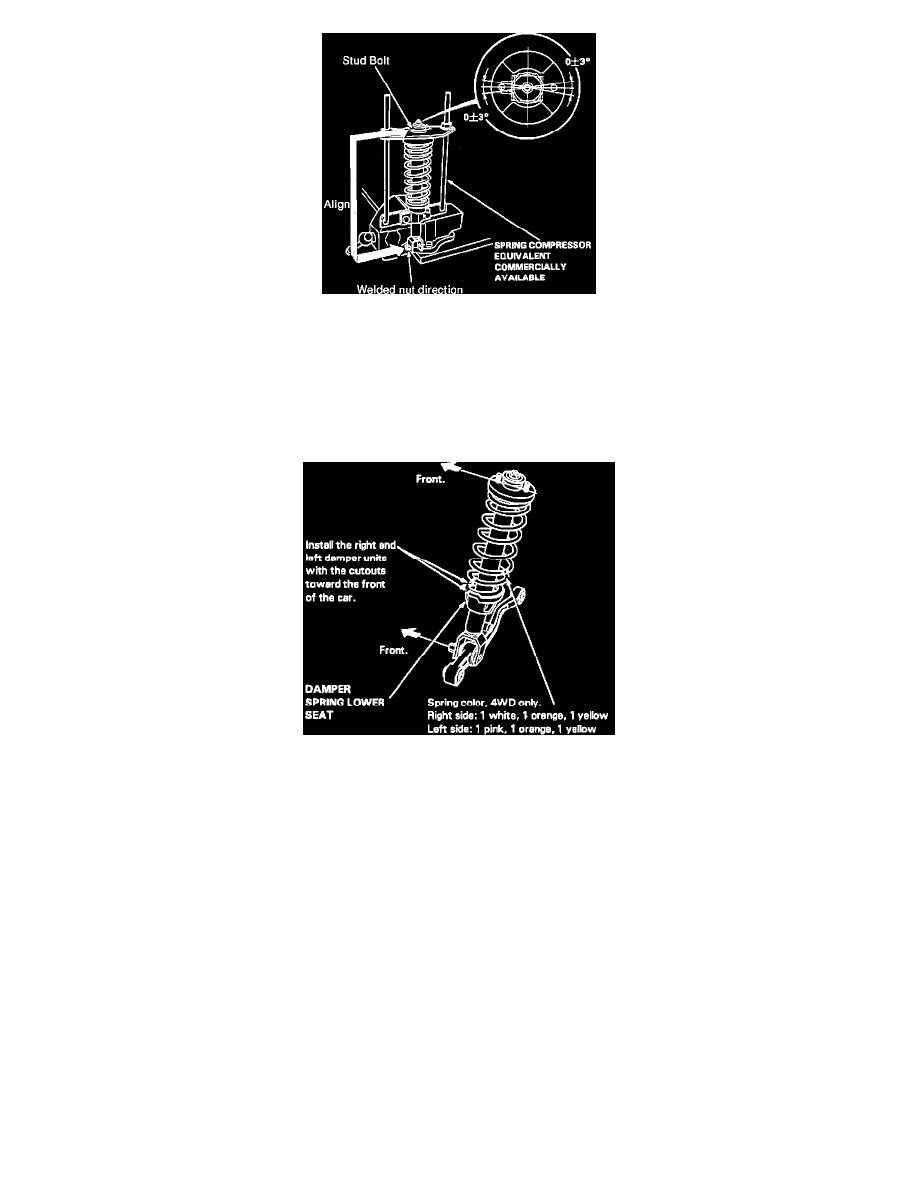
Fig. 9 Installing Damper Mounting Base. Civic
2.
Install damper spring, bump stop, stop plate, dust cover plate, mounting rubber, damper mounting rubber, collar and damper mounting base on
damper unit. When installing damper mounting base, ensure angle of stud bolt is as shown in Figs. 8 and 9.
3.
Compress spring and install damper mounting washer and self-locking nut.
4.
Loosely tighten self-locking nut, then while holding damper shaft torque self-locking nut to specification.
5.
On Accord models, lower rear suspension and position damper assembly in its original position.
6.
On Civic models, position damper assembly so that two cutouts in damper spring lower seat are toward front of vehicle as shown in Fig. 10.
Fig. 10 Mounting Damper Assembly. Civic
7.
On four wheel drive models, left and right damper units are not interchangeable and are distinguished by damper unit label and spring color as
shown in Fig. 10.
8.
On all models, loosely install damper unit lower mounting bolt.
9.
Install damper upper base mounting nuts and torque to specifications.
10.
Using a suitable floor jack, raise rear suspension until weight of car is on the damper.
11.
Torque lower mounting bolt to specification.