
Accord L4-2156cc 2.2L SOHC (1991)
7.
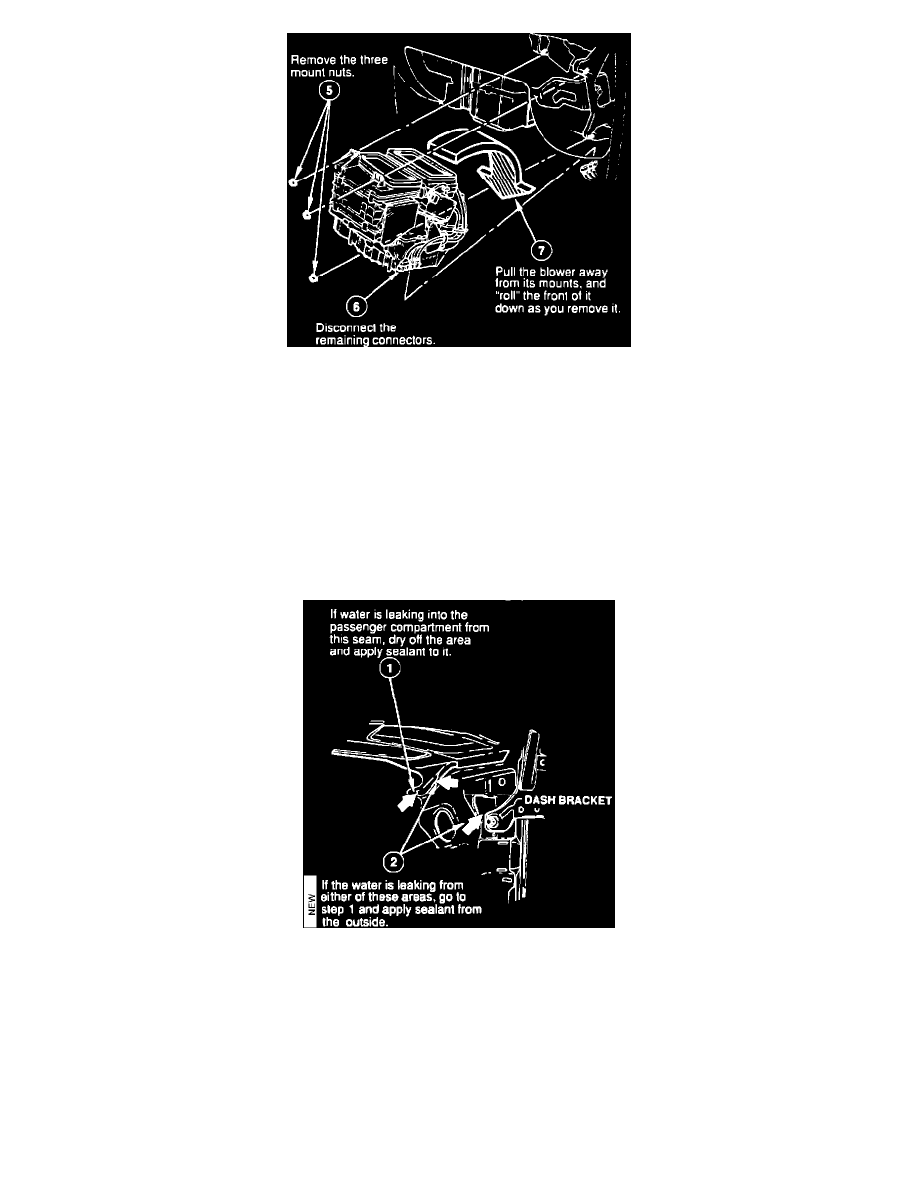
Remove the blower:
-
Without A/C: Remove the heater (3 screws) and blower (3 nuts).
-
With A/C: Remove the blower as follows.
8.
Run more water on the windshield, then check for leaks again under the right end of the dashboard.
CORRECTIVE ACTION
If bubbles appeared when you checked the windshield, follow the steps under Repair Windshield Leak.
If you found leak(s) when you checked the dash, follow the steps under Repair Cowl Leak(s).
Repair Windshield Leak
1.
Mark the section of windshield seal that's leaking, then rinse the soap off, and blow the area dry.
2.
Seal the leak with 3M Window-Weld Resealer (3M part number # 08633), or equivalent.
Repair Cowl Leek(s) Seal any cowl leaks as noted in the following drawings (all cowl area drawings show the right side; the left side is a mirror image):
1.
Remove the fender by removing the
-
front bumper