
Accord V6-3.0L (2003)
Tail Lamp: Service and Repair
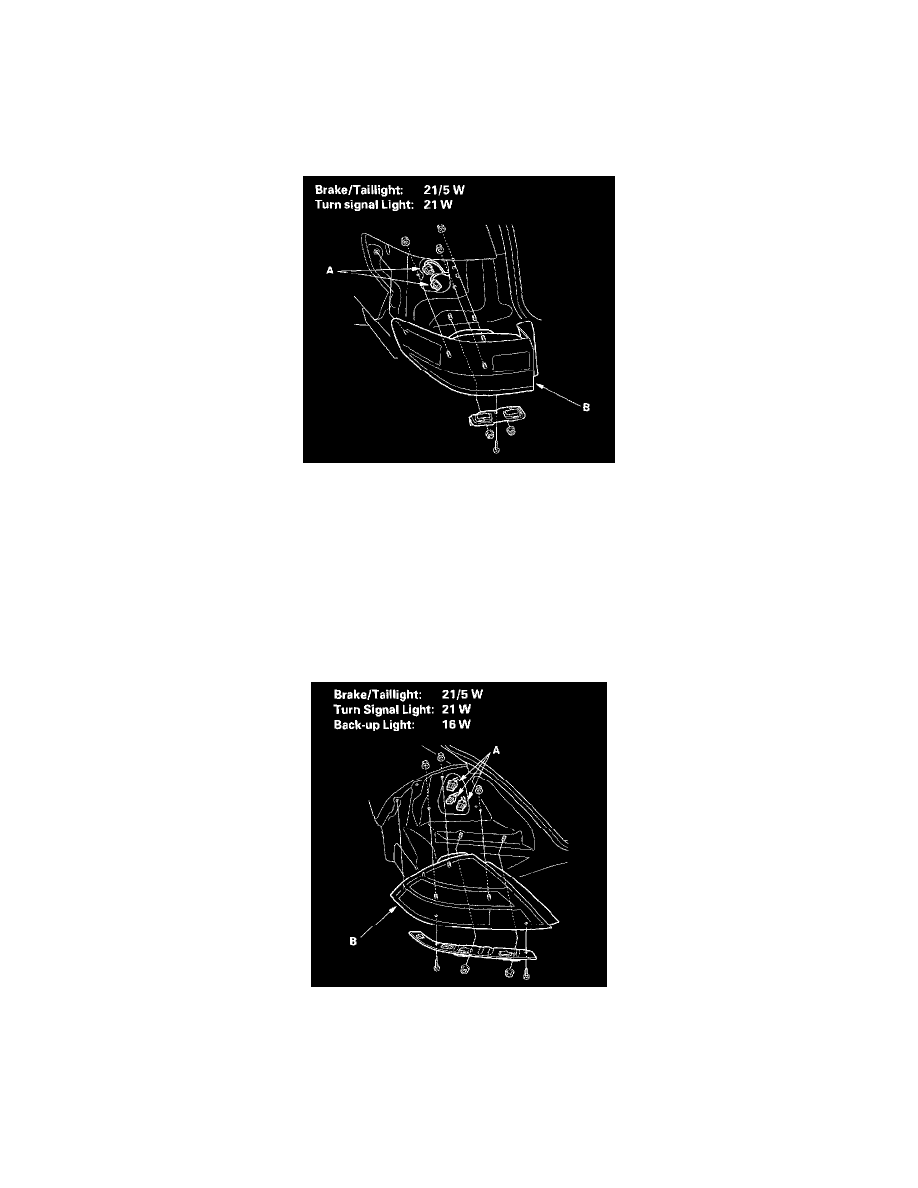
Taillight Replacement
Taillight (4-door)
1. Remove the rear bumper.
2. Open the trunk lid and remove the trunk side trim panel.
3. Disconnect the connectors (A) from the taillight (B).
4. Remove the mounting nuts and screws, then remove the taillight.
5. Turn the bulb socket 45 ° counterclockwise to remove the bulb.
6. Inspect the gasket; replace it. If it is distorted or stays compressed.
7. Install the taillight and tighten the nuts to 5 N.m (0.5 kgf.m, 4 lbf.ft).
8. After installing the taillight, run water over it to make sure it does not leak.
Taillight (2-door)
1. Remove the rear bumper.
2. Open the trunk lid and remove the trunk side trim panel.
3. Disconnect the connectors (A) from the taillight (B).
4. Remove the mounting nuts and screws, then remove the taillight.
5. Turn the bulb socket 45 ° counterclockwise to remove the bulb.
6. Inspect the gasket; replace it. If it is distorted or stays compressed.
7. Install the taillight and tighten the nuts to 5 N.m (0.5 kgf.m, 4 lbf.ft).
8. After installing the taillight, run water over it to make sure it does not leak.
Inner Taillight (4-door)