Accord V6-3.0L (2003)

Fuse Block: Service and Repair
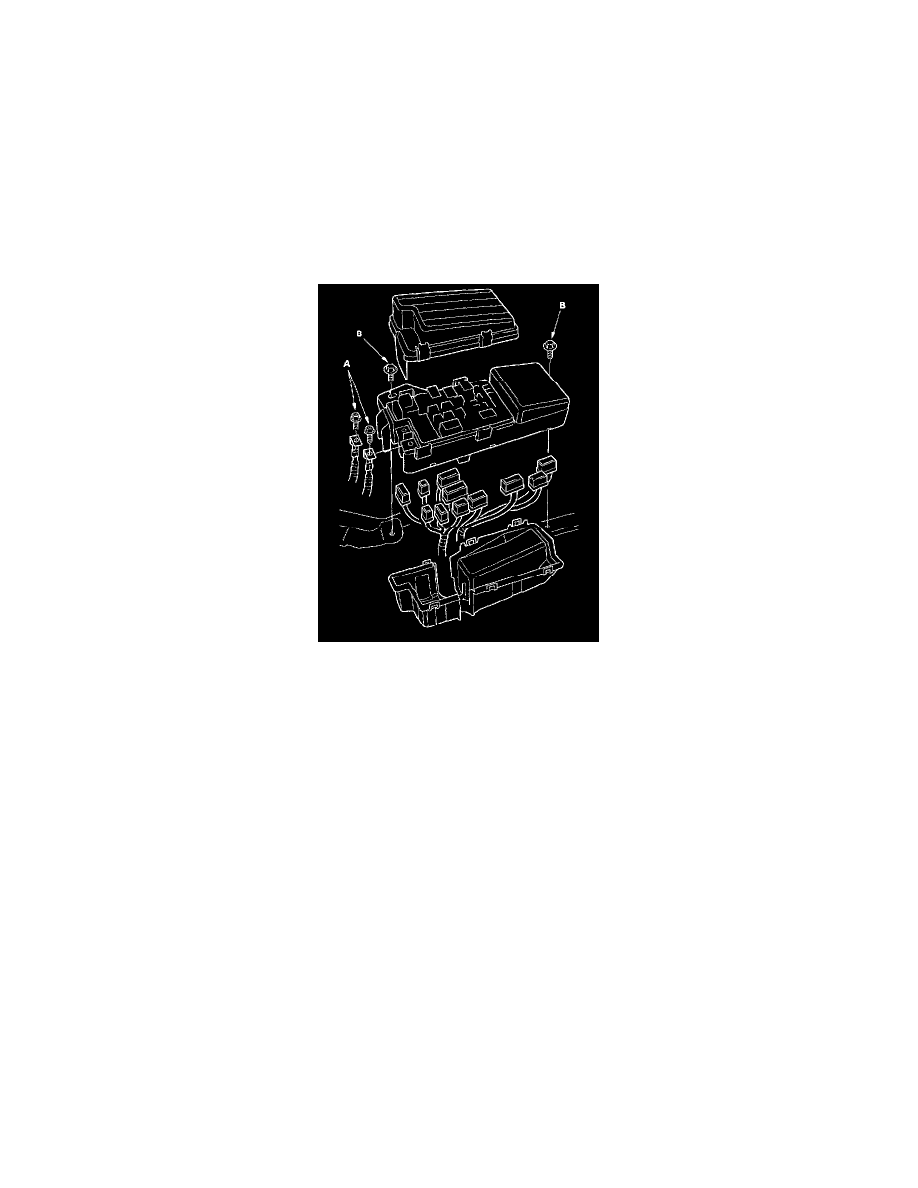
Under-Hood Fuse/Relay Box
Removal and Installation
Removal
1. Make sure you have the anti-theft codes for the radio and the navigation system, then write down the frequencies for the radio's preset buttons.
2. Connect the HDS to the date link connector (DLC), and ground the SCS.
3. Disconnect the battery negative cable, then disconnect the positive cable, and wait at least 3 minutes.
4. Remove the under-hood multi-relay box (Canada) from the under-hood fuse/relay box.
5. Remove the screws (A) from the alternator and battery cable terminals.
6. Remove the two mounting bolts (B) from the under-hood fuse/relay box.
7. Remove the under cover from the under-hood fuse/relay box.
8. Disconnect the connectors from the under-hood fuse/relay box.
Installation
1. Connect the connectors to the under-hood fusel relay box, then install the under-hood fuse/relay box in the reverse order of removal.
2. Install the removed parts in the reverse order of removal.
3. Connect the both positive cable and negative cable to the battery.
4. Do the ECM/PCM idle learn procedure.
5. Do the power window control unit reset procedure.
6. Enter the anti-theft codes for the radio and navigation system, then enter the customer's radio station presets.
7. Confirm that all systems work properly.
