
Accord V6-3.0L (2003)
Transmission Fluid Warmer - A/T: Service and Repair
ATF Warmer Replacement
NOTE: Replace the ATF warmer with a new one whenever the transmission assembly is replaced.
1. Lift the vehicle upon a lift or apply the parking brake, block rear wheels, and raise the front of the vehicle. Make sure it is securely supported.
2. Remove the splash shield.
3. Drain the engine coolant.
4. Remove the intake air duct and air cleaner housing.
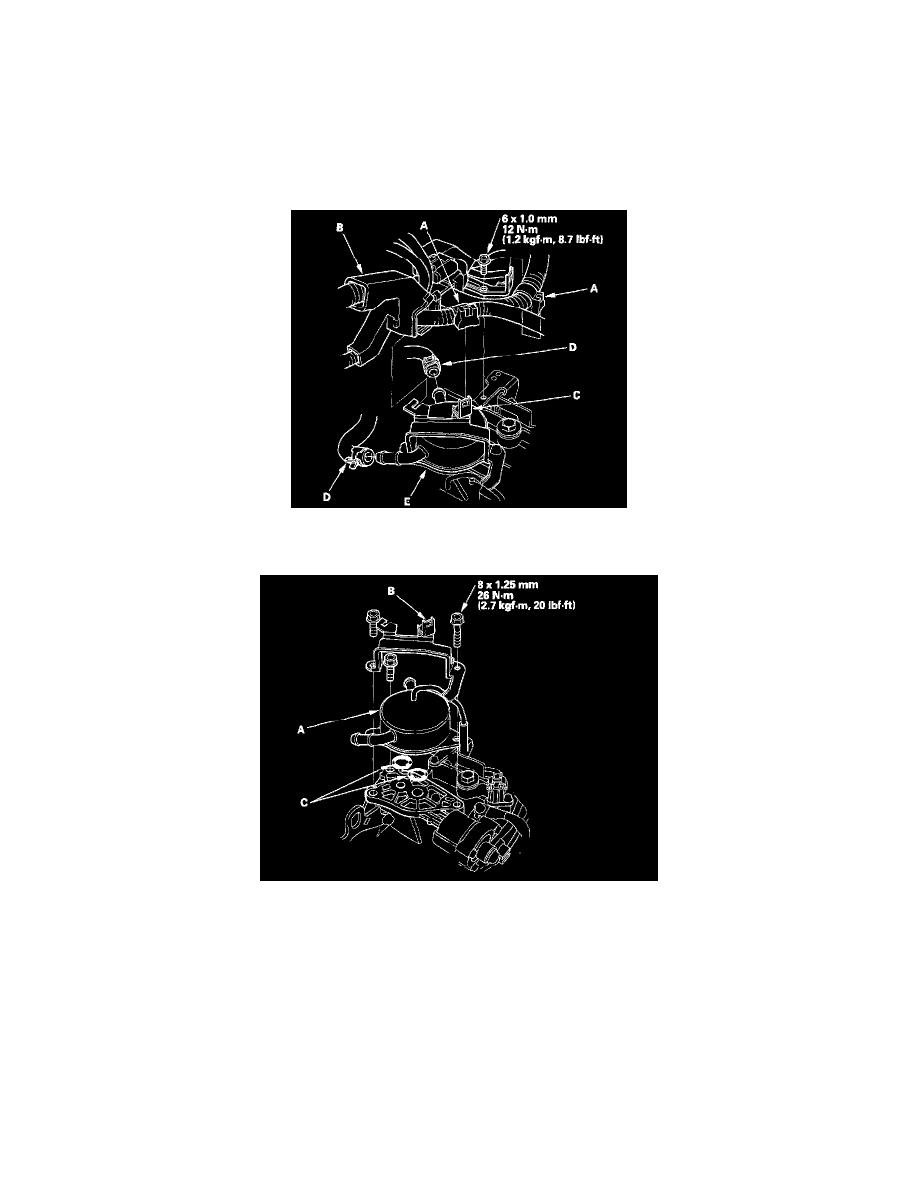
5. Remove the harness clamps (A) and harness cover (B) from the harness clamp bracket (C), and remove the bolt securing the bracket.
6. Disconnect the water hoses (D) from the ATF warmer (E).
7. Put a shop rugs around the ATF warmer (A) to catch the ATF that flows out.
8. Remove the bolts securing the ATF warmer and the bracket (B), then remove the ATF warmer from the transmission
9. Clean the mounting surfaces and fluid passages. Do not allow dust or other foreign particles to enter the transmission
10. Install the new ATF warmer with the new O-rings (C) and the bracket. Do not pinch the O-rings.
11. Connect the water hoses on the ATF warmer, and secure the hoses with the clips.
12. Install the harness clamp bracket bolt, and install the harness clamps and harness cover on the bracket.
13. Install the intake air duct and air cleaner housing.
14. Fill the radiator with the engine coolant, then bleed air from the cooling system.
15. Install the splash shield.