
Accord V6-3.0L Hybrid (2005)
NOTE: Remove the connecting rod bolt if you tightened it beyond the specified angle, and go back to step 14 of the procedure. Do not loosen it
back to the specified angle.
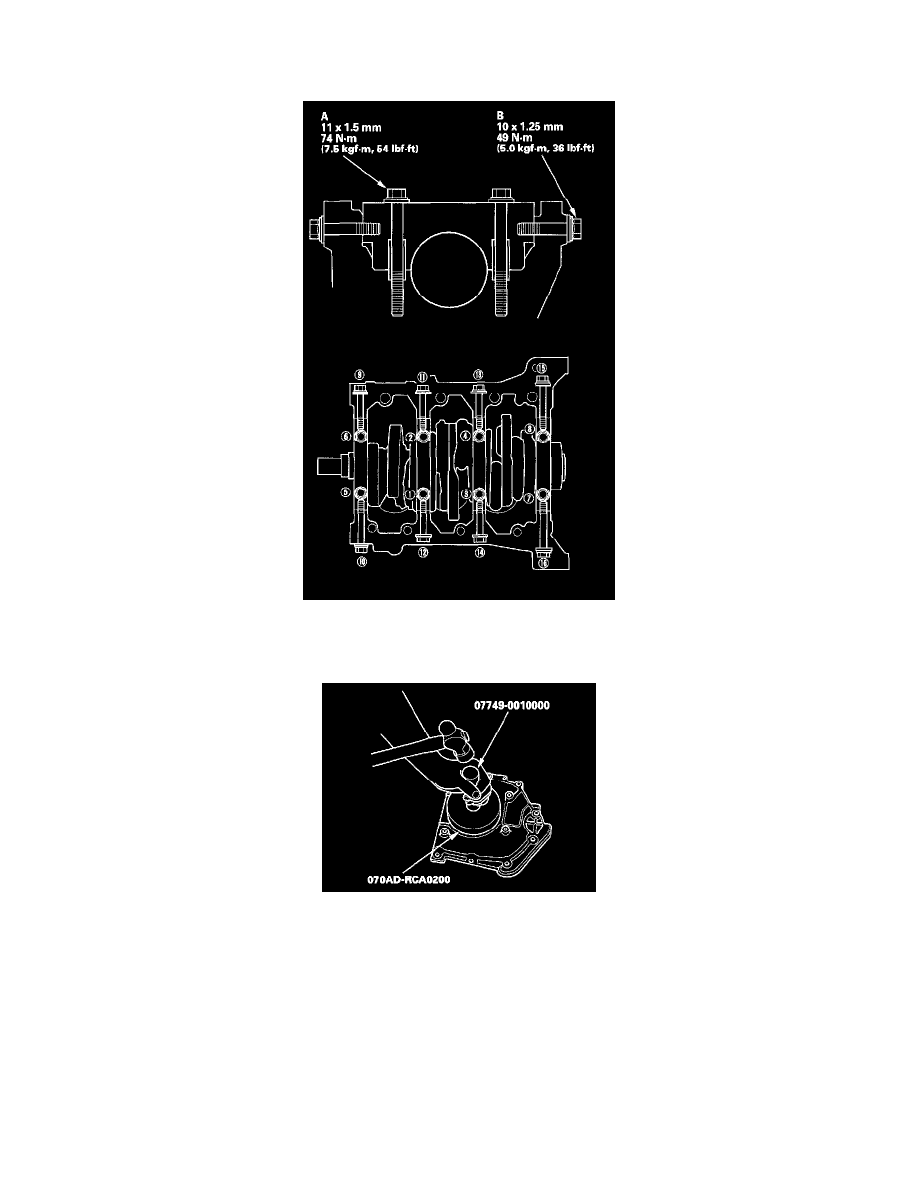
21. Tighten the bearing cap bolts (A), and then the bearing cap side bolts (B) to the specified torque in the sequence shown. Repeat the torque
sequence again to ensure the bolts are properly torqued.
22. Apply a light coat of multipurpose grease to the crankshaft and to the lip of the seal.
23. Drive the new crankshaft oil seal until the special tool bottoms on the engine block end cover.
24. Remove all of the old liquid gasket from the engine block end cover mating surfaces, bolts, and bolt holes.
25. Clean and dry the engine block end cover mating surfaces.