Accord V6-3.0L Hybrid (2005)

Seat Belt: Testing and Inspection
Inspection
SRS components are located in this area. Review the SRS component locations and the precautions and procedures before performing repairs or service.
Retractor
1. Before installing the retractor, check that the seat belt can be pulled out freely.
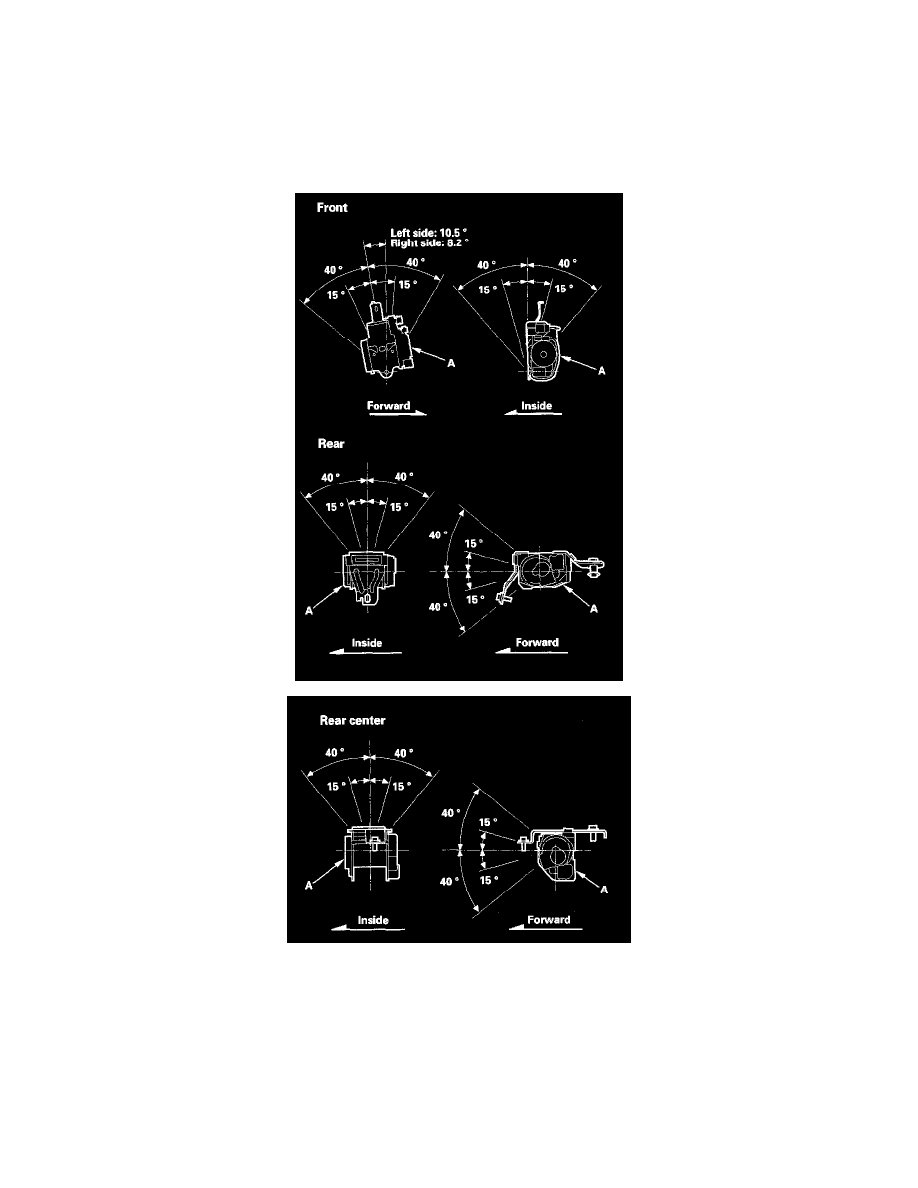
2. Make sure that the seat belt does not lock when the retractor (A) is leaned slowly up to 15° from the mounted position. The seat belt should lock
when the retractor is leaned over 40°. Do not attempt to disassemble the retractor.
3. Replace the seat belt with a new assembly if there is any abnormality. Do not disassemble any part of the seat belt for any reason.
In-vehicle
1. Check that the seat belt is not twisted or caught on anything.
2. After installing the anchors, check for free movement on the anchor bolts. If necessary, remove the anchor bolts and check that the washers and
other parts are not damaged or improperly installed.
3. Check the seat belts for damage or discoloration. Clean with a shop towel if necessary. Use only soap and water to clean.
