Accord V6-3.0L Hybrid (2005)

Fluid Pressure Sensor/Switch: Service and Repair
2ND Clutch Pressure Switch Replacement
2nd Clutch Transmission Fluid Pressure Switch Replacement
1. Get the customer's radio anti-theft code (navigation code), and write down the customer's audio presets.
2. Disconnect the negative terminal from the battery, then disconnect the positive terminal.
3. Remove the battery hold-down bracket, and remove the battery and battery tray.
4. Remove the intake air duct and air cleaner housing.
5. Remove the bolts securing the under-hood fuse/ relay box, and move the fuse/relay box.
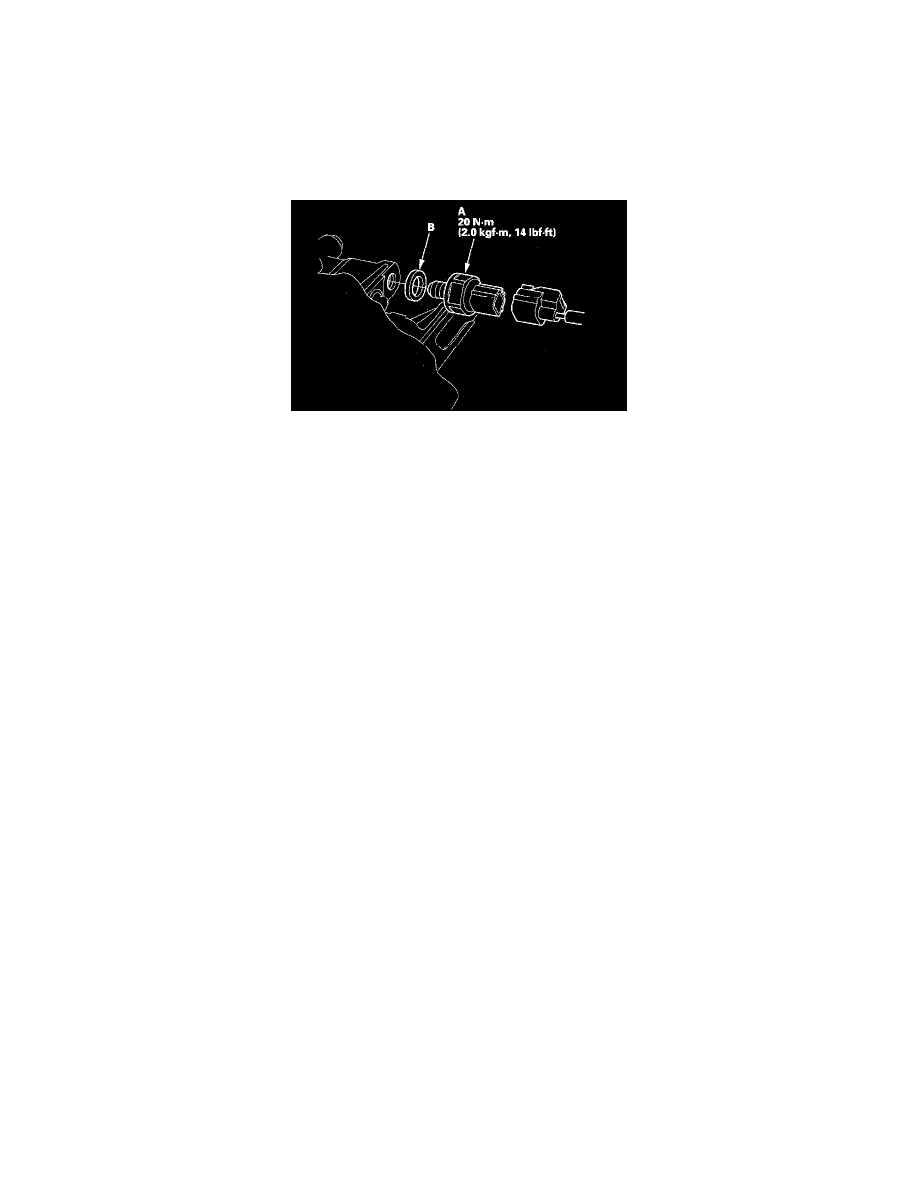
6. Disconnect the 2nd clutch transmission fluid pressure switch connector, and remove the switch.
7. Make sure there is no water, oil, dust, or foreign particles inside the connector.
8. Install the new 2nd clutch transmission fluid pressure switch (A) and a new sealing washer (B), and tighten the switch.
9. Connect the connector securely.
10. Install the intake air duct and air cleaner housing.
11. Install the battery tray, battery, and battery hold down bracket, then connect the battery terminals.
12. Enter the radio code (navigation code), then enter the customer's audio presets, and set the clock.
13. Do the power window control unit reset procedure.
14. If the IMA battery level gauge (BAT) displays no segments, start the engine in the P or N position, and hold it between 3,500 and 4,000 rpm with
no load until the BAT displays at least three segments.
