
Accord V6-3.0L Hybrid (2005)
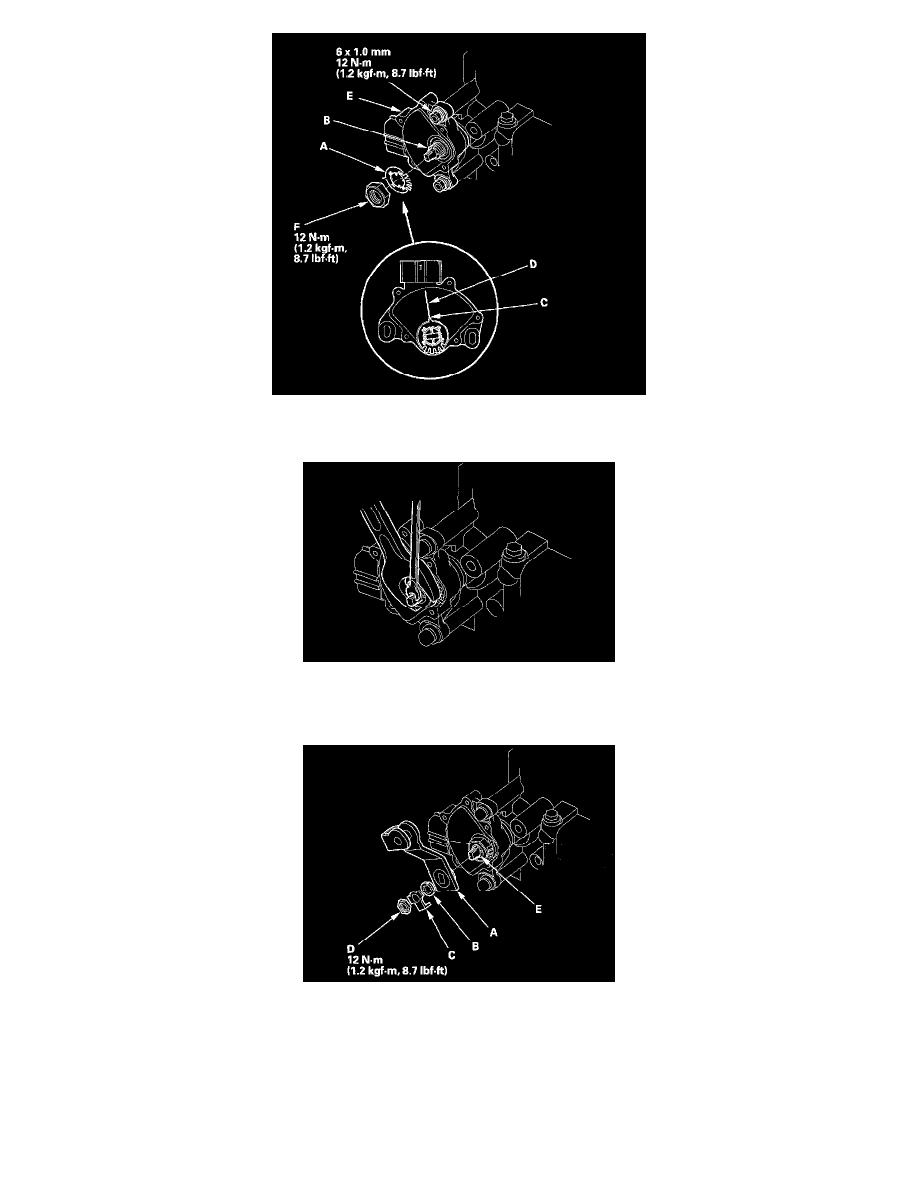
15. Install the new lock washer (A) over the selector control shaft (B) while aligning the projection (C) of the lock washer with the N positioning line
(D) on the transmission range switch (E), and install the locknut (F).
16. Push the locknut against the transmission housing to seat the transmission range switch into the selector control shaft, and tighten the locknut to 12
Nm (1.2 kgf-m, 13.7 ft. lbs.) while holding the selector control shaft with a 6.0 mm wrench, then bend the lock tabs against the locknut.
17. Tighten the bolts to 12 Nm (1.2 kgf-m, 8.7 ft. lbs.). securing the transmission range switch.
18. Install the control lever (A), spring washer (B), lock washer (C), and locknut (D) on the selector control shaft (E).
19. Attach the shift cable end to the control lever, then insert the control pin into the control lever hole through the shift cable end, and secure the
control pin with the spring clip/washer.
20. Secure the shift cable bracket.
21. Check the connectors for rust, dirt, or oil, clean or repair if necessary, then connect the connector securely.
22. Install the battery base.
23. Install the intake air duct and air cleaner housing.
24. Install the battery tray, battery, and battery hold down bracket, then connect the battery terminals.
25. Turn the ignition switch ON (II). Move the shift lever through all positions, and check the transmission range switch synchronization with the A/T