
Accord V6-3.5L (2010)
Power Seat Switch: Testing and Inspection
Front Passenger's Power Seat Adjustment Switch Test/Replacement
Front Passenger's Power Seat Adjustment Switch Test/Replacement
Front Passenger's Seat
NOTE: SRS components are located in this area. Review the SRS component locations 4-door See: Restraint Systems/Air Bag Systems/Locations/SRS
Component Location Index (4-Door), 2-door See: Restraint Systems/Air Bag Systems/Locations/SRS Component Location Index (2-Door), and
precautions and procedures See: Interior Moulding / Trim/Dashboard / Instrument Panel/Air Bag(s) Arming and Disarming/Service and Repair before
doing repairs or servicing.
1. Remove the front passenger's seat See: Service and Repair/Front Seat Removal/Installation.
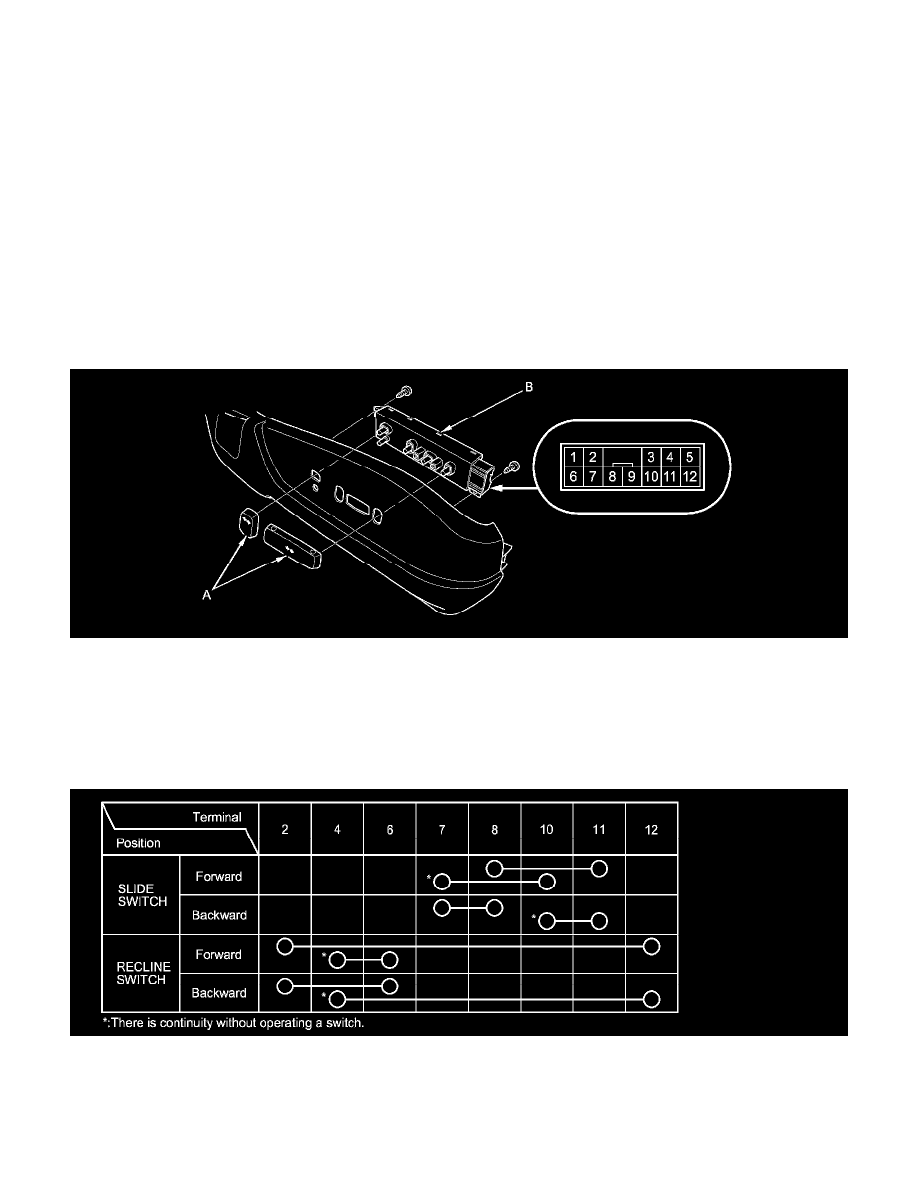
2. Remove the power seat adjustment switch knobs (A) and the recline cover from the front passenger's seat.
-
4-door See: Seat Cover/Service and Repair/Front Seat Cushion Cover Replacement (4-Door)
-
2-door See: Seat Cover/Service and Repair/Front Seat Cushion Cover Replacement (2-Door)
3. Remove the two screws and the power seat adjustment switch (B).
4. Disconnect the 12P connector from the power seat adjustment switch.
5. Reinstall the adjustment switch knobs to the switch.
6. Check for continuity between the terminals in each switch position according to the table.
7. If the continuity is not as specified, replace the switch.