
Accord V6-3.5L (2010)
Relay Box: Service and Repair
Drivers Under-dash Fuse/Relay Box (Drivers MICU) Removal and Installation (USA Models)
Driver's Under-dash Fuse/Relay Box (Driver's MICU) Removal and Installation
Special Tools Required
-
Relay Puller 07AAC-000A1A0 or 07AAC-000A2A1
USA models
NOTE: SRS components are located in this area. Review the SRS component locations 4-door See: Restraint Systems/Air Bag Systems/Locations/SRS
Component Location Index (4-Door), 2-door See: Restraint Systems/Air Bag Systems/Locations/SRS Component Location Index (2-Door), and
precautions and procedures See: Body and Frame/Interior Moulding / Trim/Dashboard / Instrument Panel/Air Bag(s) Arming and Disarming/Service and
Repair before doing repairs or servicing.
Removal
1. Do the battery terminal disconnection procedure See: Starting and Charging/Battery/Service and Repair/Procedures.
2. Remove the driver's dashboard lower cover See: Body and Frame/Interior Moulding / Trim/Dashboard / Instrument Panel/Service and
Repair/Removal and Replacement/Driver's Dashboard Lower Cover Removal/Installation, and the driver's kick panel:
-
4-door See: Body and Frame/Interior Moulding / Trim/Scuff Plate/Service and Repair/Interior Trim Removal/Installation - Door Areas
(4-Door)
-
2-door See: Body and Frame/Interior Moulding / Trim/Scuff Plate/Service and Repair/Interior Trim Removal/Installation - Door Areas
(2-Door)
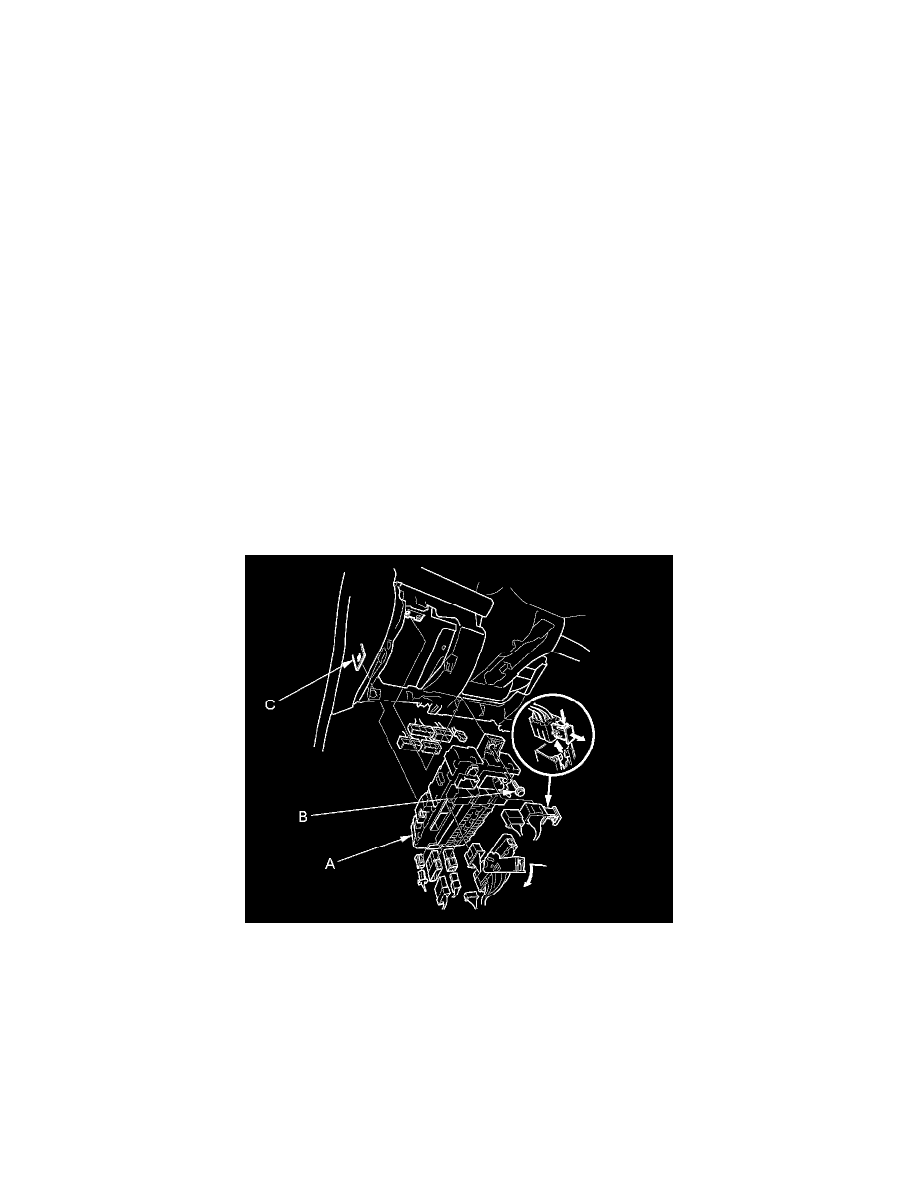
3. Disconnect the connectors from the fuse side of the driver's under-dash fuse/relay box (A).
4. Remove the mounting bolt (B), release the tab (C), and pull the driver's under-dash fuse/relay box away from the body.
5. Disconnect the connectors from the back side of the driver's under-dash fuse/relay box, then remove the driver's under-dash fuse/relay box.
6. Carefully remove the relays by prying under the base of the relay using the relay puller See: Power and Ground Distribution/Testing and
Inspection.
NOTE: Do not use pliers. Pliers will damage the relays, which could cause the engine to stall or not start.
Installation
1. Install the relays and connect the connectors to the driver's under-dash fuse/relay box, then install the driver's under-dash fuse/relay box in the