Accord V6-3.5L (2010)

the threaded section and the mating surfaces of the castle nut.
-
Torque the castle nut to the lower torque specification, then tighten it only far enough to align the slot with the ball joint pin hole. Do not align
the castle nut by loosening it.
-
Before installing the wheel, clean the mating surfaces of the brake disc and the inside of the wheel.
9. Check the wheel alignment, and adjust it if necessary See: Alignment/Service and Repair.
Compliance Bushing Replacement
1. Remove the lower arm.
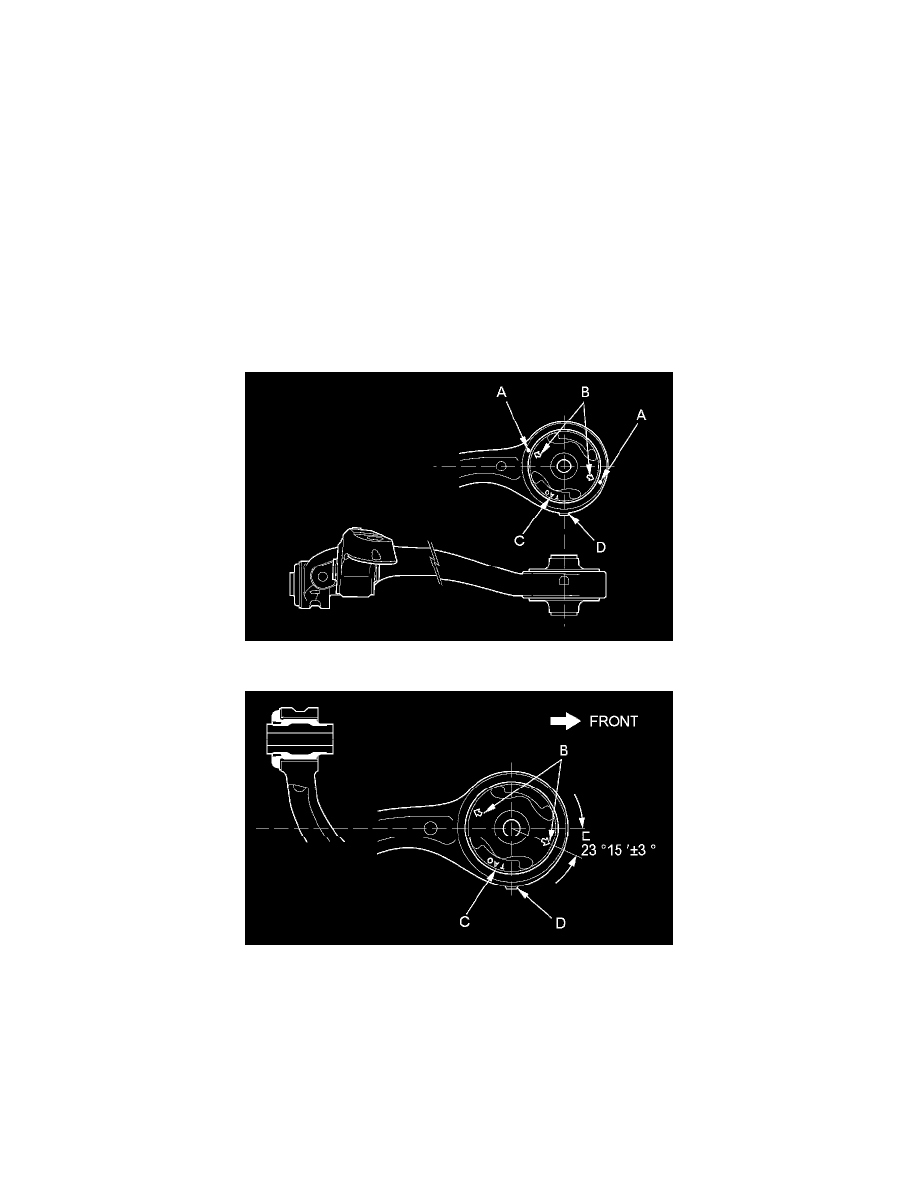
2. Mark alignment marks (A) on the bottom of the lower arm next to the aligning marks (B) on the compliance bushing.
NOTE: The compliance bushing has a specific installation position. Turn the lower arm so that its bottom side is up. Position the bushing identifying
mark (C) face up and near the tab (D) on the lower arm. Then align the bushing aligning marks on the bushing and the lower arm.
If the alignment marks are gone, align the angle (E) between the lower arm and the bushing as shown.
Aligning the marking position
Aligning the angle (reference)
3. Press out the compliance bushing (A) with the bushing driver, the bushing receiver set (attachment A), and a hydraulic press, and remove the
bushing from the lower arm (B).
NOTE: Be careful not to damage the inside of the bushing hole on the lower arm.
