Accord DX Sedan L4-2254cc 2.3L SOHC MFI (2001)

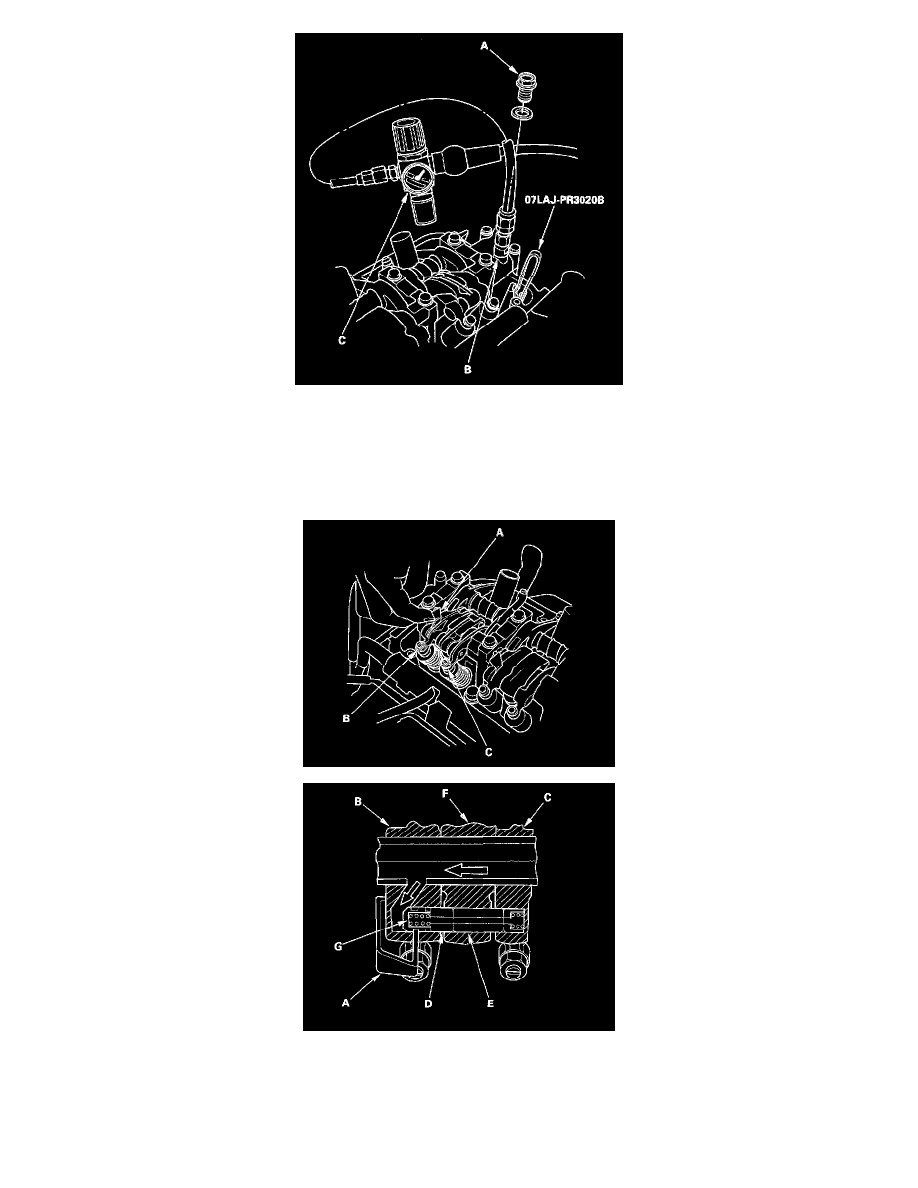
9. Remove the sealing bolt (A) from the inspection hole (B), and connect an air pressure regulator with a 0 - 100 psi gauge (C).
NOTE: Remove any oil from the bolt threads and camshaft holder threads before retightening the sealing bolt.
10. Loosen the valve on the regulator, and apply the specified air pressure.
Specified Air Pressure: 400 kPa (4 kgf/cm2, 57 psi)
11. With the specified air pressure applied and the piston at TDC, push up the timing plate (A) 2 - 3 mm (0.08 - 0.12 inch) at the plate end then
release it. The synchronizing piston will pop out and engage the intake mid, primary (B) and secondary (C) rocker arms.
Visually check the engagement of the synchronizing pistons A (D)/B (E). The synchronizing pistons can be seen in the gap between the mid (F),
secondary (C) and primary (B) rocker arms.
NOTE:
