Accord LX Coupe V6-3.0L (2001)

Brake Master Cylinder: Adjustments
Master Cylinder Pushrod Clearance Adjustment
Special Tools Required
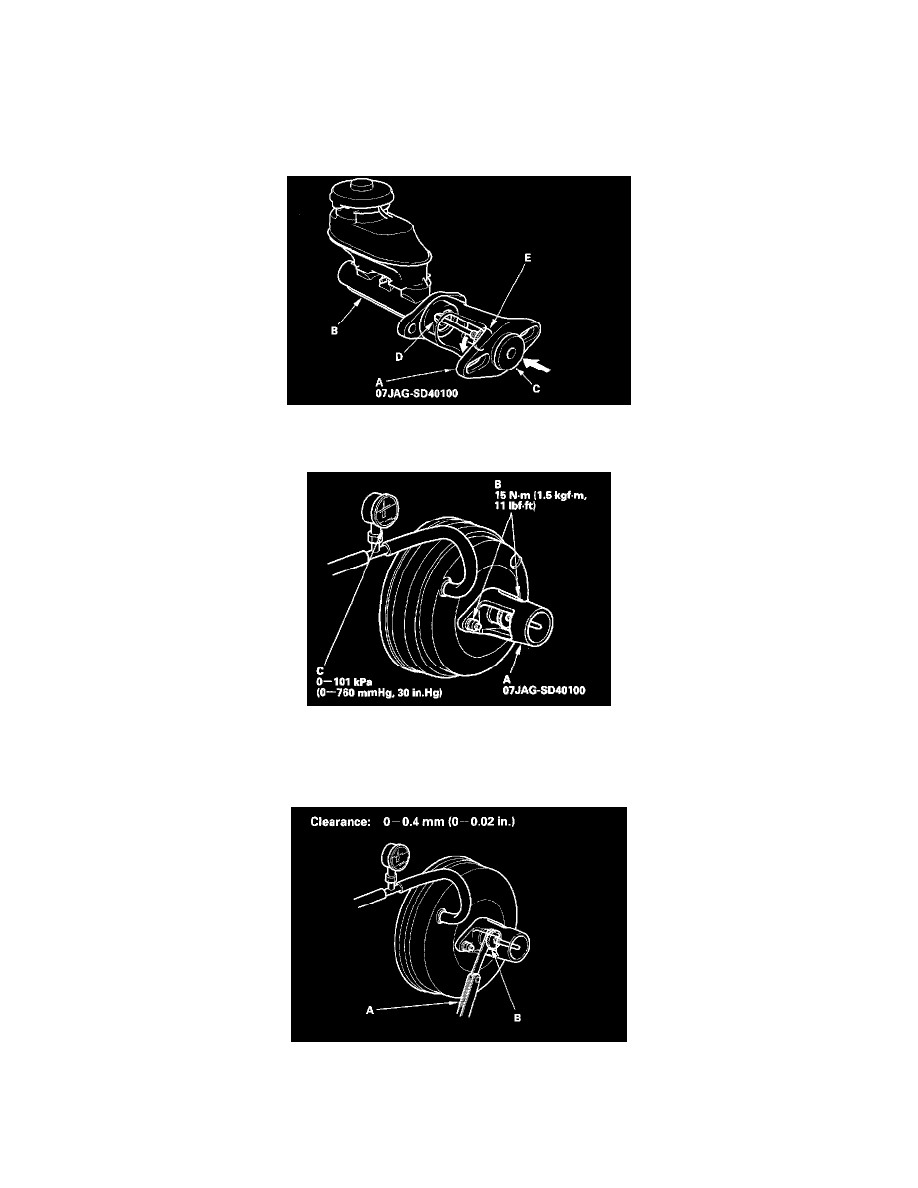
Pushrod Adjustment Gauge 07JAG-SD40100
NOTE: Master cylinder pushrod-to-piston clearance must be checked and adjustments made, if necessary, before installing the master cylinder.
1. Set the special tool (A) on the master cylinder body (B), push in the center shaft (C) until the top of it contacts the end of the secondary piston (D)
by turning the adjusting nut (E).
2. Without disturbing the center shaft's position, install the special tool (A) backwards on the booster.
3. Install the master cylinder nuts (B), and tighten to the specified torque.
4. Connect the booster in-line with a vacuum gauge (C) 0 - 101 kPa (0 - 760 mm-Hg, 30 inch-Hg) to the booster's engine vacuum supply, and
maintain an engine speed that will deliver 66 kPa (500 mm-Hg, 20 inch-Hg of vacuum.
5. With a feeler gauge (A), measure the clearance between the gauge body and the adjusting nut (B) as shown. If the clearance between the gauge
body and adjusting nut is 0.4 mm (0.02 inch), the pushrod-to-piston clearance is 0 mm. However, if the clearance between the gauge body and
adjusting nut is 0 mm, the pushrod-to-piston clearance is 0.4 mm (0.02 inch) or more. Therefore it must be adjusted and rechecked.
