
Accord LX Coupe V6-3.0L (2001)
Temperature Gauge: Testing and Inspection
Coolant Temperature Gauge Test
Coolant Temperature Gauge Needle Does Not Move at All
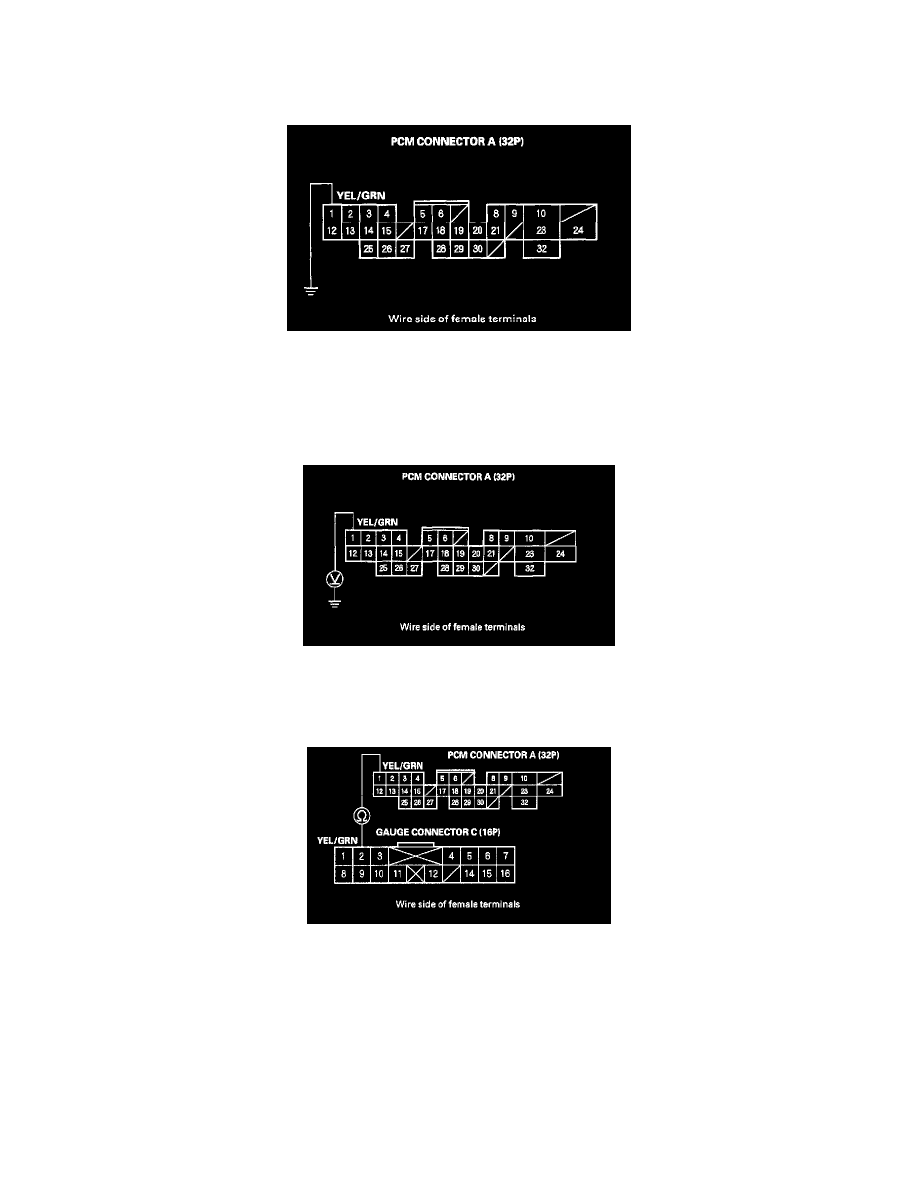
1. Turn the ignition switch OFF, and connect Powertrain Control Module (PCM) connector terminal A1 to body ground with a jumper wire.
2. Turn the ignition switch ON (II).
After 30 seconds or more, does the temperature gauge needle move to the Hot side?
YES - Substitute a known-good PCM and recheck. If the symptom/indication goes away, replace the original PCM.
NO - Go to step 3.
3. Turn the ignition switch OFF, and disconnect PCM connector A (32P).
4. Turn the ignition switch ON (II), and measure voltage between PCM connector terminal A1 and body ground.
Is there about 5 Volts?
YES - Replace the fuel and temperature gauge assembly.
NO - Go to step 5.
5. Turn the ignition switch ON (II), and measure voltage between PCM connector terminal A1 and body ground.
Is there continuity?
YES - Replace the fuel and temperature gauge assembly.
NO - Repair open in the wire between PCM connector terminal A1 and gauge connector terminal C2.
Coolant Temperature Gauge Needle Goes Past the Hot Mark
1. Turn the ignition switch OFF, and disconnect PCM connector A (32P).
2. Turn the ignition switch ON (II) and watch the coolant temperature gauge.
Does the temperature gauge needle move at all? (you may have to watch it for about 30 seconds.)
YES - Go to step 3.
NO - Substitute a known-good PCM and recheck. If the symptom indication goes away, replace the original PCM.
3. Turn the ignition switch OFF, then turn it ON (II) again, and watch the coolant temperature gauge.