
Accord LX Coupe V6-3.0L (2001)
-
If the terminals look OK, go to step 7.
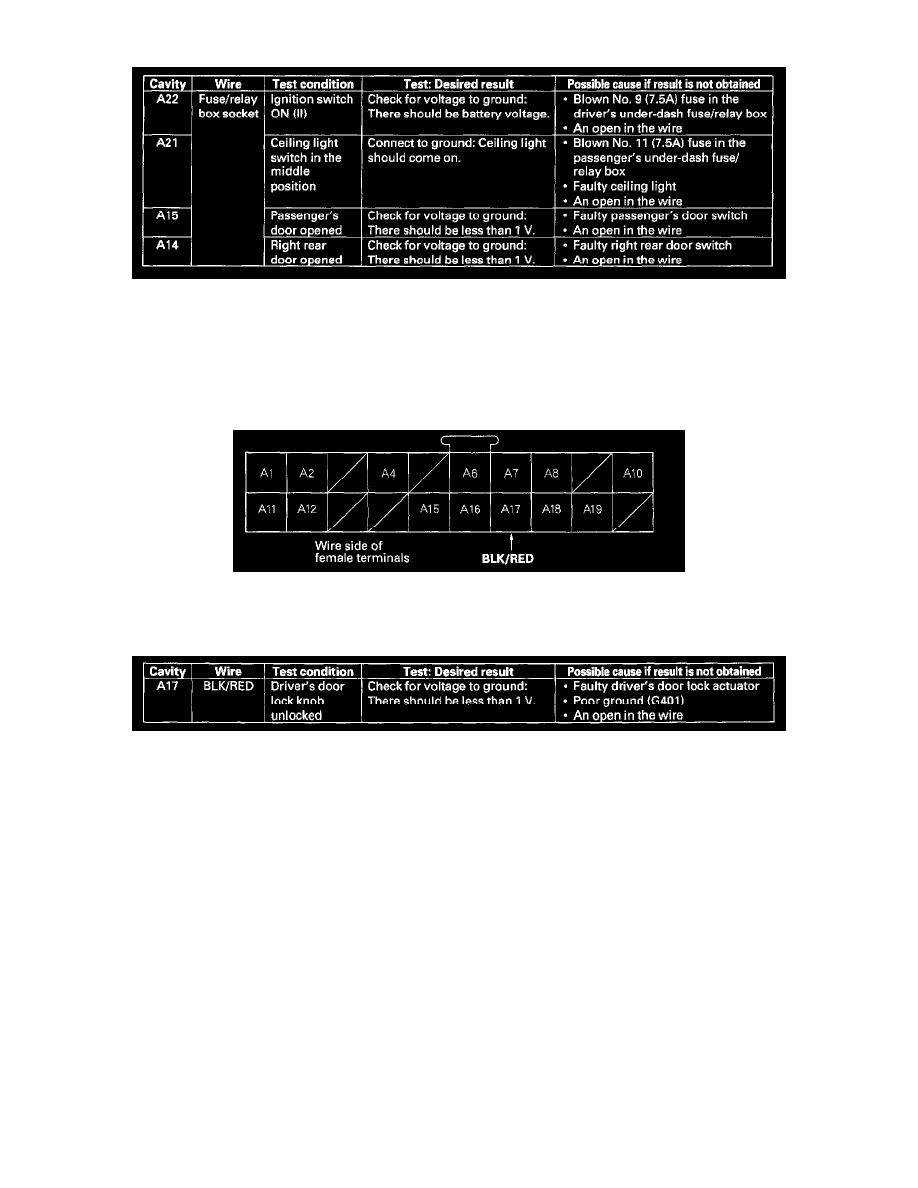
7. With the passenger's multiplex control unit still disconnected, make these input tests at the fuse/relay box socket.
-
If any test indicates a problem, find and correct the cause, then recheck the system.
-
If all the input tests prove OK, go to step 8.
Multiplex Control Unit, Door:
8. Remove the driver's door panel, and disconnect the 20P connector from the door multiplex control unit.
9. Inspect all connector and socket terminals to be sure they are making good contact.
-
If the terminals are bent, loose or corroded, repair them as necessary, and recheck the system.
-
If the terminals look OK, go to step 10.
10. Reconnect the connectors to the door multiplex control unit, and make these input tests at the connector.
-
If any test indicates a problem, find and correct the cause, then recheck the system.
-
If all the input tests prove OK, go to step 11.
11. If all the input tests prove OK, one of the control units must be faulty. Substitute a known-good control unit for the one that is most likely at fault,
then recheck the system. If the system works properly, the original control unit is faulty; replace it. If there is still a malfunction, substitute a
known-good control unit for the next most likely unit to be at fault, and recheck. If the system works properly, the original unit is faulty; replace it.