
Accord LX Coupe V6-3.0L (2001)
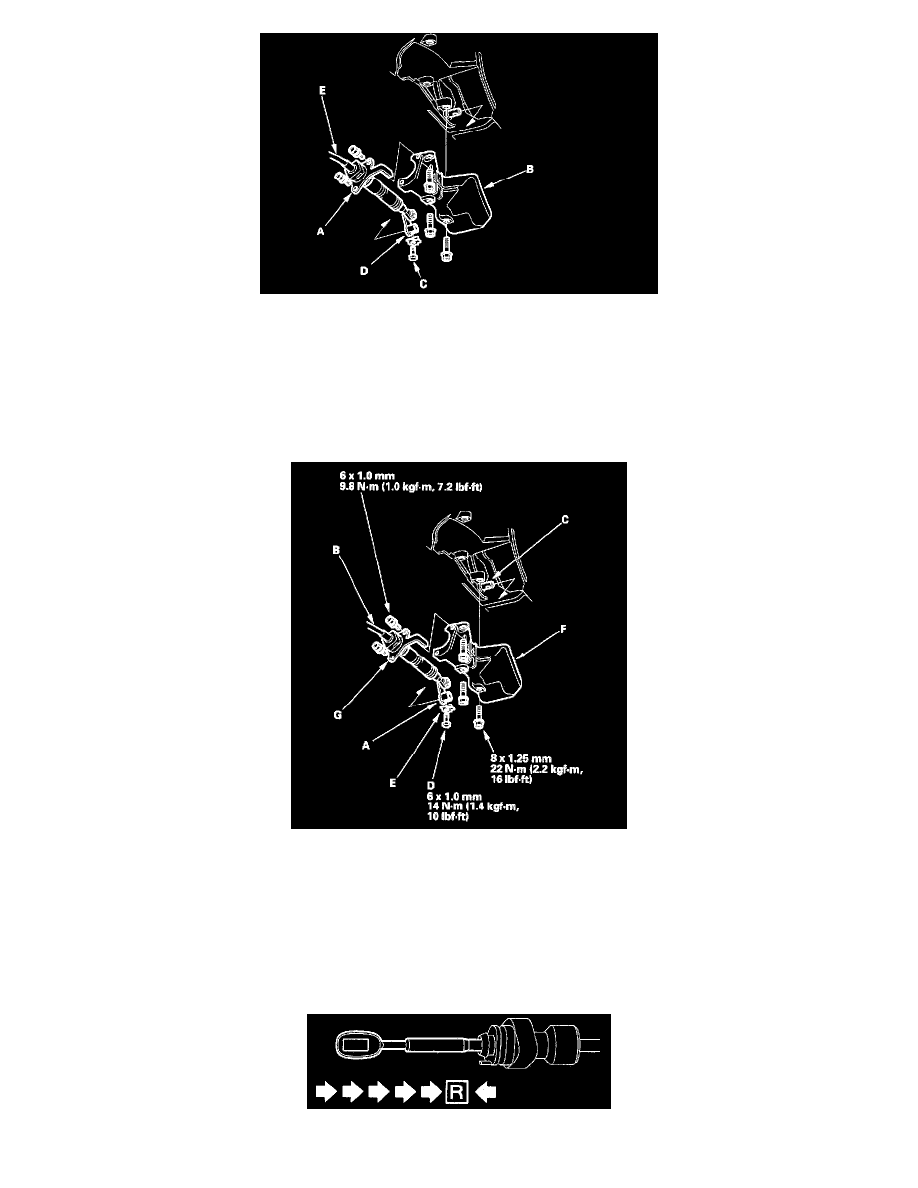
9. Remove the bolts securing the shift cable holder (A), then remove the shift cable cover (B).
NOTE: To prevent damage to the control lever joint, remove the bolts securing the shift cable holder before removing the bolts securing the shift
cable cover.
10. Remove the lock bolt (C) securing the control lever (D), then remove the shift cable (E) with the control lever.
11. Insert the new shift cable through the grommet hole, then install the shift cable guide bracket.
12. Verify that the transmission is in R position on the control shaft.
13. Install the control lever (A) with the shift cable (B) on the control shaft (C). Do not bend the shift cable excessively.
14. Install the lock bolt (D) with a new lock washer (E), then bend the lock washer tab against the bolt.
15. Install the shift cable cover (F), then install the shift cable holder (G) on the cover.
NOTE: To prevent damage to the control lever joint, be sure to install the shift cable holder after installing the shift cable cover to the torque
converter housing.
16. Install the floor heat shield.
17. Turn the ignition switch ON (II), and verify that the R position indicator light comes on.
18. If necessary, push the shift cable until it stops, then release your hand. Pull the shift cable back one step so that the shift position is in R.