
Accord LX Sedan L4-2156cc 2.2L SOHC MFI (1997)
Installing Pads And Shims
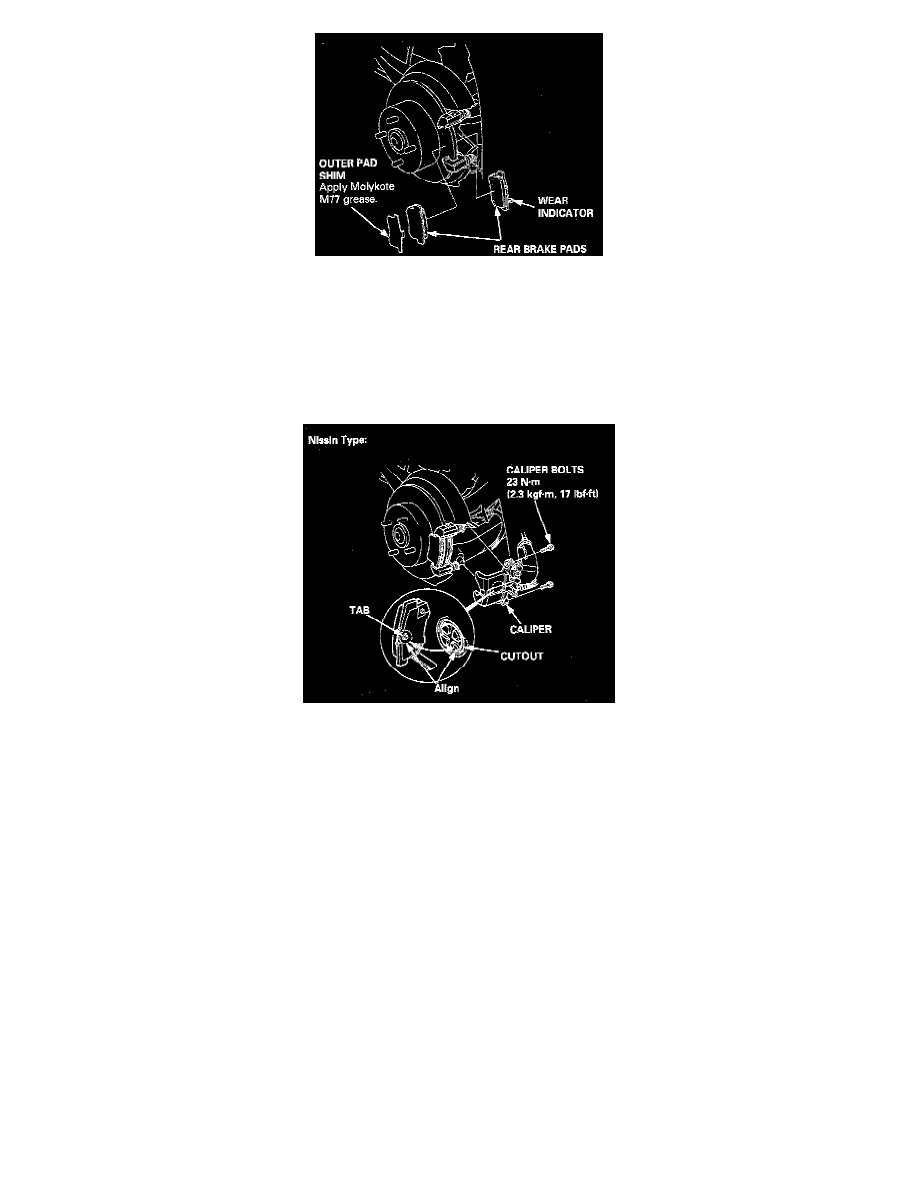
^ Install the brake pads and pad shims on the caliper bracket.
^ Rotate the caliper piston clockwise into the cylinder, then align the cutout in the piston with the tab on the inner pad by turning the piston back.
CAUTION: Lubricate the boot with rubber grease to avoid twisting the piston boot. If the piston boot is twisted, back it out so it sits properly.
^ Install the brake caliper
Nissin Caliper
^ Install and tighten the caliper bolts while holding the caliper pins with a thin, open-end wrench.
^ After installation, check for leaks at hose and line joints and connections, and retighten if necessary.
^ Depress the brake pedal several times to make sure the brakes work, then road-test.
NOTE: Engagement of the brake may require a greater pedal stroke immediately after the brake pads have been replaced as a set. Several
applications of the brake pedal will restore the normal pedal stroke.
Akebono Calipers
WARNING:
-
Never use an air hose or dry brush to clean brake assemblies. Use an OSHA-approved vacuum cleaner to avoid breathing brake dust.
-
Block the front wheels before lacking up the rear of the vehicle.
REMOVAL
^ Block the front wheels, loosen the rear wheel nuts slightly, support the rear of vehicle on safety stands, then remove the rear wheels.
^ Release the parking brake.