
Accord LX Sedan L4-2156cc 2.2L SOHC MFI (1997)
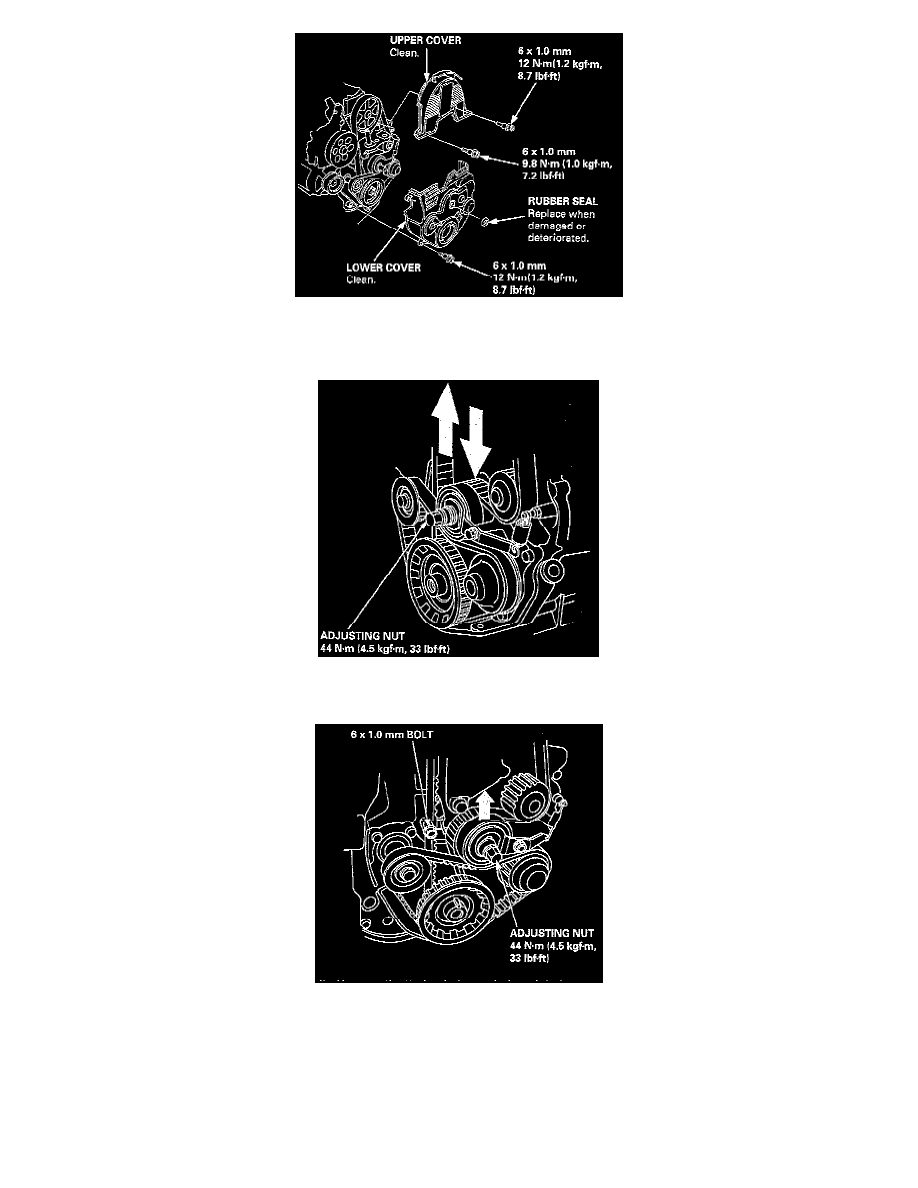
10. Remove the rubber seal from the adjusting nut, then remove the upper and lower covers.
NOTE: Do not use the upper and lower covers for storing removed items.
11. Loosen the adjusting nut 2/3 - 1 turn. Push the tensioner to remove tension from the timing belt and timing balancer belt, then retighten the
adjusting nut.
NOTE: When removing the timing balancer belt only:
^
Lock the timing belt adjuster arm in place by installing one of the 6 x 1.0 mm bolts.
^
Loosen the adjusting nut 2/3 - 1 turn. Push the tensioner to remove tension from the timing balancer belt, then retighten the adjusting nut.
12. Remove the timing balancer belt and timing belt.