
Accord LX Sedan L4-2156cc 2.2L SOHC MFI (1997)
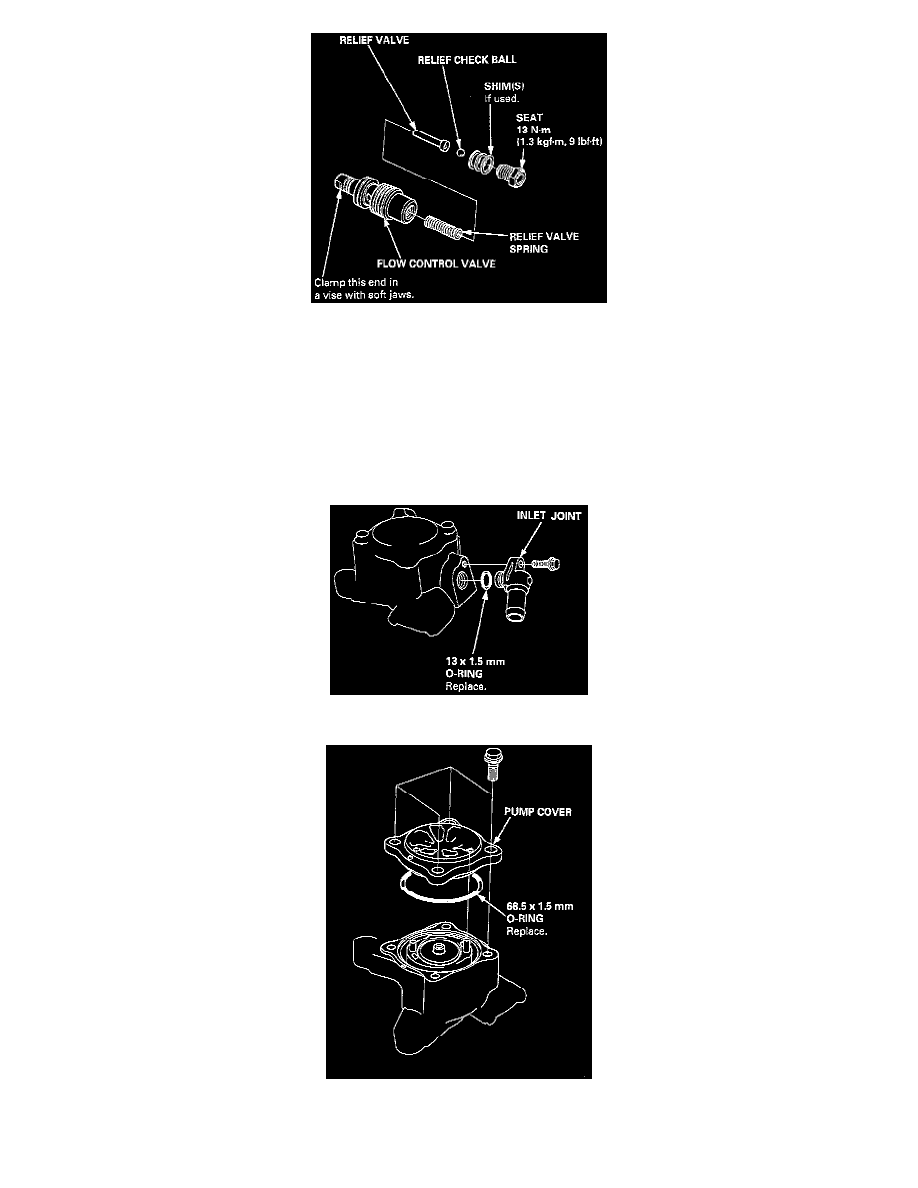
9. Unscrew the seat in the top end of the valve, and remove any shims, the relief check ball, relief valve and relief valve spring.
10. Clean all the parts in solvent, dry them off, then reassemble and retest the valve (see step 7). If the flow control valve tests OK, reinstall it in
the pump. If the flow control valve still leaks air, replace the pump as an assembly. The flow control valve is not available separately.
NOTE: If necessary, relief pressure is adjusted at the factory by adding shims under the check bail seat. If you found shims in your valve, be sure
you reinstall as many as you took out.
PUMP ROTOR REMOVAL
CAUTION: The pump components are made of aluminum. Be careful not to damage them when servicing.
1. Remove the inlet joint and O-ring.
2. Remove the pump cover and O-ring.