
Accord SE Coupe L4-2156cc 2.2L SOHC MFI (1997)
Caliper Pin, Boot Replacement
-
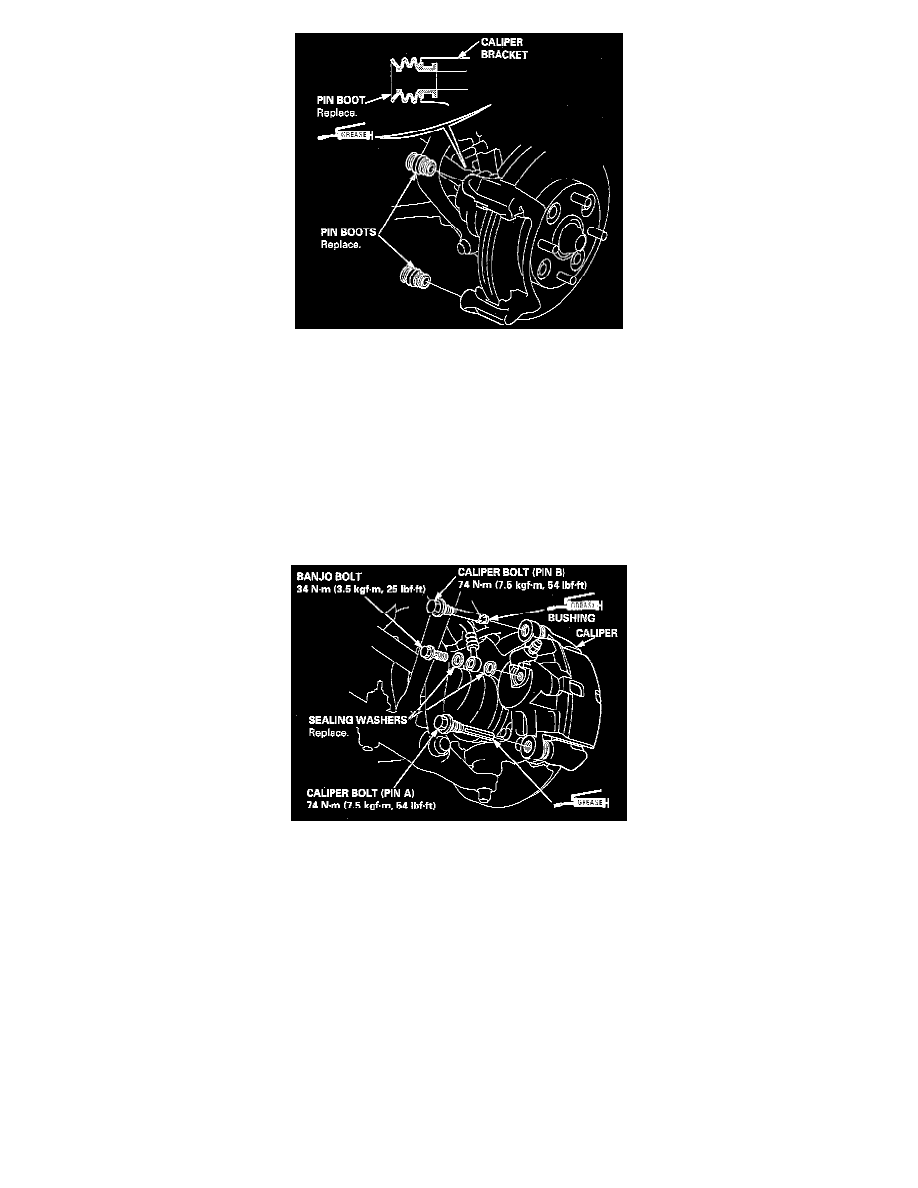
Install the pin boots into the groove in the caliper bracket properly.
-
Install the brake pads in their original positions.
CAUTION: Be careful not to damage the pin boots when installing the caliper.
-
Push in the piston so that the caliper will fit over the pads, and install the caliper.
-
Coat the caliper bolts (pin A and pin B) with seal grease and insert them into the caliper.
-
Tighten the caliper bolts (pin A and B) 74 Nm (54 lb.ft.).
Caliper Bolt Replacement
-
Connect the brake hose to the caliper with new sealing washers, and tighten the banjo bolt 34 Nm (25 lb.ft.)
.
-
Fill the brake reservoir and bleed the brake system. See: Brake Bleeding/Service and Repair
-
After installation, check for leaks at hose and line joints or connections, and retighten if necessary.
Disassembly and Assembly
WARNING:
-
Never use an air hose or dry brush to clean brake assemblies.
-
Use an OSHA-approved vacuum cleaner to avoid breathing brake dust.
-
Contaminated brake discs or pads reduce stopping ability.
-
When reusing the pads, always reinstall the brake pads in their original positions to prevent loss of braking efficiency.
CAUTION:
-
Do not spill brake fluid on the vehicle it may damage the paint; if brake fluid does contact the paint, wash it off immediately with water.
-
Clean all parts in brake fluid and air dry; blow out all passages with compressed air. Before reassembling, check that all parts are free of dust and