
Accord SE Coupe L4-2156cc 2.2L SOHC MFI (1997)
CAUTION:
-
Do not spill brake fluid on the car; it may damage the paint: if brake fluid does contact the paint, wash it off immediately with water.
-
To prevent spills, cover the hose joints with rags or shop towels.
-
Clean all parts in brake fluid and air dry; blow out all passage with compressed air.
-
Before reassembling, check that all parts are free of dust and other foreign particles.
-
Replace parts with new ones whenever specified to do so.
-
Make sure no dirt or other foreign matter is allowed to contaminate the brake fluid.
-
Do not mix different brands of brake fluid as they may not be compatible.
-
Do not reuse the drained fluid. Use only clean DOT 3 or 4 brake fluid.
NOTE:
-
Coat piston, piston seal, and caliper bore with clean brake fluid.
-
Replace all rubber parts with new ones whenever disassembled.
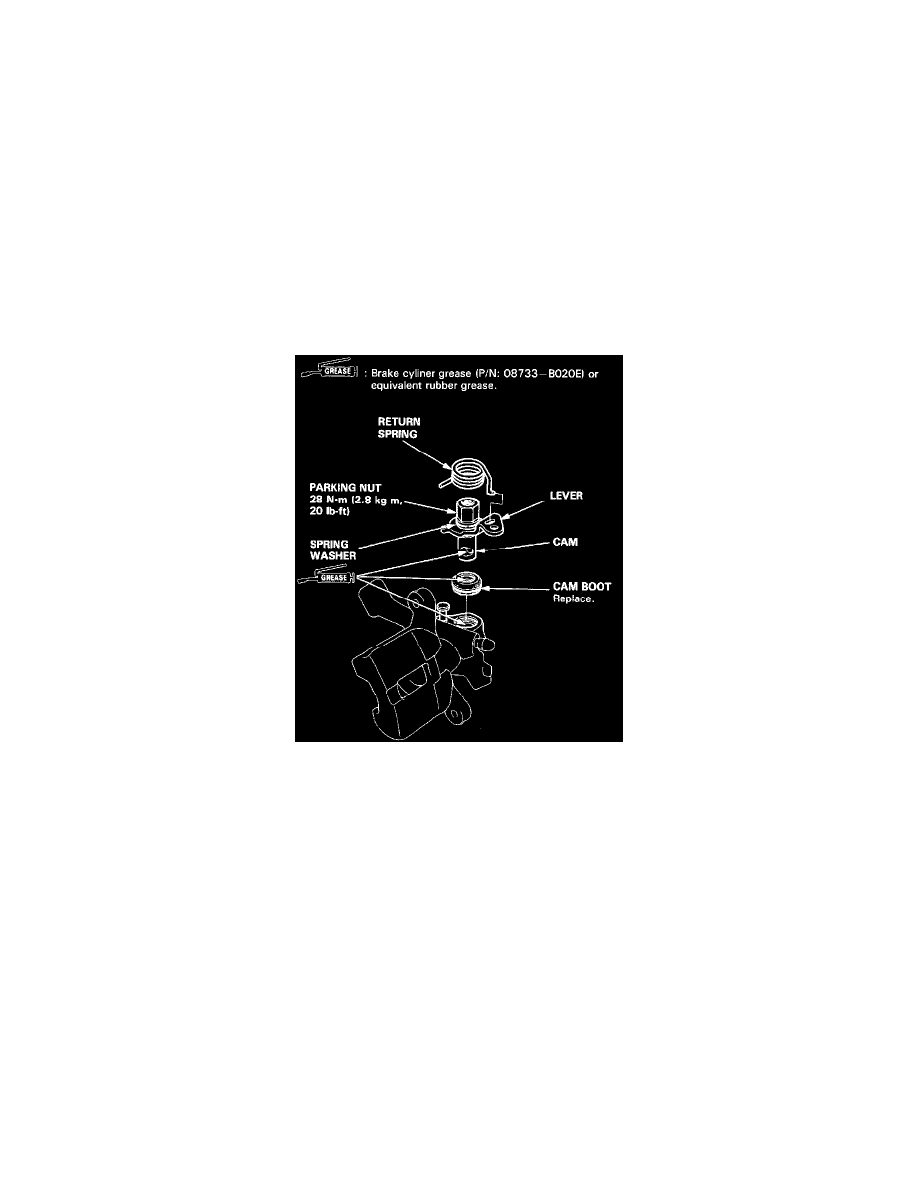
1. Pack all cavities of the needle bearing with recommended grease.
.
Coat the new cam boot with recommended grease and install it in the caliper body.
3. Apply recommended grease to the pin contacting area of the cam and install the cam and lever assembly into the caliper body.
4. Install the return spring.
CAUTION:
-
When the cam and lever were separated, be sure to assemble them before installing the cam in the caliper body. Install the lever and spring
washer apply locking agent to the threads, and tighten the parking nut while holding the lever with a vise.
-
Avoid damaging the cam boot since it must be installed before the cam.
-
When installing the cam, do not allow the cam boot lips to turn outside in.