
Accord SE Coupe L4-2156cc 2.2L SOHC MFI (1997)
Alignment: Service and Repair
Alignment
Camber
NOTE: Use commercially-available computerized four wheel alignment equipment to measure wheel alignment (that is, caster, camber, toe, and/or
turning angle). Follow the equipment manufacturer's instructions.
1. Check the camber angle. Camber angle:
-
Front: (0°00' ± 1°) -1° to +1°
-
Rear: (-0°25' ± 30') -0.92° to +0.09°
2. If out of specification, check for bent or damaged suspension components.
Caster
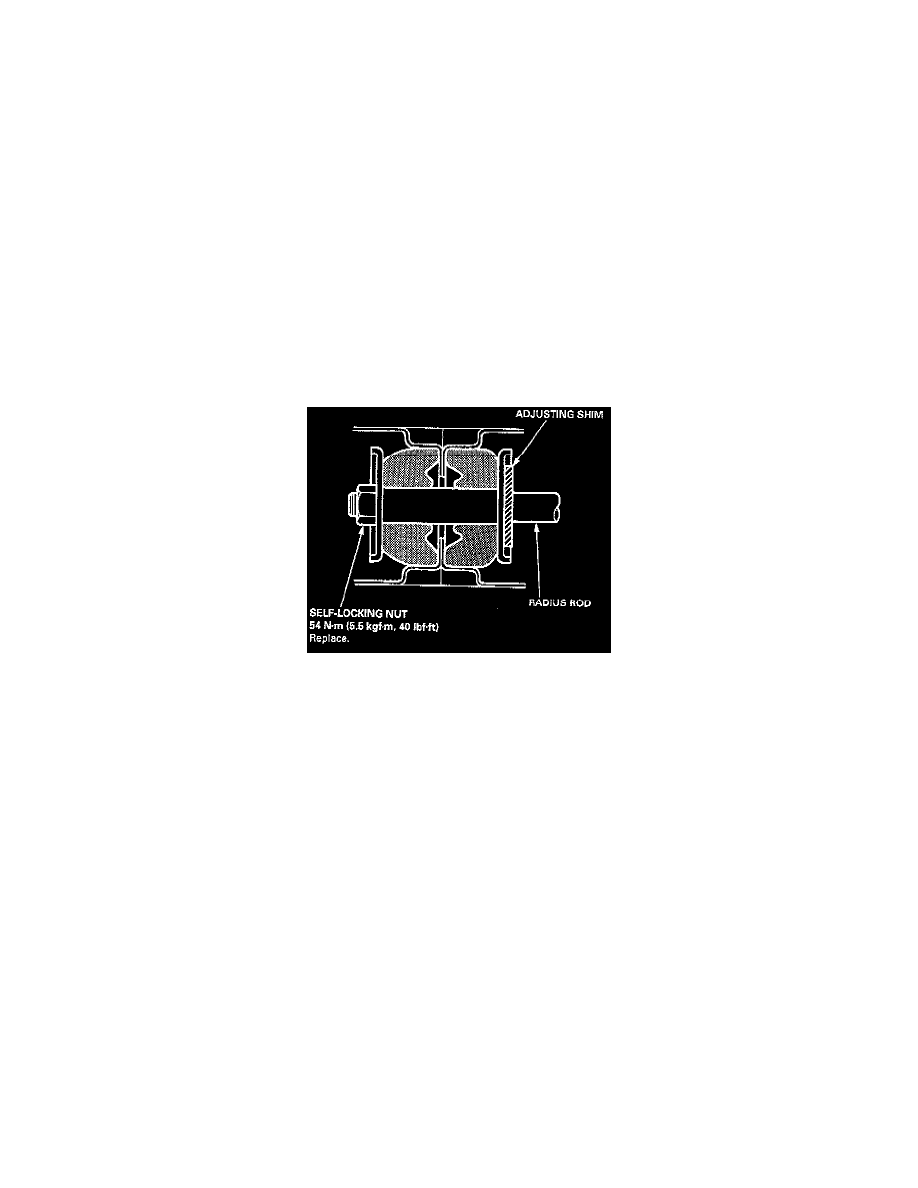
NOTE: Caster angle can be adjusted by increasing/decreasing the number of the adjusting shims. Remove and install the radius rod each time the caster
angle is adjusted.
1. Raise the front of the car, and support it with safety stands in the proper locations.
2. Remove the self-locking nut on the end of the radius rod.
3. Remove the flange bolts at the radius rod on the lower arm, and remove the radius rod.
4. Adjust the caster angle by increasing/decreasing the adjusting shims.
NOTE:
-
Do not use more than two adjusting shims.
-
One adjusting shim changes the caster angle by 35' and the caster angle can be adjusted by 1°10' maximum.
-
One adjusting shim is 3.2 mm (0.13 inch) in thickness.
5. After the adjustment, install the radius rod onto the lower arm, and tighten the flange bolts.
6. Tighten the new self-locking nut to specified torque.
Toe-In
NOTE: Use commercially-available computerized four wheel alignment equipment to measure wheel alignment (that is, caster, camber, toe, and/or
turning angle). Follow the equipment manufacturer's instructions.
1. Check the tire pressure.
2. Center steering wheel spokes.
3. Check the toe with the wheels pointed straight ahead. Front toe: (0 ± 3 mm /0 ± 1/8 inch) -0.13 to +0.13 inch.
a. If adjustment is required, go on to step 4.
b. If no adjustment is required, remove alignment equipment.
4. Loosen the tie-rod locknuts, and turn both tie-rods in the same direction until the front wheels are in straight ahead position.
5. Turn both tie-rods equally until the toe reading on the turning radius gauge is correct.