
Accord SE Coupe L4-2156cc 2.2L SOHC MFI (1997)
Timing Component Alignment Marks: Locations
Caution: Incorrect removal or installation of the timing belt can result in damage to internal engine components.
For complete Timing Belt Removal and Installation information: See: Timing Belt/Service and Repair
NOTE:
^
Install the timing belt and timing balancer belt in the reverse order of removal.
^
Only key points are described here.
^
When installing only the timing balancer belt, go to step 13.
^
Clean the upper and lower covers before installation.
1. Remove the timing balancer belt drive pulley.
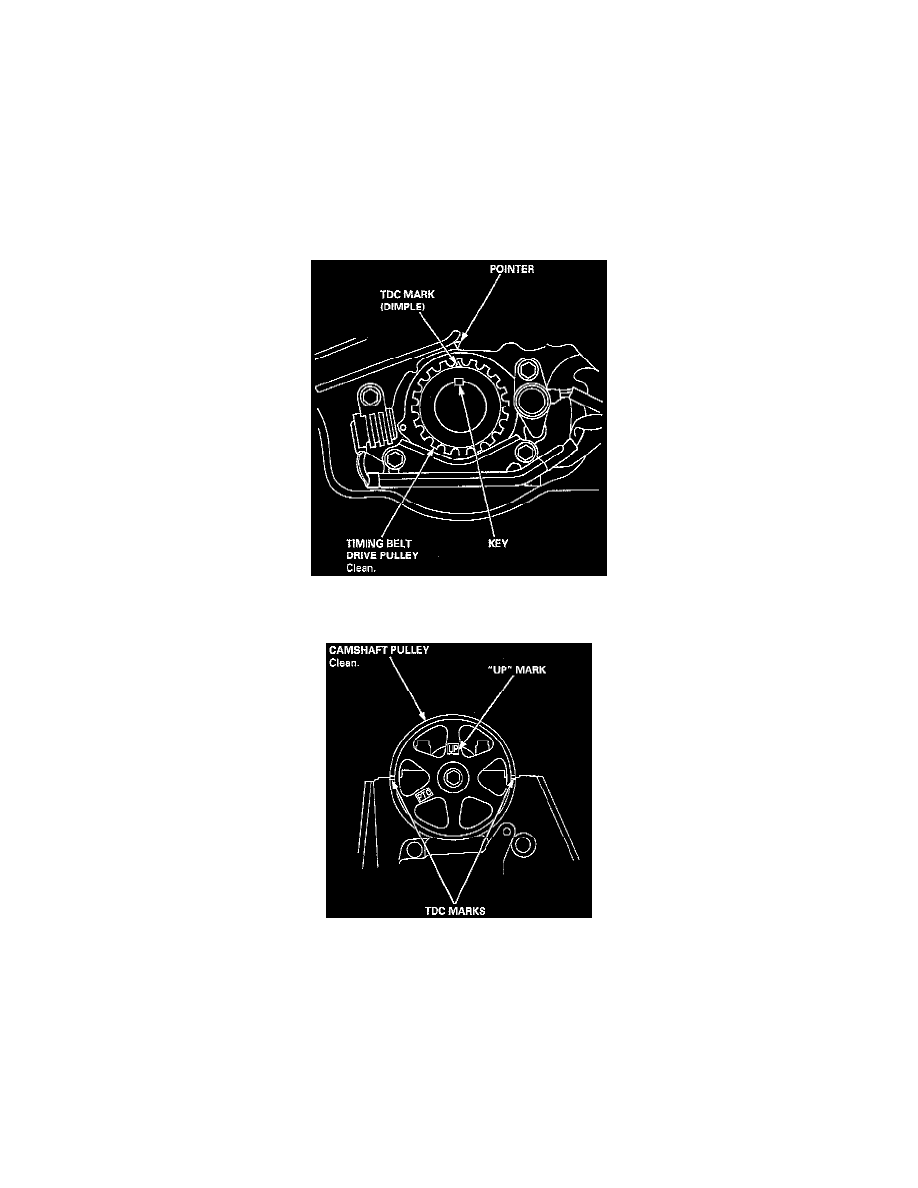
2. Set the timing belt drive pulley so that the No. 1 piston is at Top Dead Center (TDC). Align the dimple on the tooth of the timing belt drive pulley
with the V pointer on the oil pump.
3. Set the camshaft pulley so that the No. 1 piston is at TDC.
^
Align the TDC mark on the camshaft pulley with the cylinder head upper surface.