
Accord SE Coupe L4-2156cc 2.2L SOHC MFI (1997)
Steering Gear: Service and Repair
Steering Gear Disassembly
1. Remove steering gear.
2. Wash gearbox off with solvent and brush. Do not dip seals and O-rings in solvent.
3. Remove air hose and clips, then the tie-rod end locknut.
4. Remove boot bands and tube clamps, then pull boots away from ends of gearbox.
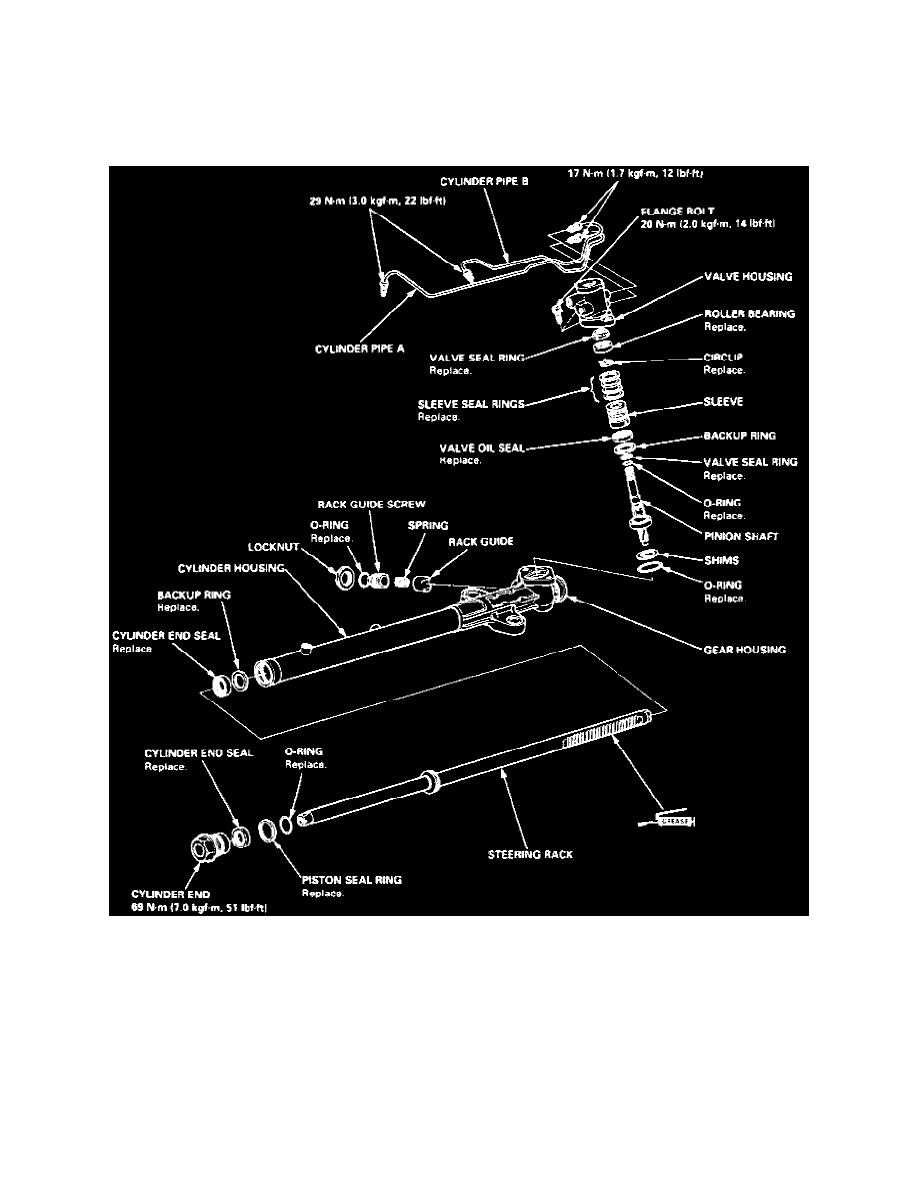
Fig. 13 Exploded View Of Power Steering Gear
5. Unbend lock washer, then hold steering rack, Fig. 13, with wrench and unscrew rack end with wrench.
6. Loosen locknut and remove rack guide screw.
7. Remove spring and rack guide from gear housing, then the cylinder pipes A and B from gearbox.
8. Drain fluid from cylinder fittings by slowly moving steering rack back and forth.
9. Remove two flange bolts, then the valve body unit from gearbox.
10. Drill 0.12 inch diameter hole approximately 0.12 inch in depth into staked point on cylinder. Do not allow metal shavings to enter cylinder
housing. After removing cylinder end, remove any burrs at staked point.
11. Install suitable puller yoke on steering gearbox, then clamp yoke in vise and loosen and remove cylinder end.
12. Set gearbox in press so gear housing points upward, then assemble 12 x 1.25 mm flange nut onto 12 x 170 mm grade 170 flange bolts. Wrap
flange portion of bolt with vinyl tape to protect cylinder.