
Civic L4-1.3L Hybrid (2008)
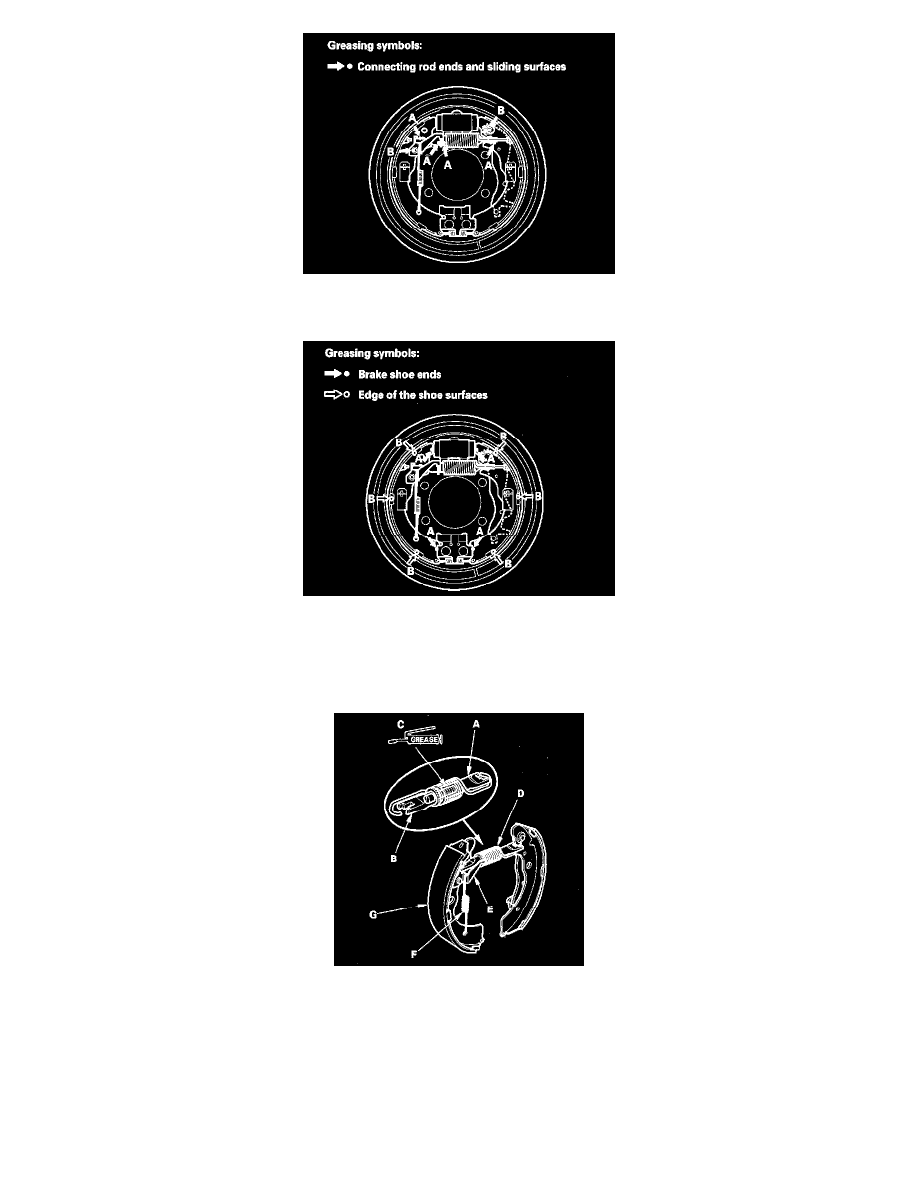
5. Apply a thin coat of Molykote 44MA grease to the shoe ends (A) and to the edge of the shoe surfaces (B) that make contact with the backing plate
as shown. Wipe off any excess. Keep grease off the brake linings.
6. Install connecting rods A and B on the adjuster bolt (C).
NOTE:
^
Clean the threaded portions of connecting rod A and the sliding surface of connecting rod B, then coat them with rubber grease.
^
Shorten connecting rod A by fully turning the adjuster bolt.
7. Assemble the brake shoes, the upper return spring (D), and the connecting rods with the adjuster bolt against the backing plate, then install the
self-adjuster lever (E) and the self-adjuster spring (F) on the forward brake shoe (G).
8. Install the tension pins (A) and the retainer springs (B) by pushing in the respective spring and turning the pin.