
Civic L4-1.3L Hybrid (2008)
Brake Hose/Line: Service and Repair
Brake Hose Replacement
NOTE:
^
Before reassembling, check that all parts are free of dirt and other foreign particles.
^
Replace parts with new ones whenever specified to do so. Do not spill brake fluid on the vehicle; it may damage the paint; if brake fluid gets on
the paint, wash it off immediately with water.
^
To prevent the brake fluid from flowing, plug and cover the hose ends and joints with a shop towel or equivalent material.
^
The illustrations show only the front of the vehicle except where the procedure is different for the rear.
1. Remove the wheel.
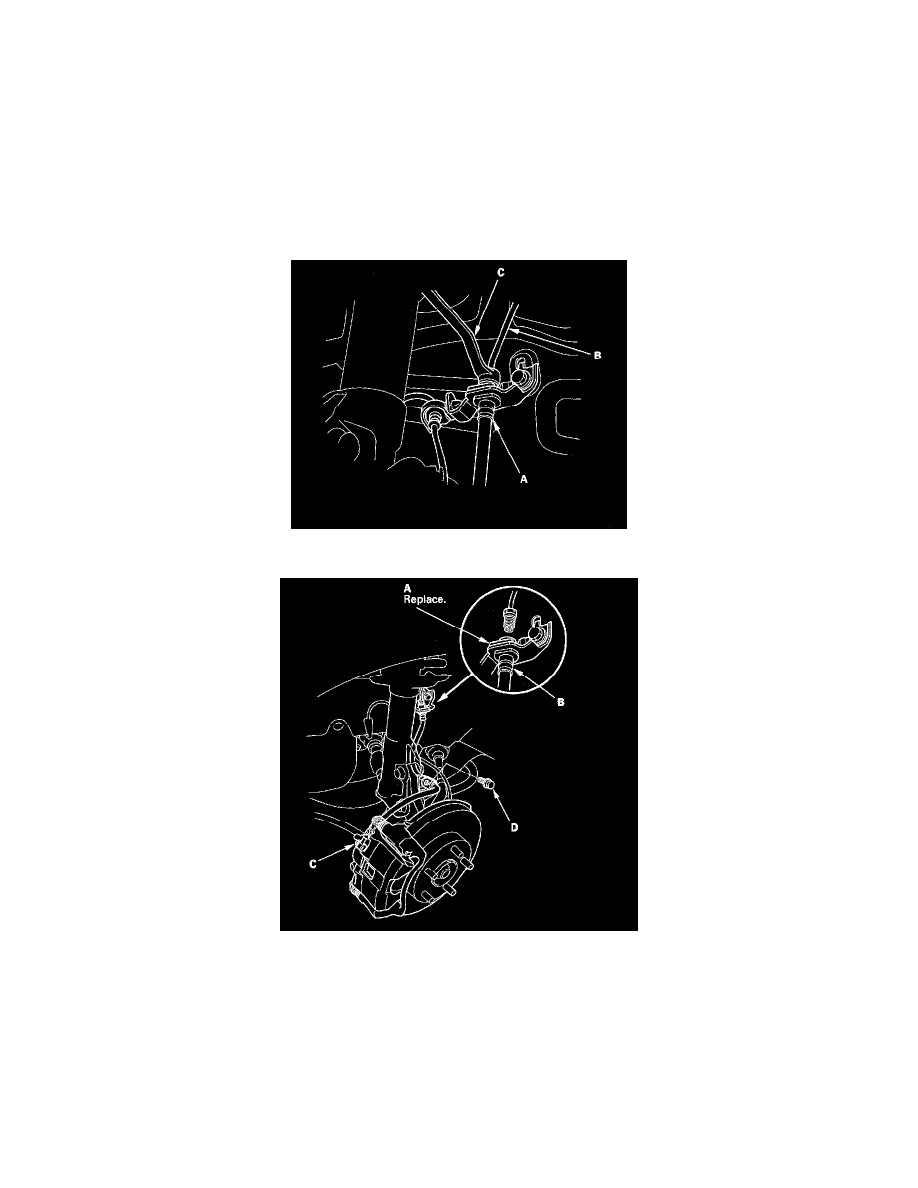
2. Disconnect the brake hose (A) from the brake line (B) using a 10 mm flare-nut wrench (C).
3. With clip type: Remove the brake hose clip (A) from the brake hose (B).
4. Disc brake type: Remove the banjo bolt (C), and disconnect the brake hose from the caliper.
5. Remove the brake hose mounting bolt(s) (D), then remove the brake hose.
NOTE: Without clip type: Remove the brake hose with the bracket.
6. Install the brake hose (A) with the brake hose mounting bolt (B).