
Civic L4-1.3L Hybrid (2008)
Heater Control Valve Cable: Adjustments
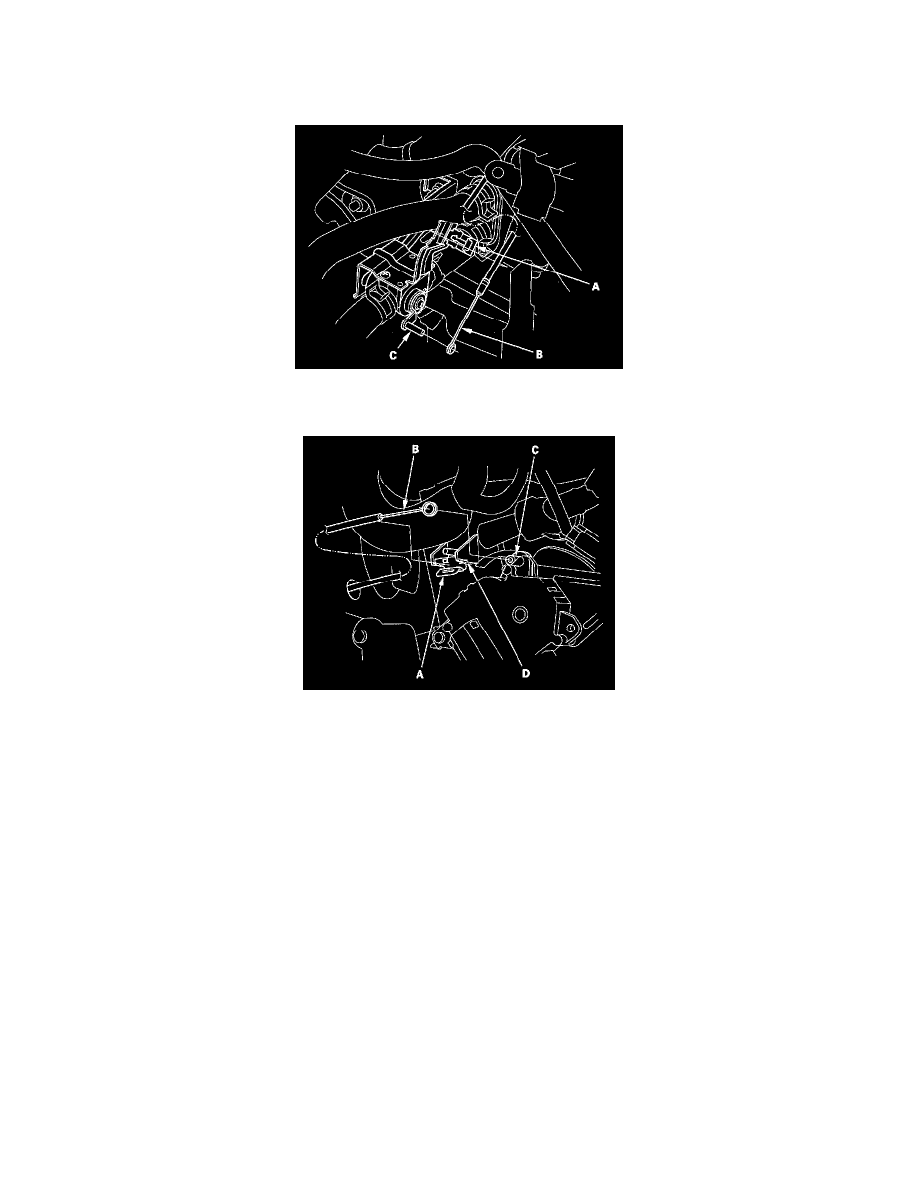
Heater Valve Cable Adjustment
1. From under the hood, open the cable clamp (A), then disconnect the heater valve cable (B) from the heater valve arm (C).
2. From under the dash, disconnect the heater valve cable housing from the cable clamp (A), and disconnect the heater valve cable (B) from the air
mix control linkage (C).
3. With the heater valve cable detached at both ends, make sure the cable moves freely with no binding. Replace the heater valve cable if it does not
move freely.
4. Set the temperature control dial to Max Cool (Lo) with the ignition switch to ON (II).
5. Attach the heater valve cable (B) to the air mix control linkage (C) as shown step 2. Hold the end of the heater valve cable housing against the stop
(D), then snap the heater valve cable housing into the cable clamp (A).
NOTE: Make sure the ring-end of the cable is pushed all the way to the base of the pin on air mix control linkage.
6. From under the hood, turn the heater valve arm (C) to the fully closed position as shown, and hold it. Attach the heater valve cable (B) to the
heater valve arm, and gently pull on the heater valve cable housing to take up any slack, then install the heater valve cable housing into the cable
clamp (A).