
Civic L4-1.3L Hybrid (2008)
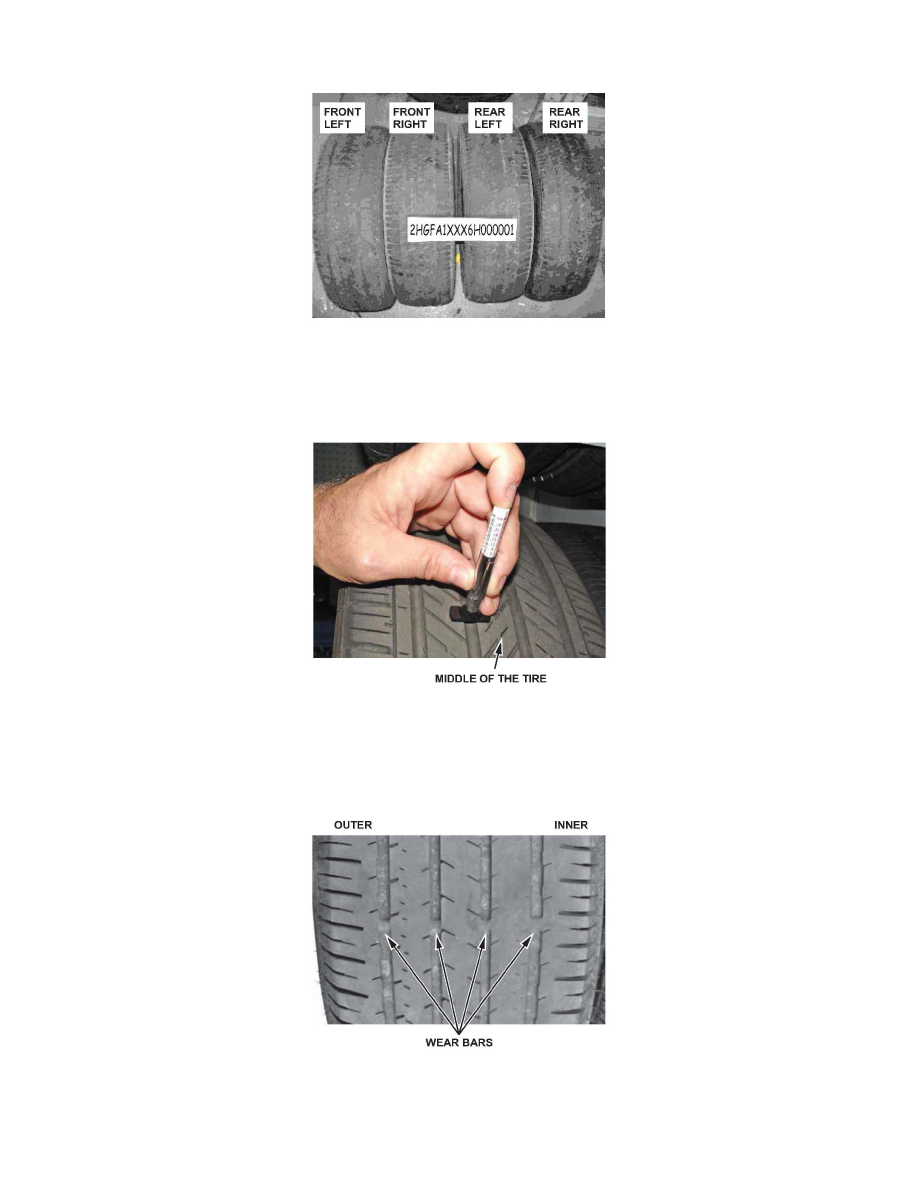
Photo # 1
Arrange the tires together, and take a photo showing the tread wear of all replaced tires and the VIN, as shown in the example below. (If only two tires
are replaced, photograph only those two tires.)
Photo # 2
Set the camera to macro mode (close-up), and select the tire with the most tread wear. Measure the tread depth of the tire at one of the grooves closest to
the middle of the tire, and take a photo of the gauge in the tire clearly showing the remaining tread depth. If the inner edge of the tire is bald or
flat-spotted, yet the tread in the center of the tire is good, make sure the photo clearly shows that the tire is past its useable life.
Photo # 3
Select the tire with the most tread wear, and take a photo of the tread surface showing the tread wear bars.
DIAGNOSIS