
Civic L4-1.3L Hybrid (2008)
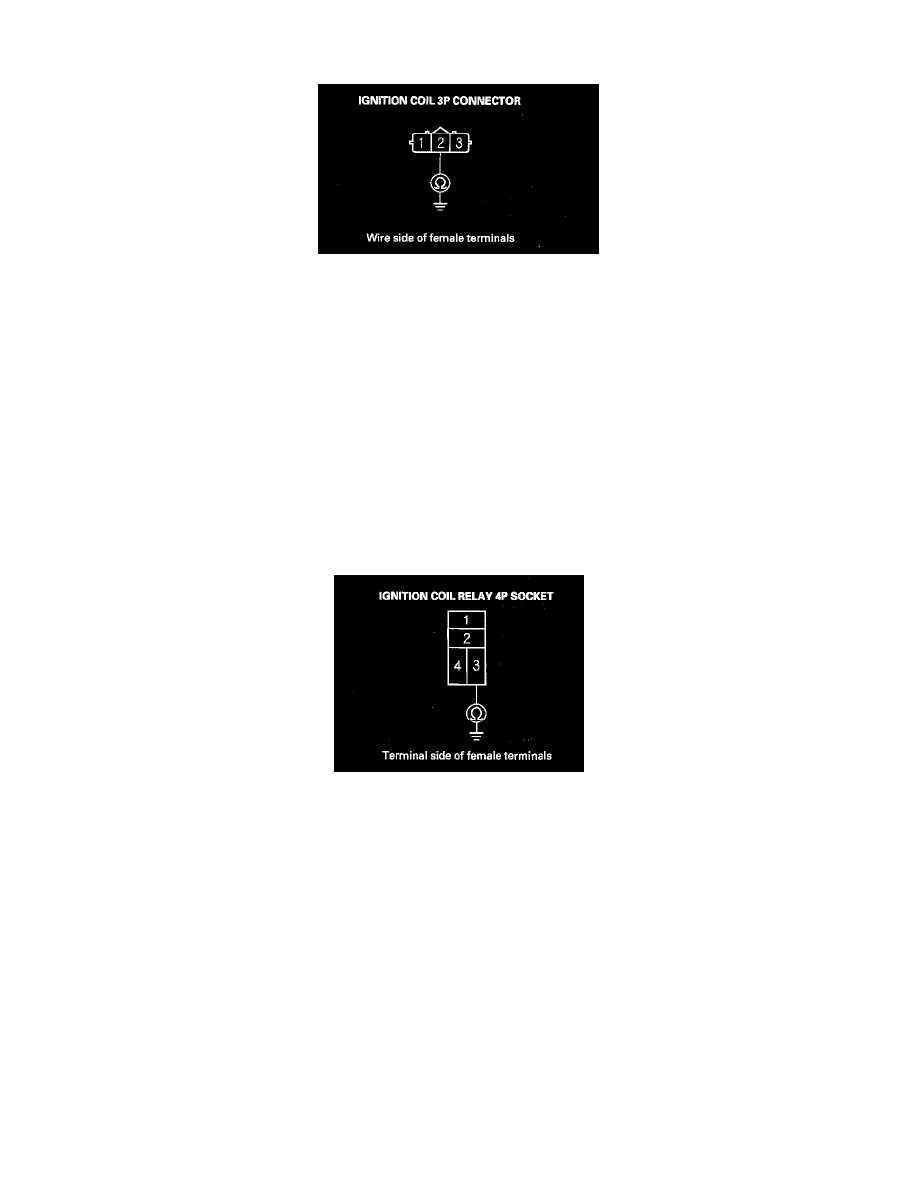
6. Check for continuity between each ignition coil 3P connector terminal No. 2 and body ground.
Is there continuity?
YES - Go to step 7.
NO - Repair open in the wire between ignition coil 3P connector terminal No. 2 and body ground.
7. Connect the Honda Diagnostic System (HDS) to the data link connector (DLC).
8. Turn the ignition switch to ON (II).
9. Make sure the HDS communicates with the vehicle and the powertrain control module (PCM). If it doesn't communicate, go to the DLC circuit
troubleshooting. See: Computers and Control Systems/Testing and Inspection/Component Tests and General Diagnostics/DLC Circuit
Troubleshooting
10. Jump the SCS line with the HDS, then turn the ignition switch to LOCK (0).
NOTE: This step must be done to protect the PCM from damage.
11. Disconnect PCM connector A (44P).
12. Check for continuity between ignition coil relay 4P socket terminal No. 3 and body ground.
Is there continuity?
YES - Repair short to ground in the wire between ignition coil relay 4P socket terminal No. 3 and the PCM (A6).
NO - Go to step 13.
13. Check for continuity between ignition coil relay 4P socket terminal No. 3 and PCM connector terminal A6.