
Civic L4-1.3L Hybrid (2008)
Clutch Control Solenoid Valve: Testing and Inspection
Start Clutch Pressure Control Calibration Procedures
Start Clutch Pressure Control Calibration Procedures
Do the start clutch pressure control calibration procedures whenever you do any of these actions:
^
Replace PCM
^
Reset PCM
^
Update PCM
^
Replace the transmission
^
Overhaul the transmission
^
Replace the engine assembly
^
Overhaul the engine assembly
^
Replace the lower valve body
^
Replace the start clutch
Start Clutch Pressure Control Calibration Procedure mode
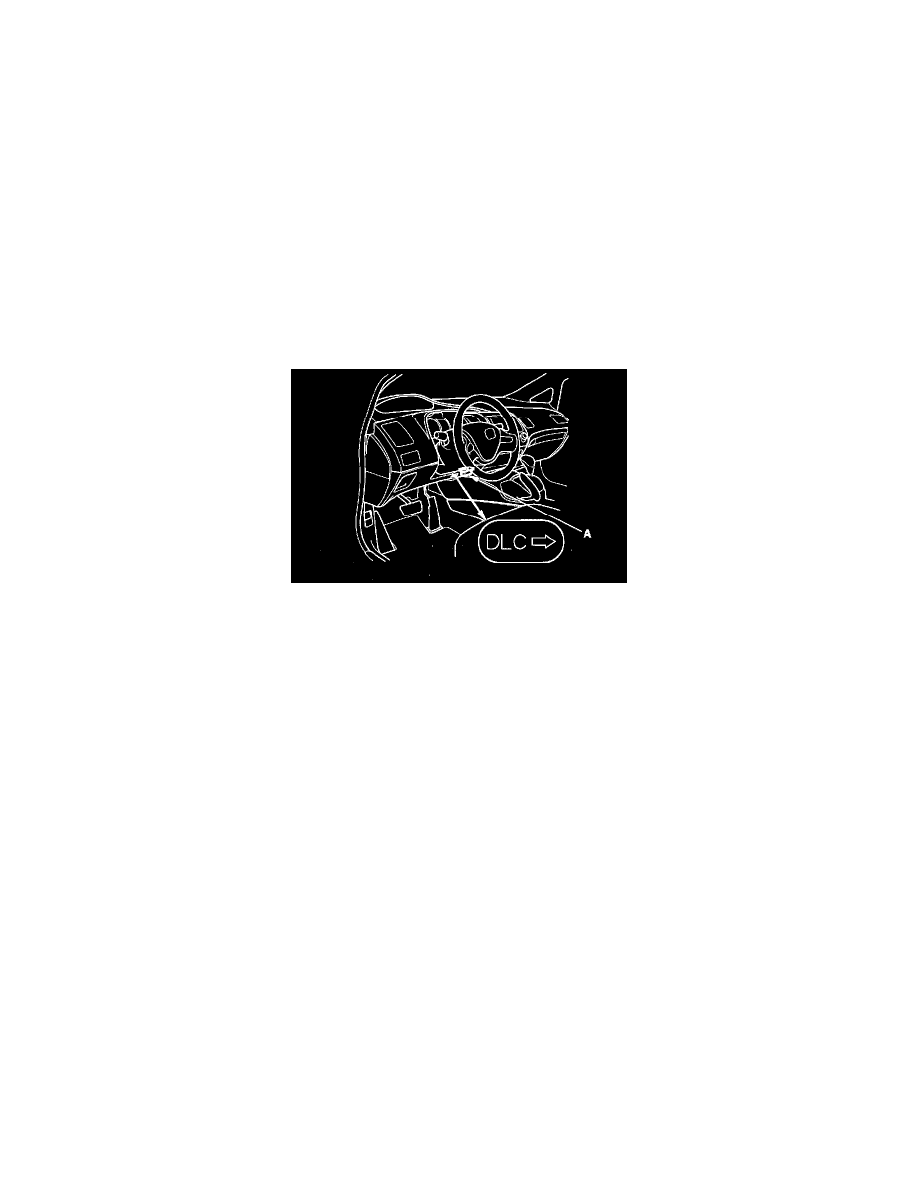
1. Connect the HDS to the DLC (A) located behind the driver's dashboard lower cover, and go to the A/T Mode Menu.
2. Turn the ignition switch to ON (II).
3. Make sure the HDS communicates with the PCM. If it does not, go to the DLC circuit troubleshooting.
4. Follow the HDS screen prompts in the Start Clutch Feedback Learn (see the HDS Operator's manual).
Calibration Procedure with SCS mode
1. Apply the parking brake, and block all four wheels securely.
2. Warm up the engine to normal operating temperature (the radiator fan comes on).
3. Make sure that the MIL does not come on and the D indicator does not blink. If the MIL comes on or the D indicator blinks, check the fuel and
emissions system or the CVT control system.
4. Turn the ignition switch to LOCK (0).
5. Connect the HDS to the DLC, and follow the screen prompts to short-circuit the SCS signal terminal using the tester menu.
6. Press the brake pedal, and continue pressing the pedal until the calibration is completed.
7. Start the engine without load condition, but turn the headlights on. The headlights must be on during calibration.
8. Shift the shift lever to N, shift to D, S, then L, and return to N. Repeat this shifting pattern three times within 20 seconds after the engine is started.
9. Check that the D indicator comes on when the shift lever is in N, then goes off in 1 minute.
10. If the D indicator blinks or does not come on, or if the indicator comes on and stays on, turn the ignition switch to LOCK (0), and restart the
procedure with step 5.
11. Shift to D, and check that the D indicator comes on, then goes off.
12. If the D indicator blinks or does not come on, or if the indicator comes on and stays on, turn the ignition switch to LOCK (0), and restart the
procedure with step 5.
13. Turn the ignition switch to LOCK (0) to complete the procedure.
14. Test-drive the vehicle to verify that a problem does not occur on the start clutch pressure control system.
Calibration by Driving the Vehicle
1. Warm up the engine to normal operating temperature (the radiator fan comes on).
2. Make sure that the MIL does not come on and the D indicator does not blink. If the MIL comes on or the D indicator blinks, check the fuel and
emissions system or the CVT control system.
3. Start the engine without load (headlights, audio system, blower fan, rear window defogger, A/C, etc.), and let it idle.
4. Check that the IMA charge gauge indicates no segments. If the IMA charge gauge indicates any segments, hold the engine speed between 3,500
rpm and 4,000 rpm without load (in Park or neutral) until the IMA battery level gauge (BAT) indicates at least three segments.