
Civic L4-1.3L Hybrid (2008)
1. Make sure you have the anti-theft code for the audio system and the navigation system (if equipped), then write down the audio presets.
2. Disconnect the negative cable from the battery, then wait for 3 minutes before starting work.
3. Remove the front seat.
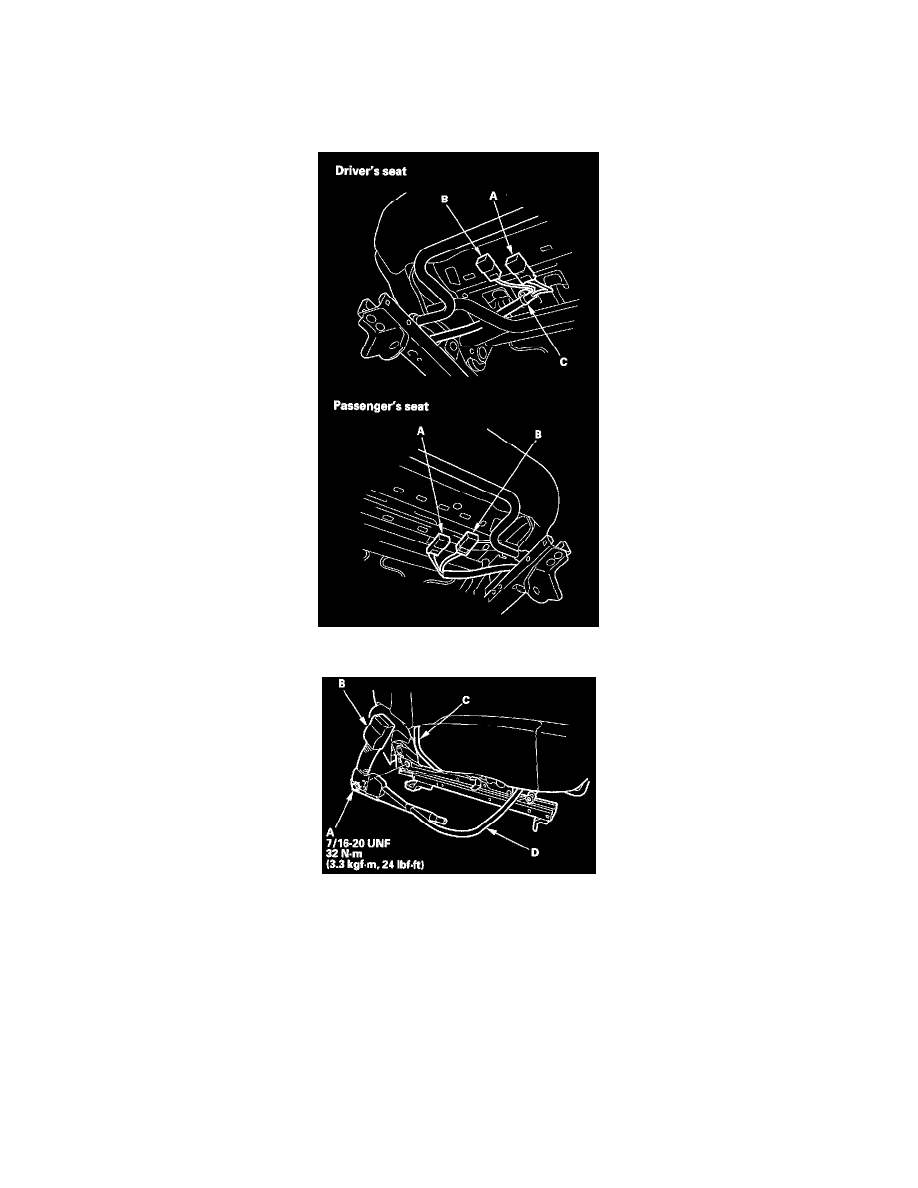
4. Lift up the front seat, then detach the seat belt switch connector (A) and seat belt buckle tensioner connector (B), and on the driver's seat, detach
the harness clip (C).
5. Remove the center anchor bolt (A), then remove the seat belt buckle (B) from the elastic band (C).
6. Pull the seat belt switch harness (D) out through the space between the seat cushion and the seat track (driver's seat), or through the hole in the seat
track (passenger's seat).
7. Install the buckle in the reverse order of removal, and note these items:
-
Assemble the washers on the center anchor bolt as shown.
-
Apply medium strength type liquid thread lock to the center anchor bolt before reinstallation.
-
Tighten the bolts by hand first, then tighten to specification with a torque wrench.
-
Make sure the seat belt switch connector and seat belt buckle tensioner connector are plugged in properly.
-
Reconnect the negative cable to the battery.
-
If the IMA battery level gauge (BAT) displays no segments, start the engine, and hold it between 3,500 rpm and 4,000 rpm without load (in
Park or Neutral) until the BAT displays at least three segments.
-
Enter the anti-theft codes for the audio system and the navigation system (if equipped), then enter the audio presets.
-
Set the clock (on vehicles without navigation).
-
Check for any DTCs that may have been set during repairs, and clear them.