
Civic L4-1.3L Hybrid (2008)
Starter Motor: Removal and Replacement
Starter Removal and Installation
Removal
1. Make sure you have the anti-theft code for the audio system or the navigation system (if equipped), then write down the audio presets.
2. Disconnect the negative cable from the battery, then disconnect the positive cable.
3. Remove the battery and battery box.
4. Remove the air cleaner assembly.
5. Remove the intake air duct.
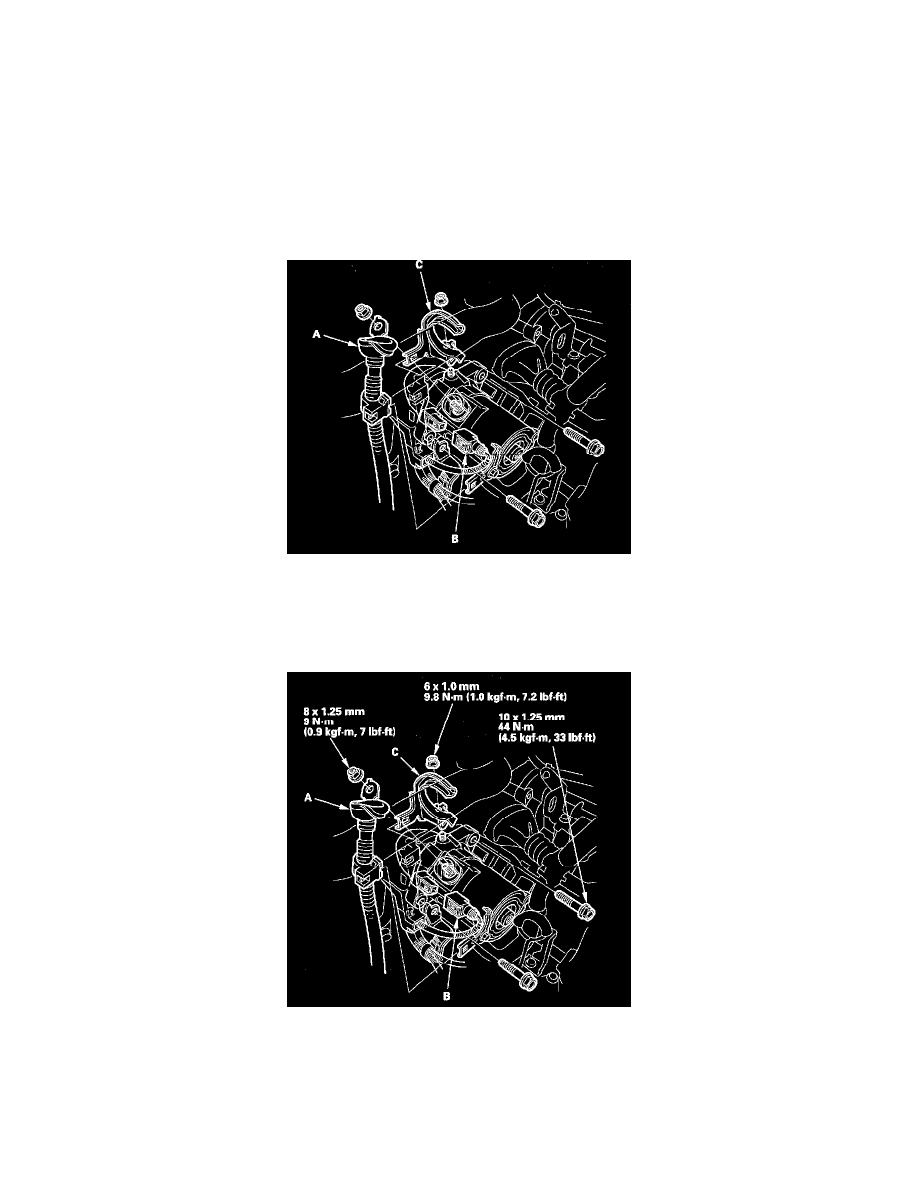
6. Disconnect the starter cable (A) from the B terminal and the BLK/WHT harness connector (B) from the S terminal, then remove the upper radiator
hose bracket (C).
7. Remove the two bolts holding the starter, then remove the starter.
Installation
1. Install the starter, then install the starter mounting bolts.
2. Connect the starter cable (A) to the B terminal and the BLK/WHT harness connector (B) to the S terminal, then install the upper radiator hose
bracket (C). Make sure the starter cable crimped side of the ring terminal faces away from the starter when you connect it.
3. Install the intake air duct.
4. Install the air cleaner assembly.
5. Install the battery and battery box.
6. Clean the battery posts and cable terminals, then assemble them, and apply grease to prevent corrosion.
7. Turn the IMA battery module switch OFF.