
Civic L4-1.3L Hybrid (2008)
2. Clean the mating surfaces of the new bushing and the lower arm.
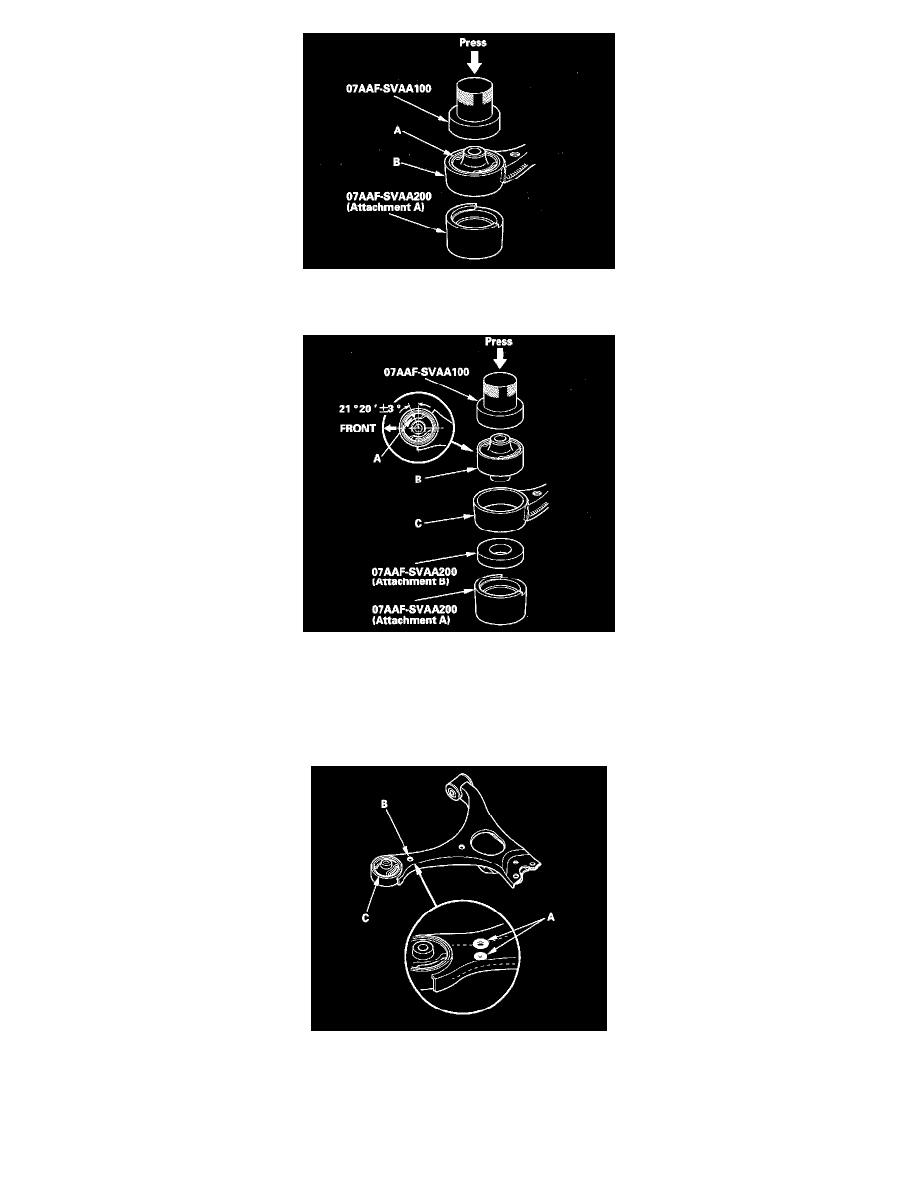
3. Position the tab (A) of the bushing (B) with the lower arm (C) as shown.
4. Using a hydraulic press, bushing driver, and receiver set (attachments A and B), press in the bushing into the lower arm.
5. Using a yellow oil-based paint marker, paint a mark (A) around the hole (B) near the front bushing (C). Also paint a mark around the hole on the
bottom side of the lower arm in the same area.
NOTE: These marks are used to identify a lower arm that has had the bushing replaced. Do not replace the bushing in a lower arm that has paint
marks; you must replace the lower arm.