
Civic L4-1.3L Hybrid (2008)
4. Place a floor jack under the trailing arm to support it.
NOTE: Do not place the jack against the plate section of the lower arm. Be careful not to damage any suspension components.
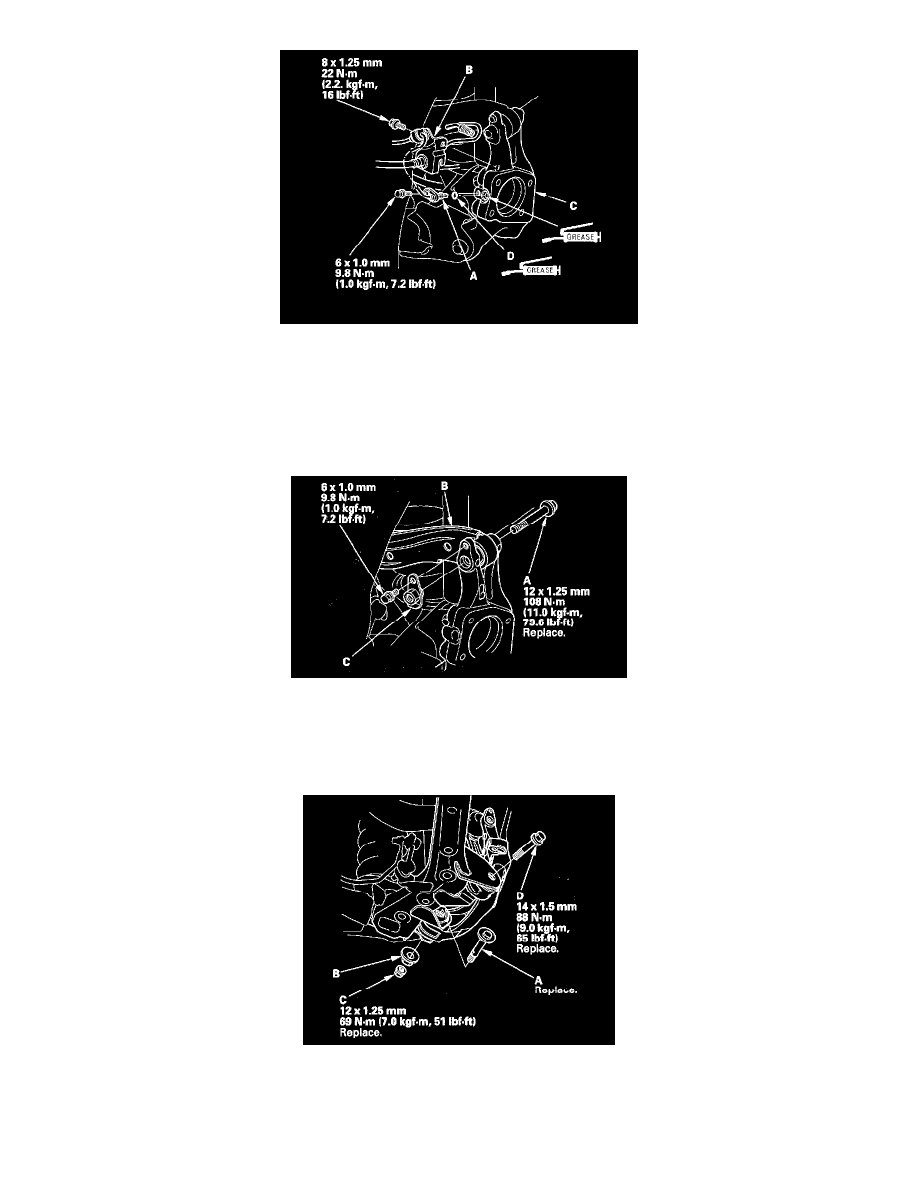
5. Remove the upper arm mounting bolt (A), and disconnect the upper arm (B) from the knuckle.
NOTE: Use the new upper arm mounting bolt during reassembly.
6. Remove the rear knuckle upper bracket (C).
7. Mark the cam positions of the adjusting bolt (A) and the adjusting cam plate (B), then remove the self-locking nut (C), the adjusting cam plate, and
the adjusting bolt. Discard the self-locking nut.
NOTE: Use the new self-locking nut and the new adjusting bolt during reassembly.
8. Remove the flange bolt (D), and remove the knuckle.
NOTE: Use the new flange bolt during reassembly.
9. Install the knuckle in the reverse order of removal, and note these items: