
Civic L4-1.3L Hybrid (2008)
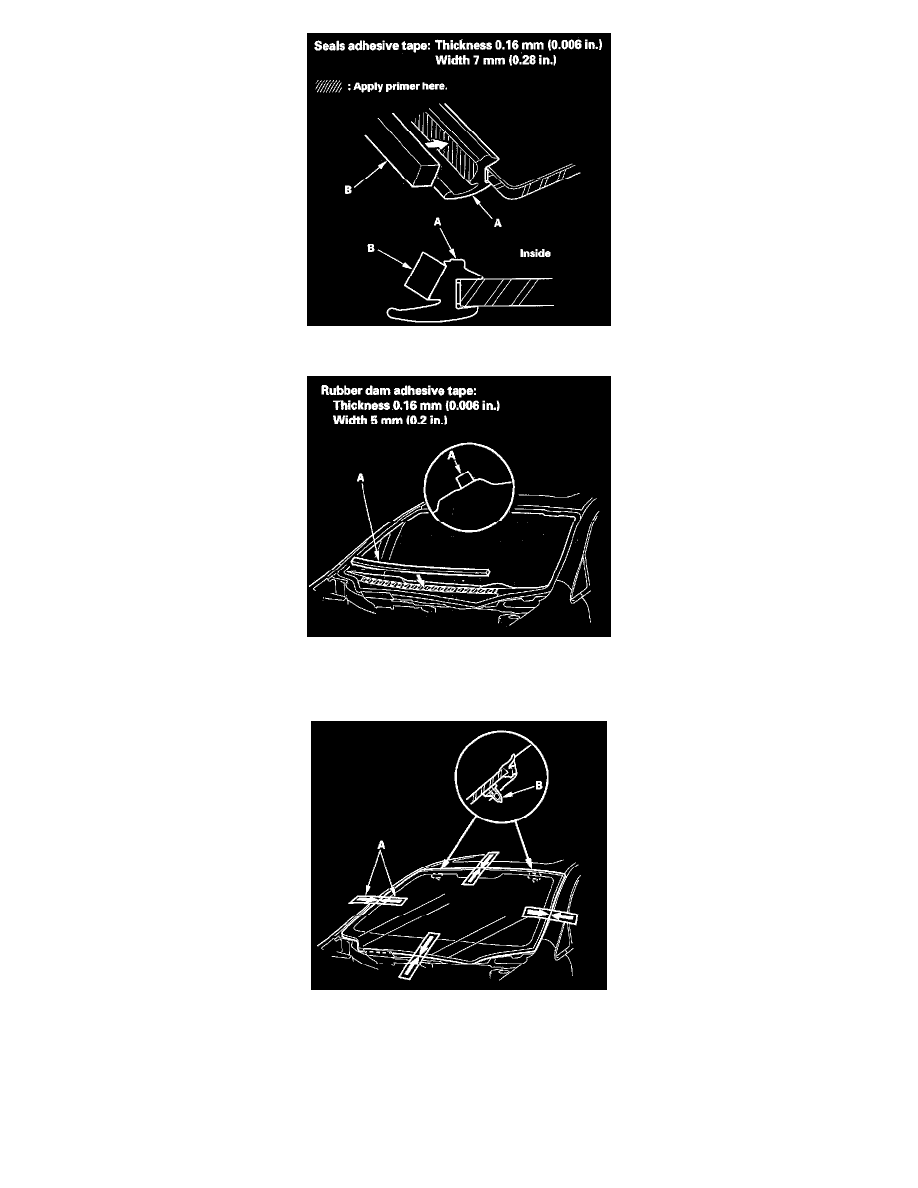
14. Attach the lower rubber dam (A) with body side adhesive tape to the body as shown. Do not peel the glass side adhesive backing.
15. Set the windshield in the opening, and center it. Make alignment marks (A) across the windshield and the body with a grease pencil at the four
points shown. Make sure both clips (B) contact with the edge of the body holes. Be careful not to touch the windshield where the adhesive will be
applied.
16. Remove the windshield.
17. Apply a light coat of glass primer with a sponge around the edge of the windshield (A) between the dams (B) and the molding (C) as shown, then
lightly wipe it off with a gauze or cheesecloth:
-
Apply glass primer to the molding.
-
Do not apply body primer to the windshield, and do not get the body and the glass primer sponges mixed up.
-
Never touch the primed surfaces with your hands. If you do, the adhesive may not bond to the windshield properly, causing a leak after the
windshield is installed.
-
Keep water, dust, and abrasive materials away from primed surfaces.