
Civic L4-1.7L CNG (2003)
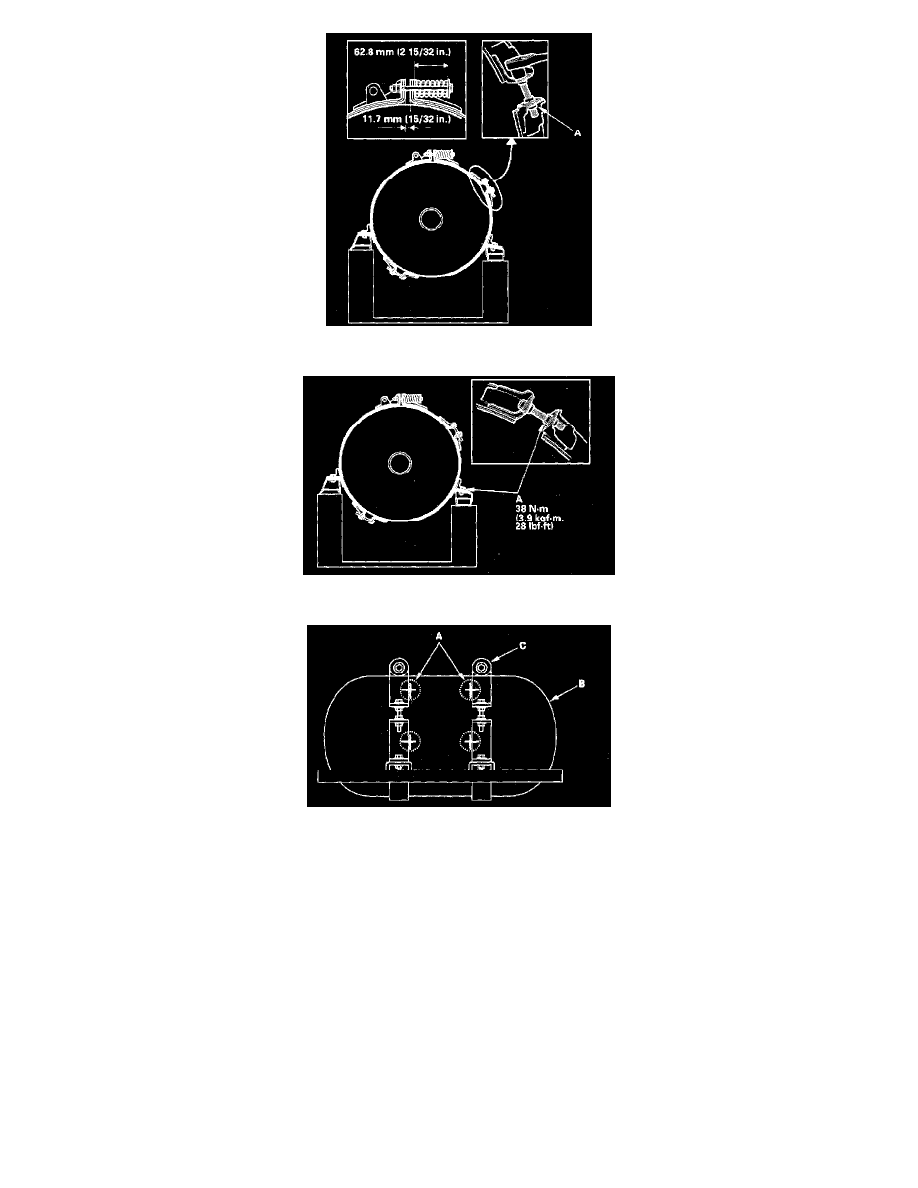
5. Tighten the nuts (A) until you get a gap of 11.7 mm (15/32 in.) at the centerline of the bolts.
6. Tighten the nuts and bolts (A).
7. Mark (A) the fuel tank (B) and the fuel tank bands (C).
8. Apply silicone oil or polyaklyleneglycol (PAG) oil to a new O-ring, and carefully install it onto its proper position.
9. Install the fuel joint block and fuel pipes.
10. Install the tank assembly in the reverse order of removal.
11. Do the leak inspection procedures.
12. Apply the CNG warning label and record the CNG tank expiration date.
Fill Procedure
If a tank has less than 690 ± 340 kPa (7.0 ± 3.5 kgf/sq.cm, 100 - 50 psi) of internal pressure and is at an ambient temperature of 32 °F (0 °C) or less,
follow the procedure below. Otherwise, fill the tank normally.
1. Fill the fuel tank to 4,800 ± 340 kPa (49.2 ± 3.5 kgf/sq.cm, 700 ± 50 psi) slowly (from a compressor, not from a cascade storage system).
2. Wait one hour.
3. Fill the rest of the tank normally.