
Civic L4-1.8L (2006)
NOTE:
-
Follow the quarter pillar trim installation procedure carefully; improper installation could cause the side curtain airbag to deploy improperly and
possibly cause injury.
-
Put on gloves to protect your hands.
-
Use the appropriate tool from the KTC trim tool set to avoid damage when prying components.
-
Take care not to scratch the trim and panels.
-
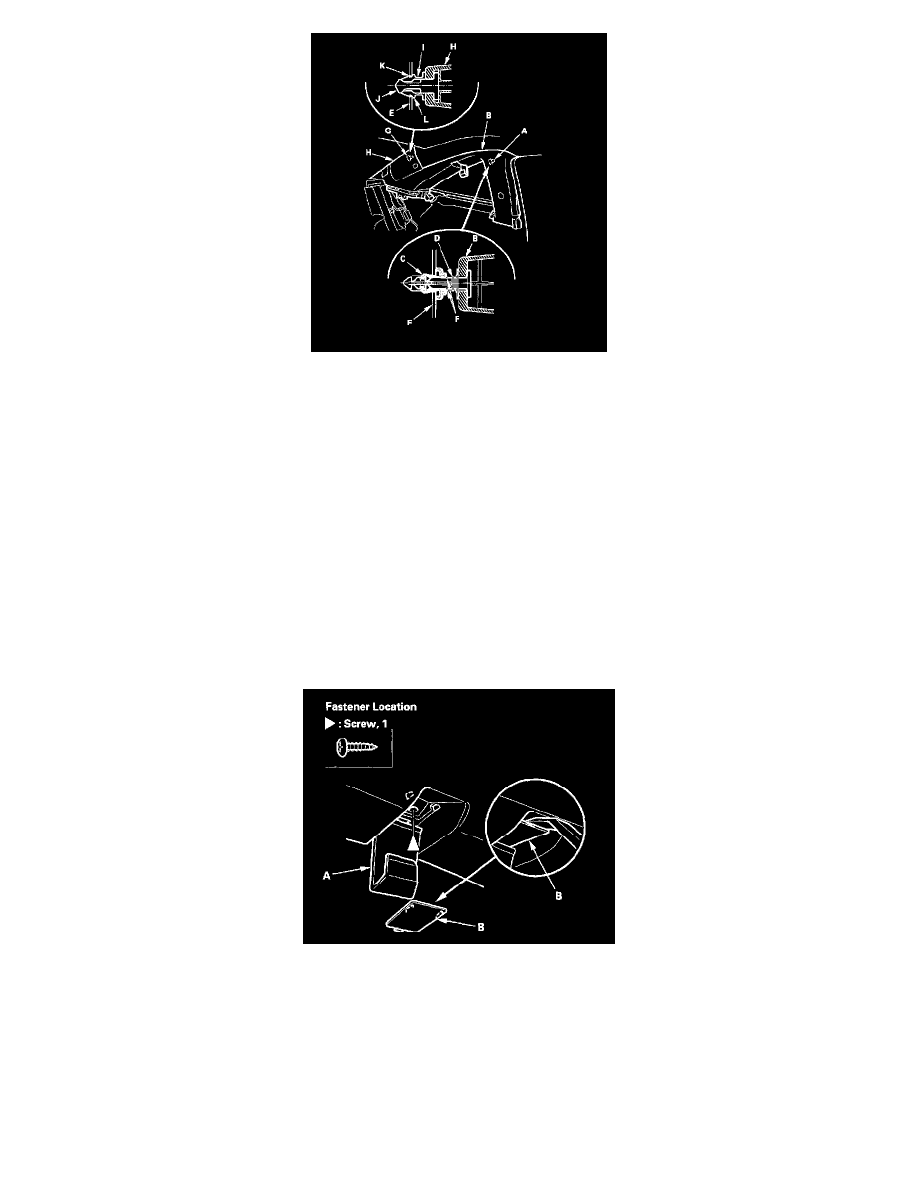
The B-pillar upper clip (A) in the quarter pillar trim (B) consists of a grommet (C) and a pin (D). The grommet expanded with the pin secures it to
the body panel (E). The projections (F) on the pin is broken during removal, so the clip must be replaced with a new one when the trim is
reinstalled.
-
The C-pillar upper clip (G) under the airbag lid (H) consists of a resin grommet (I) and a metal pin (J). The groove (K) in the grommet secures it to
the body panel. The shoulder (L) on the grommet is broken during removal, so the grommet must be replaced with a new one when the trim is
reinstalled.
1. Remove these items:
-
Rear side trim panel
-
Rear shelf extension
2. Remove the front seat belt upper anchor.
3. Lower the coat hanger (A), pry off the lid (B) with a trim tool, then remove the screw.