
Civic L4-1.8L (2006)
Oil Pan: Service and Repair
Oil Pan Installation
Oil Pan Installation
1. Remove all of the old liquid gasket from the oil pan mating surfaces, bolts, and bolt holes.
2. Clean, and dry the oil pan mating surfaces.
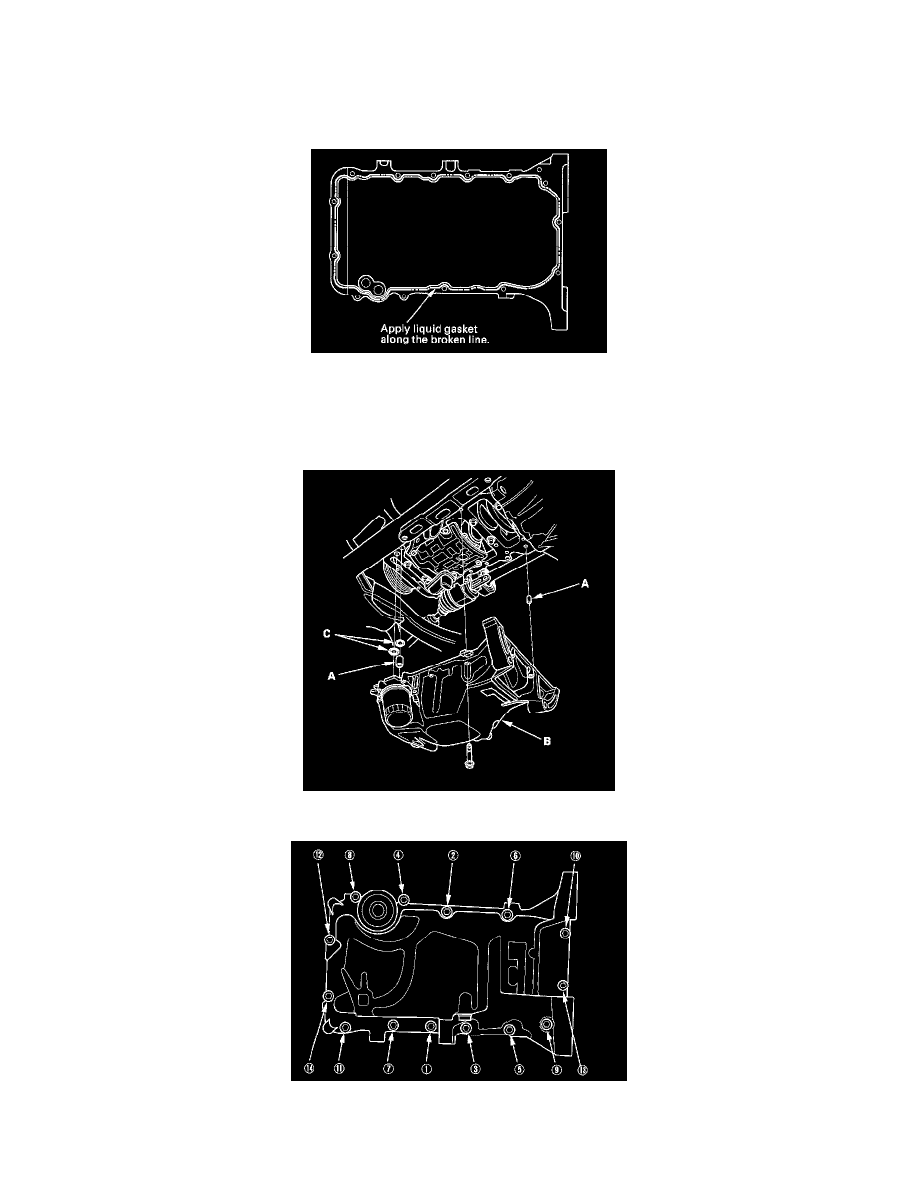
3. Apply liquid gasket, P/N 08717-00004, 08718-0001, 08718-0002, 08718-0003, or 08718-0009, evenly to the engine block mating surface of the
oil pan.
NOTE: Do not install components if too much time has passed after applying the liquid gasket (for P/N 08718-0002, no more than 4 minutes,
for all others, no more than 5 minutes). Instead, remove the old residue and reapply the liquid gasket.
4. Install the dowel pins (A), then install the oil pan (B) with a new O-rings (C).
5. Tighten the bolts in two or three steps. In the final step, tighten all bolts, in sequence, to 18 Nm (1.8 kgf-m, 13 ft. lbs.). Wipe off the excess liquid
gasket on the each side of crankshaft pulley and flywheel/drive plate.